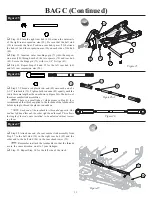
79
76
81
82
GREASE
80
82
81
GREASE BOTH
SIDES
BAG D (Continued)
1 3
Figure 32
Figure 33
Figure 34
!
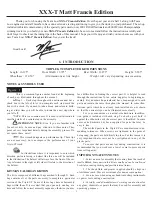
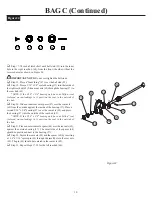
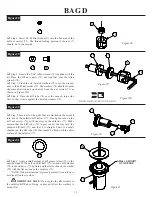
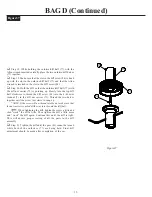
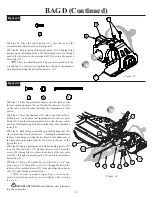
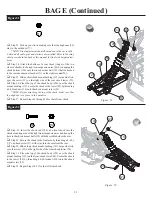
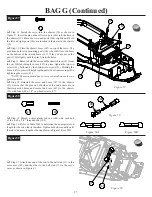
Step 7. Insert a 5mm x 8mm bearing (80) into the center of
the diff gear (81).
!
Step 8. Press a 3/32" carbide diff ball (82) into each of the
small holes in the diff gear (81).
IMPORTANT NOTE:
There are two sets of diff balls
in Bag D. Be certain to use the slightly larger balls that are pack-
aged alone (12 total) in Figure 32, Step 8. There is a second set of
eight 5/64" balls packaged with washers in the bag. These balls
will be used in Figure 35.
!
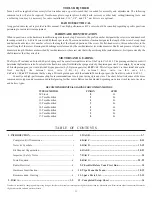
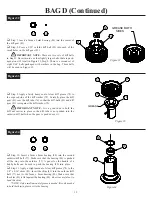
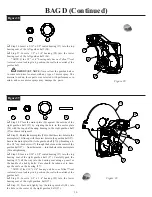
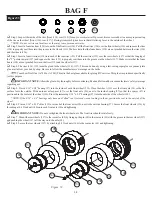
Step 9. Apply a fairly heavy coat of clear diff grease (78) to
the exposed side of the diff washer (79). Carefully place the diff
gear (81) over the diff tube (76) so that the diff balls (82) and diff
gear (81) rest against the diff washer (79).
IMPORTANT NOTE:
It is a good idea to hold the
diff nut carrier in place so the diff tube is not pushed into the
outdrive/diff half when the gear is pushed over it.
!
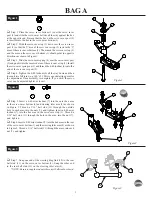
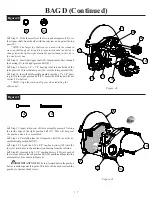
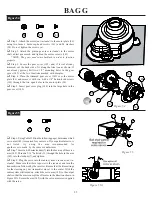
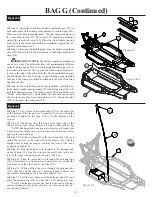
Step 10. Insert a 5mm x 8mm bearing (80) into the second
outdrive/diff half (77). Make sure that the bearing (80) is pushed
all the way into the outdrive (77). A pencil or the handle of a
hobby knife can be used to push the bearing (80) into place.
!
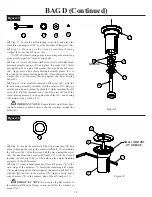
Step 11. Apply a slight amount of clear diff grease (78) to the
1/4" x 5/16" shim (83). Insert the shim (83) into the outdrive/diff
half (77) next to the 5mm x 8mm bearing (80). Make sure that
the shim (83) is flat against the bearing (80).
Be extra careful not to
bend this shim!
*NOTE: Only a small amount of grease is needed. It is only needed
to hold the shim in place next to the bearing.
Figure 32
Figure 33
Figure 34
80
82
83
80
77
80
83
Содержание XXX-T Matt Francis Edition
Страница 2: ......

