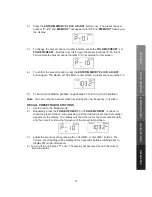


6.)
Press the
CLOCK ADJUST
button again to complete the clock setting. It will revert
to STANDBY mode. The display backlight will become dim.
NOTE:
●
If the
CLOCK ADJUST
button is not pressed while the hour or minute digits
are flashing, the unit will exit the clock setting mode and revert to Standby mode.
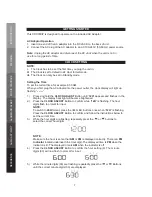
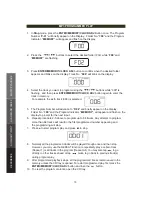
The Display will show flashing “- - : - -”. To set the time, start the clock setting
procedure from the beginning.
●
When the unit is powered on, whenever you want to view the current time simply
press the SYNC/DISPLAY Button once. The Display will switch to the current
time and resume to current function mode in 10 seconds.
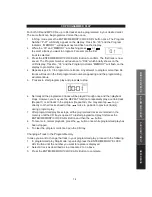
TIME SYNCHRONIZATION
The CRX350iP features a “
SYNC
” Button that allows you to set the time using the
internal clock of the iPod/iPhone.
1. With the CRX350iP in iPod mode, dock an iPod/iPhone onto the 30 pin connector on
the unit. The authentication process will start and complete in a few seconds. The
display will show “AUEH” during authentication and revert to iPod mode in a few
seconds.
2. After completion of the authentication process, press and hold the “
SYNC/DISPLAY
”
Button until “
SYNC
” appears on the Display. The clock will be synced with the
iPod/iPhone time.
NOTE:
●
An iPod /iPhone can only sync time up to the nearest minute; it is possible to have up
to 59 seconds difference between the clock radio and synced iPod/iPhone.
●
The iPod internal clock is automatically updated when synced with iTunes. We
recommend you sync the iPod with iTunes prior to docking to the unit to make sure
you have the most current time available.
●
The iPhone receives constant updates from the phone service provider, so the
iPhone time will always be current.
●
The SYNC function does not support earlier iPod models, like iPod mini, iPod 3G,
4G and iPod photo (4G /color display).
8
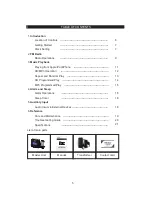
INTRODUCTION
FM RADIO
MUSIC PLA
YBACK
ALARM
AND SLEEP
AUXILIAR
Y
INPUT
REFERENCE
Содержание CRX350iP
Страница 1: ...Docking Alarm Clock for iPhone and iPod CRX350iP...
Страница 2: ......
Страница 23: ......
Страница 24: ...TEAC CUSTOMER SUPPORT HOTLINE TCS...