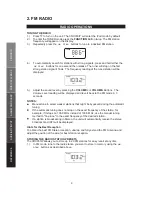
background image

CD/MP3 OPERATION


The CRX50iP will play CD-R/RW discs on top of commercial music CDs.


  Because of the non-standardized format definition/production of CD-R/RW, playback 

quality & performance is not guaranteed. 

    The manufacturer is not responsible for the playability of CD-R/RW due to recording 

conditions such as PC performance, writing software, media characteristics, etc. 

  The CD-R/RW that has no music data or non-MP3 files cannot be played back. 
  Do not make an empty folder. It may not work properly. 
  For the CRX350iP, the recommended recording bitrate for audio files is 128 kbps. 

If files are recorded in other bitrates, for example at 320 kbps or in variable bitrate

s

track-skidding may sometimes happen because of the recording conditions. 

 
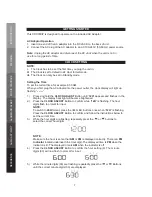
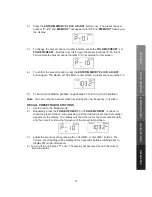
1.  With the CRX350iP powered on, press the Function button repeatedly until CD

 is


displayed. The unit will start reading the TOC (table of contents) of the CD. 

no

” will appear on the display if no disc is loaded.  

2.  Open the CD tray by pulling the CD tray gently at the part marked “PULL OPEN”. 
3.  Insert a CD in place with the label facing upward and then close the CD tray. 
4.  The unit will start reading the disc. “rEAd” blinks. The total number of tracks on 

the disc will be shown on the display after a few seconds. 
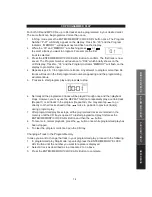


Total Tracks On CD

Total Tracks On MP3


Note:

 The unit will take more time to read the Table of Contents on a MP3 CD as 

it contains more songs. 

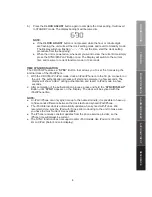
5.   Press        once. The unit will start playing from the first track. The PLAY Indicator, 

”, and the elapsed playing time will appear in the display.   


                            CD Playback

MP3 Playback 


Note:

For MP3 playback, the current track no., folder no. and elapsed playing time 

will be shown on the display one by one during playback.  

6.  Press       during playback to pause. The PLAY Indicator, “

”, track no. and elapsed 

playing time flash in the display.    

7.  Note: When the         button is pressed during MP3 playback, The PLAY Indicator, 

” will flash and the track number, folder number and elapsed time will show one by 

one. 

8.  To resume playback press        again. The PLAY Indicator, “

”, will stop flashing on 

the display.                                                                                                         

9.  To skip forward or backward tracks, press the Skip/Search         /         

b

uttons. 

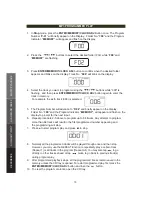
10.  For MP3 playback, press the 

 or 

FOLDER-

 buttons to skip to the next or 

previous folder. The first track no. of the selected folder will be displayed. 

11.  To stop playing, briefly press the 

 Button. 

12

MUSIC PLA

YBACK

ALARM 

AND SLEEP

AUXILIAR

Y

 INPUT

REFERENCE

Содержание CRX350iP

Страница 1: ...Docking Alarm Clock for iPhone and iPod CRX350iP...

Страница 2: ......

Страница 3: ...your own records Owner s Name Owner s Address Postcode Model Name No Serial No Dealer s Name Dealer s Address Postcode Authorised Service Centres in Major Australian Cities NSW 151 Arthur Street Homeb...

Страница 4: ...ill be available for collection by or return to the purchaser at a fee upon request TEAC in home service can be made available at a fee upon request Carry in Service 6 A 12 month replacement warranty...

Страница 5: ...that are subject to vibration excessive heat cold or moisture As the unit may become warm during operation always leave sufficient space around it for ventilation Do not place the unit on an amplifier...

Страница 6: ...ay CD Programmed Play MP3 Programmed Play 4 Alarm and Sleep Alarm Operations Sleep Timer 5 Auxiliary Input Audio Input via External Devices 6 Reference Care and Maintenance Troubleshooting Guide Speci...

Страница 7: ...E CLOCK ADJUST BACKWARD ALARM MODE SELECT BACKWARD ALARM VOLUME ADJUST 11 iPod iPhone SKIP FORWARD RADIO TUNE CLOCK ADJUST FORWARD ALARM MODE SELECT FORWARD ALARM VOLUME ADJUST 12 MENU BUTTON 13 VOLUM...

Страница 8: ...ay The display backlight will become brightened 2 Press the CLOCK ADJUST Button to confirm while 12H is flashing The hour digits flash to prompt for input NOTE To switch to 24H format press the or but...

Страница 9: ...tor on the unit The authentication process will start and complete in a few seconds The display will show AUEH during authentication and revert to iPod mode in a few seconds 2 After completion of the...

Страница 10: ...tune to select weaker stations that might be bypassed during the automatic tuning If the automatic tuning does not stop on the exact frequency of the station for example if it stops on 100 9 MHz inste...

Страница 11: ...tions Note You can overwrite a preset station by storing the new frequency in its place RECALL PRESET RADIO STATIONS 1 Set the unit to the Tuner mode 2 Repeatedly press the FOLDER PRESET or FOLDER PRE...

Страница 12: ...vious song Press and hold the button during playback for fast backward search within the song 7 Press the VOLUME or VOLUME buttons to adjust the volume output level You can also 8 Repeatedly press the...

Страница 13: ...en close the CD tray 4 The unit will start reading the disc rEAd blinks The total number of tracks on the disc will be shown on the display after a few seconds Total Tracks On CD Total Tracks On MP3 N...

Страница 14: ...REPEAT ALL When the PLAY MODE button is pressed 3 times the Repeat Indicator REPEAT will be shown steadily on the LCD display The whole disc will be played continuously until the button is pressed 4...

Страница 15: ...play and press to stop 6 Normally all the programmed tracks will be played through once and then playback stops However you may use the REPEAT function to repeatedly play a certain track Repeat 1 or a...

Страница 16: ...cator MEMORY will appear and flash on the display to prompt for the next input 6 Repeat procedure 2 5 above to program up to 64 tracks Any attempt to program more than 64 tracks will result in the fir...

Страница 17: ...is set so that AM or PM is correctly displayed There is a PM Indicator located underneath the Hour digit The displayed time is PM when the indicator is lit The displayed time is AM when the indicator...

Страница 18: ...isplay Press the ALARM button again to confirm The display will show the chosen Alarm time and then revert to the current function mode Press the STANDBY button to turn off the unit The alarm will bee...

Страница 19: ...nd older non dockable iPods except iPod shuffle 3rd gen and listen to your external source through the speakers of this system 1 Use an audio cable not included with one 3 5 mm stereo plug on each end...

Страница 20: ...om the AC power source when cleaning The finish on the unit may be cleaned with a dust cloth and cared for as other furniture Use caution when cleaning and wiping the plastic parts If the cabinet beco...

Страница 21: ...iPhone does not charge Unit turned to CD or radio mode Select other modes for iPod charging iPod iPhone is not installed properly Remove your iPod iPhone from the dock and check for obstruction on th...

Страница 22: ...ical appliances must not be disposed of in the normal unsorted municipal waste stream Old appliances must be collected separately in order to optimize the recovery and recycling of the materials they...

Страница 23: ......

Страница 24: ...TEAC CUSTOMER SUPPORT HOTLINE TCS...

Отзывы: