M134 Alignment Procedures
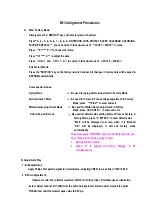
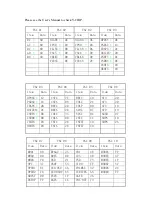
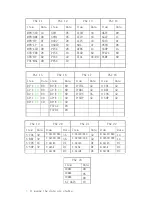
A. Enter Factory Mode:
Simply press the “SERVICE” key on the factory remote handset.
Press
“
“
“
“
1
,
,
,
,
2
,
,
,
,
3
,
,
,
,
4
,
,
,
,
5
,
,
,
,
6
,
,
,
,
7
,
,
,
,
8
,
,
,
,
9
,
,
,
,
0
,
,
,
,
NOTEBOOK,CAPS, DISPLAY ,SLEEP, CALENDAR ,COLOR/INS
,
,
,
,
FAVORITE,RECALL
”
”
”
”
, you can switch in the sub-menus of
“
“
“
“
FAC01
~
~
~
~
FAC18
”
”
”
”
in turns.
Press
“
“
“
“
P+
”“
”“
”“
”“
P-
”
”
”
”
to choose the items.
Press
“
“
“
“
V+
”“
”“
”“
”“
V-
”
”
”
”
to adjust the data.
Press
“
“
“
“
OK
”
”
”
”
and
“
“
“
“
P+
”“
”“
”“
”“
P-
”
”
”
”
to switch in the sub-menus of
“
“
“
“
FAC19
~
~
~
~
FAC23
”
”
”
”
.
Exit Factory Mode:
Press the “SERVICE” key on the factory remote handset. All changes in factory data will be saved in
EEPROM automatically.
Some special modes:
Aging Mode
—
—
—
—
Be used for aging before adjustment in Factory Mode.
Vertical doesn’t Work
—
—
—
—
Be used for Screen & Focus voltage adjustment. In Factory
Mode, press
“
“
“
“
TV/AV
”
”
”
”
to enter and exit.
White balance adjustment Mode
—
—
—
—
Be used for White balance adjustment. In Factory
Mode, press
“
“
“
“
BUS OFF
”
”
”
”
to enter and exit.
Default Value OK mode
—
—
—
—
Be used for default value setting before TV leaves Factory. In
Factory Mode, press “S. EFFECT” to enter default value.
“Wait” will be displayed in screen, when it is finished,
“OK” will be displayed. It will exit factory mode
automatically.
Note: Now press “SERVICE” cannot enter factory mode, you
have to take the following steps to enter:
1. Setting Volume to Zero.
2. Press “V-” in cabinet and Press “Display” in RC
simultaneously.
B. Adjustment Way
1. B
+
+
+
+
Adjustment
:
:
:
:
Apply Philips Test pattern signal in normal status, adjusting VR821 to make B
+=
+=
+=
+=
130V
±
±
±
±
0.5V.
2. RF AGC adjustment:
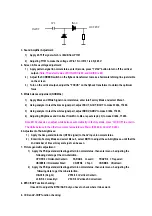
Observe monitor the collector waveform of Q101 with the probe of Oscilloscope as illustration
below. Select channel 2 (>70dB) from the antenna input. Enter D-mode, select menu6 to adjust
RFAGC item until the monitor peak value to 0.8Vp-p.
Содержание 34189S6
Страница 3: ...1 MANUAL DEL USUARIO 34189...
Страница 27: ...OPERATION MANUAL 1 34189...
Страница 49: ...72 A189S6 X499A...
Страница 72: ......
Страница 73: ...34189S6 01 A189S6 AG49...
Страница 74: ......
Страница 75: ......
Страница 76: ......

