OPERATING PROCEDURES
6-11
Models 8752, 8756, and 8757
Operating Procedures
6
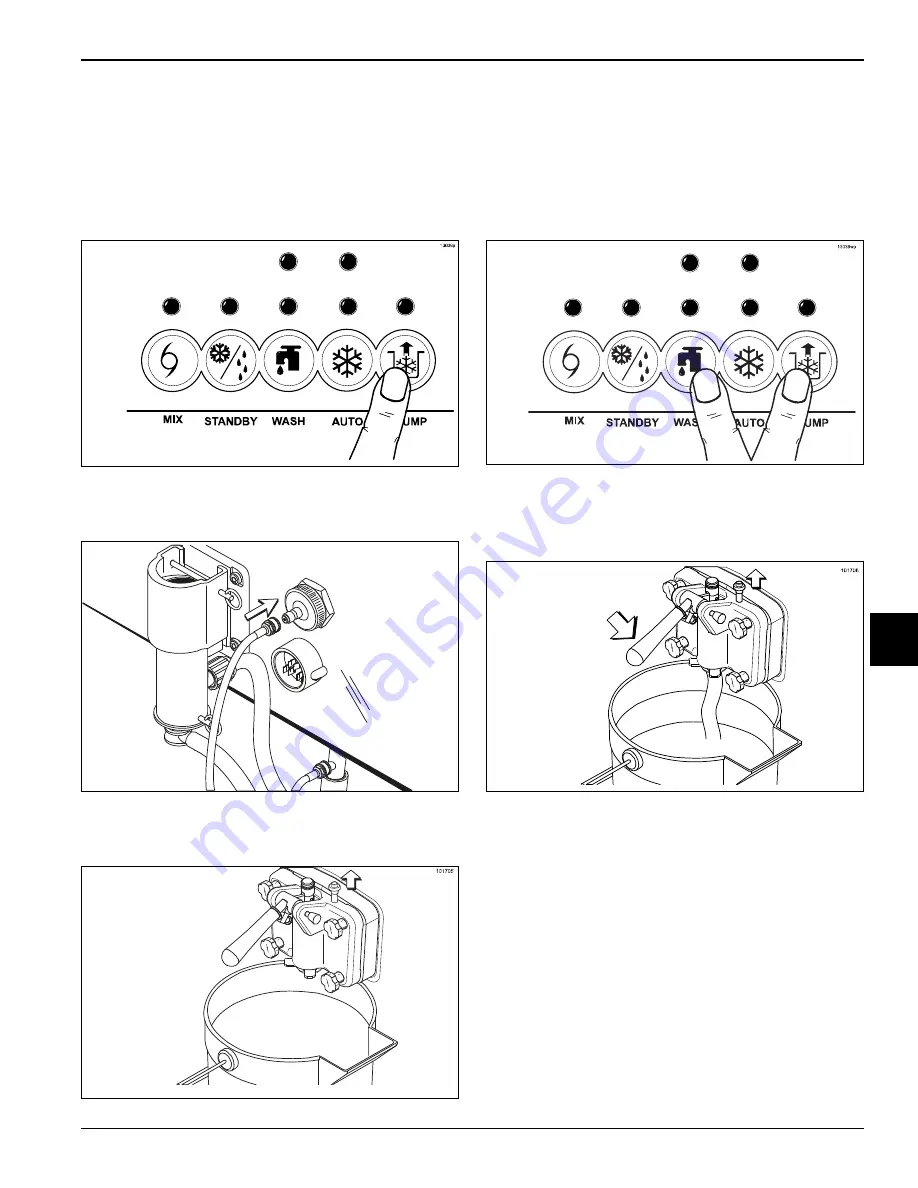
8. Press the PUMP button. A light will come on,
indicating the air/mix pump is operating. This action
will cause the sanitizing solution to be pumped
through the air/mix pump and out through the
pressure line. After approximately 15 seconds, press
the PUMP button. The light will go out, and the pump
will stop operation.
Figure 6-41
9. Drain and connect the free end of the pressure line to
the pressure switch.
Figure 6-42
10. Place an empty pail beneath the door spout. Raise
the prime plug.
Figure 6-43
11. Press the WASH and PUMP buttons. The indicators
will light, indicating the pump and beater motor are
operating. When a steady stream of sanitizing
solution is flowing from the prime plug hole in the
bottom of the freezer door, press the PUMP button,
stopping pump operation. Push down the prime plug
and allow beater agitation for 5 minutes.
Figure 6-44
12. After 5 minutes, open the prime plug. Press the
PUMP button. Pull the draw handle down and draw
off the remaining sanitizer.
Figure 6-45
13. Once the sanitizer stops flowing from the door spout,
close the draw valve. Press the PUMP and WASH
buttons to stop operation. Disconnect the pressure
line from the pressure switch. Drain the sanitizer and
reconnect.
Important!
The machine must not be placed in Auto
mode until all sanitizing solution has been removed
from the freezing cylinder and proper priming
procedures have been completed. Failure to follow
this instruction may result in damage to the freezing
cylinder.
Note:
On Models 8756 and 8757, momentarily pull
down the center draw handle to sanitize the center
door spout.
15063
Содержание Horizon 8752
Страница 14: ...3 4 SAFETY Models 8752 8756 and 8757 Safety 3 Notes...
Страница 24: ...4 10 OPERATOR PARTS IDENTIFICATION Models 8752 8756 and 8757 Operator Parts Identification 4 Notes...
Страница 28: ...5 4 USER INTERFACE Models 8752 8756 and 8757 User Interface 5 Notes...
Страница 52: ...9 2 PARTS REPLACEMENT SCHEDULE Models 8752 8756 and 8757 Parts Replacement Schedule 9 Notes...
Страница 58: ...11 4 LIMITED WARRANTY ON PARTS 8752 8756 and 8757 Limited Warranty on Parts 11 Notes...


