OPERATING PROCEDURES
6-7
Models 8752, 8756, and 8757
Operating Procedures
6
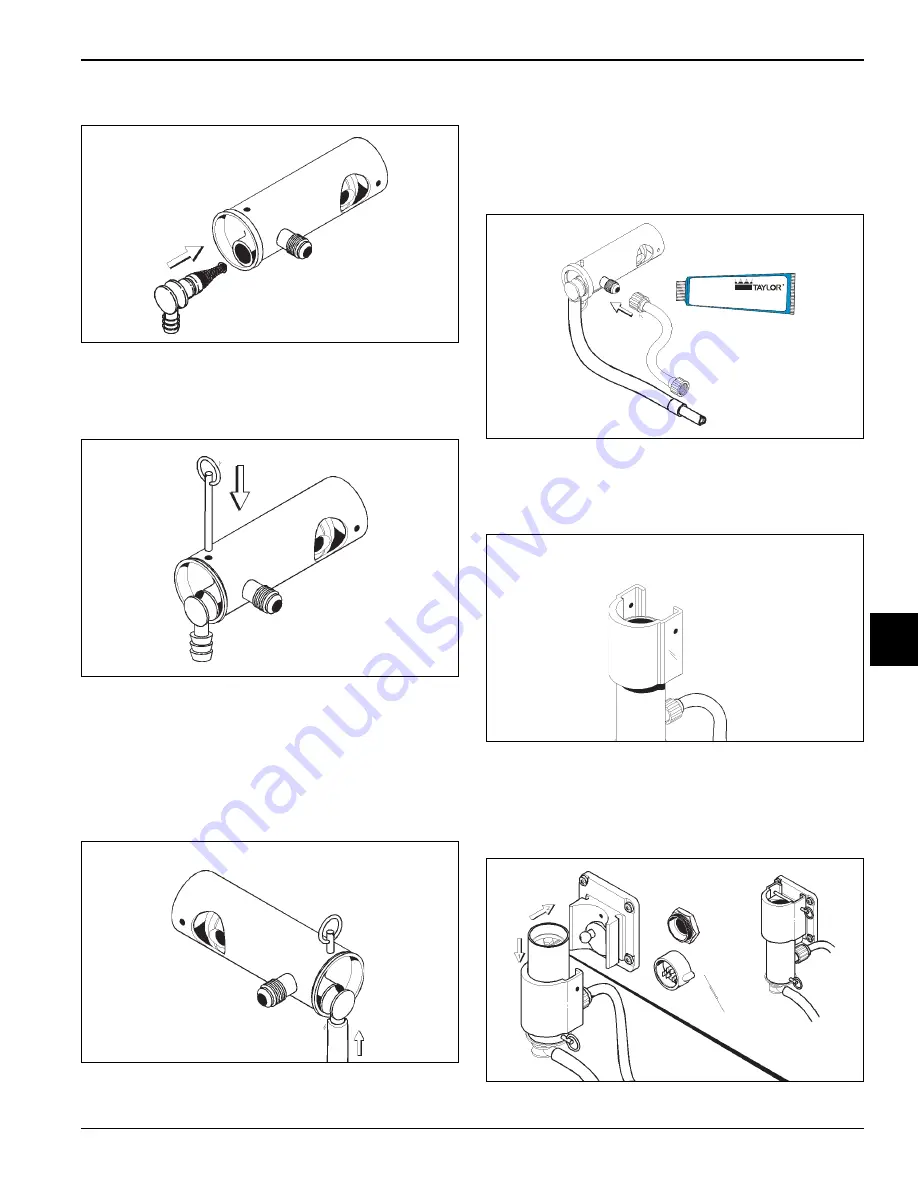
9. Insert the mix inlet fitting into the hole in the base of
the liquid valve body.
Figure 6-26
10. Secure the pump parts in position by sliding the
retaining pin through the crossholes located at the
bottom of the pump cylinder.
Figure 6-27
Note:
The suction line must fit tightly against the
mix inlet fitting
11. Assemble the flare line and suction line. Assemble
the weighted end into the suction line. Attach the mix
suction line to the barbed end of the mix inlet fitting
and allow the weighted end to hang free.
Figure 6-28
12. Push both nuts back from the flare end and lightly
lubricate the underside of the plastic flare. This will
allow the nut to turn freely without twisting the tubing.
13. Attach one end of the flare line to the threaded fitting
on the lower side of the pump cylinder and allow the
other end to hang free.
Figure 6-29
14. Secure the air/mix pump. Place the pump collar over
the pump cylinder. (The crossholes of the pump
collar should be on top.)
Figure 6-30
15. Align the drive hole in the piston to the ball crank of
the motor reducer. At the same time, align the
locating pin hole in the pump cylinder to the locating
pin on the face plate.
Figure 6-31
Apply the appropriate
Taylor approved food safe lubricant.
Содержание Horizon 8752
Страница 14: ...3 4 SAFETY Models 8752 8756 and 8757 Safety 3 Notes...
Страница 24: ...4 10 OPERATOR PARTS IDENTIFICATION Models 8752 8756 and 8757 Operator Parts Identification 4 Notes...
Страница 28: ...5 4 USER INTERFACE Models 8752 8756 and 8757 User Interface 5 Notes...
Страница 52: ...9 2 PARTS REPLACEMENT SCHEDULE Models 8752 8756 and 8757 Parts Replacement Schedule 9 Notes...
Страница 58: ...11 4 LIMITED WARRANTY ON PARTS 8752 8756 and 8757 Limited Warranty on Parts 11 Notes...


