


Taurus Super-S Combo User Guide
Page 6 / Chapter 2 - HDD Assembly
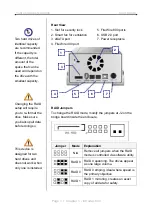
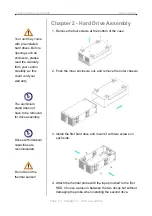
5. Install the second hard drive and mount it with two screws
on each side.
Be careful not to
damage any cables
or components, and
make sure the
cables are
connected firmly.
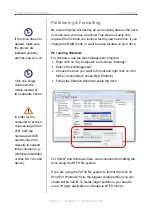
6. Connect the SATA and power cables to your hard drives. Be
careful not to damage any components and confirm that the
cables are connected firmly.
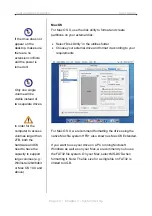
7. Slide the inner enclosure back into the outer chassis.
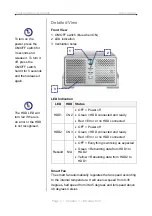
The LED indication
e hard
for HDD1 is
referring to th
drive connected to
CN2, where HDD2
is referring to CN3.
Upon initial st rt up
e
e
a
of the device and
when changing the
RAID mode, any
existing data on th
installed hard drives
will be erased.
Make sure to
backup all data prior
to installing the
drives and befor
changing the RAID
mode!
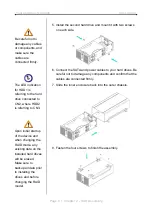
8. Fasten the four screws to finish the assembly.


