background image

14

CVRM2550 Elite Rower

2.4 

Adjustments

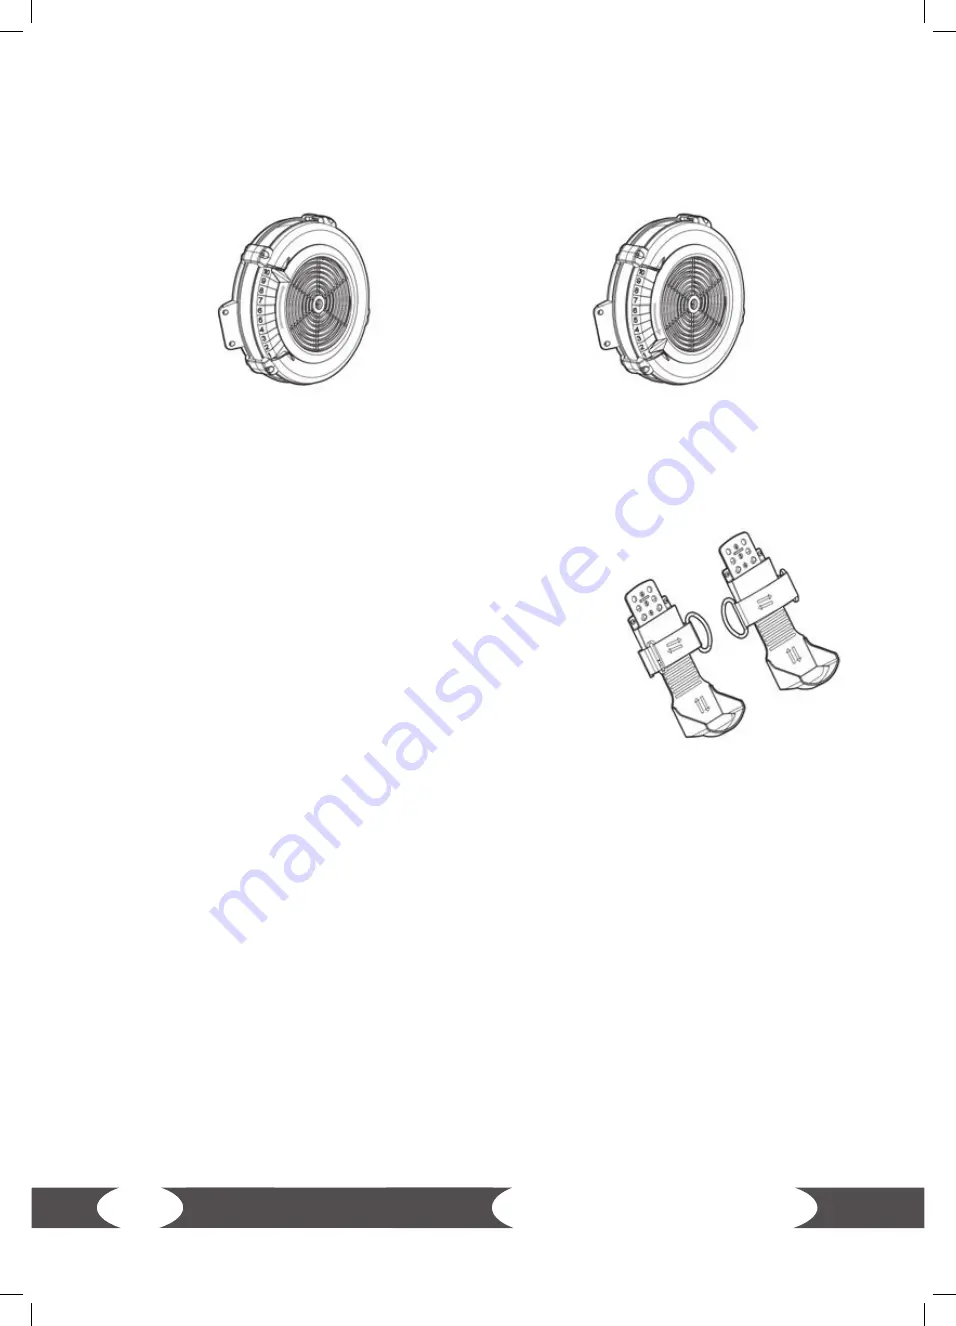
Damper


        moving upwards - the gear is increased  

   moving downwards - the gear is decreased

Heel Rest and Strap 

There  are  several  settings  for  the  heel  rest.  Before  you  start 

with your training, adjust the heel rests correctly.

1.  Loosen the strap by opening the Velcro fastener and place 

your foot on the heel rest through the strap.

2.  Tighten the strap of the heel rest so far upwards that your 

heel is supported and the foot strap lies over the widest part 

of your foot.

3.  Tighten the strap at the loosened end of the Velcro fastener and 

press the Velcro fastener back on.

Содержание CVRM2550

Страница 1: ...CVRM2550 01 01 max 150 kg 10 15 Min C M 34 kg Assembly and Operating Instructions SKU Code CVRM2550 TF Taurus Elite Rower L 142 W 61 H 102...

Страница 2: ...2 CVRM2550 Elite Rower...

Страница 3: ...ey Functions 16 3 3 Operation Instructions 17 3 4 Notes on Correct Rowing 27 4 STORAGE AND TRANSPORT 30 4 1 General Instructions 30 4 2 Transportation Wheels 30 5 TROUBLESHOOTING CARE AND MAINTENANCE...

Страница 4: ...4 CVRM2550 Elite Rower 9 WARRANTY 37 10 CONTACT 39...

Страница 5: ...B 1000 SL Local Court Flensburg European VAT Number DE813211547 Disclaimer 2011 Taurus is a registered brand of the company SportTiedje GmbH All rights reserved Any use of this trademark without the e...

Страница 6: ...re securely in place If required read through the instructions again to correct any mistakes Please pay close attention to the safety and maintenance instructions given here The contract partner canno...

Страница 7: ...kcal heart rate when using a chest strap Watt Resistance system air resistance Total number of training programs 9 Weight and dimensions Article weight gross including packaging 39 0 kg Article weight...

Страница 8: ...have a medical license and must be under strict observation when using the equipment The equipment is strictly for use by one person at a time If your equipment provides a safety key the clip of the...

Страница 9: ...The recommended free zone around the equipment should be at least 60 cm on each side and 45 cm in front of and behind the equipment The training room should be well ventilated during training and not...

Страница 10: ...t in order to reduce the risk of injuries CAUTION Do not open the packaging when it is lying on its side The assembly of the equipment must be carried out by at least two adults If in doubt seek the h...

Страница 11: ...nging to the device are included in the scope of delivery and whether damage has occurred In the event of complaints the contractual partner must be contacted directly CAUTION If parts of the scope of...

Страница 12: ...ven NOTICE using the tool only when you are instructed to do so Step 1 1 Attach the Leg Front Long 3 and Leg Front Short 4 to the Front Stabilizer 2 with 4pcs Flat Head Hex Socket Screw 92 2 Notice th...

Страница 13: ...d CAUTION Do not lean on or lay anything on the product as this may cause the product to become unstable and fall over NOTICE The rowing machine can be disassembled to save space during storage This a...

Страница 14: ...tart with your training adjust the heel rests correctly 1 Loosen the strap by opening the Velcro fastener and place your foot on the heel rest through the strap 2 Tighten the strap of the heel rest so...

Страница 15: ...gnal input DIST User exercise distance Without setting it will count up setting range 0 9990 10 CAL User exercise calorie Without setting it will count up setting range 0 9990 10 SPM Display its value...

Страница 16: ...LORIES will be set by user TARGET STROKES The STROKES will be set by user TARGET PULSE The heart rate will be set by user 3 2 Key Functions SET KEY Press once to increase once and long press to set ra...

Страница 17: ...ulse input for 4mins the LCD will enter into Sleeping mode 3 Exercise End Screen value The pulse value is the current value 3 2 When the exercise ends press the MODE key to continue 3 3 When the exerc...

Страница 18: ...according to the operation value and switch display every 5s picture 2 3 6 4 During exercising without pressing any key or if no signal is received for 4 minutes then the console enters into the stan...

Страница 19: ...tautologically and circularly with each cycle counting plus 1 until displaying WORK 08 08 after each exercise and then enter the end screen 7 1 5 When doing the WORK function if no signal is detected...

Страница 20: ...display 7 2 4 7 2 3 and 7 2 4 will perform tautologically and circularly with each cycle count plus 1 until displaying WORK 08 08 after each exercise then enter into the end screen and the buzzer soun...

Страница 21: ...ST 8 display the TIME window will display 0 05 and then be set circularly After pressing the MODE key the buzzer will beep for 0 5s and then enter into the exercise screen picture 18 7 3 8 7 3 3 and 7...

Страница 22: ...itch display every 5s In standby mode press the MODE and SET keys to select TARGET function The LCD displays TARGET flashing 8 display picture 21 Pressing MODE key to enter into TARGET FUNCTION SELECT...

Страница 23: ...splay every 2s picture 28 29 All function values will accumulate according to the operation values and switch display every 5s Picture 26 TARGET TIME DISTANCE CALORIE PULSE WATT SPM STROKES TOTAL METE...

Страница 24: ...de 8 3 3 When the LCD displays the TARGET and CALORIES 8 display it will switch displayevery 2s picture 32 33 All function values will accumulate according to the operation values and the display will...

Страница 25: ...All function values will accumulate according to the operation values and switch display in every 5s TARGET TIME DISTANCE CALORIE PULSE WATT SPM STROKES TOTAL METER MILE TIME 500m Picture 38 Picture 3...

Страница 26: ...lays the current the AD value of VR Picture 44 Adjust Damper Picture 45 to the first level and press ENTER KEY to confirm 10 3 After confirming the first level value of VR H will be displayed in the T...

Страница 27: ...ser slightly leans back holds the legs down keeps the upper body straight and pulls the handle to the body Straddled elbows Wrong The user s elbows are straddled from the body at the end of the moveme...

Страница 28: ...d of stretching it completely Leaning too far forward Wrong The body is bent too far forward The shins are no longer vertical The head and shoulders are facing the feet The body is therefore in a weak...

Страница 29: ...movement with the arms instead of Right The user begins by stretching out the legs relaxing the back and stretching the arms Bent wrists Wrong The user bents the wrists during the movement Right Alway...

Страница 30: ...chosen so that improper use by third parties or children can be prevented 4 2 Transportation Wheels ATTENTION as parquet planks or laminate lay out the transport route with cardboard or similar to avo...

Страница 31: ...duction Nevertheless faults or malfunctions may occur Frequently individual parts are responsible for these disturbances an how to correct them If the equipment still does not function properly contac...

Страница 32: ...ox one teaspoon of the oil on the cloth Then pull out carefully the chain on the handle to the fence Wipe along the chain with the cloth several times Then remove the remaining oil with a dry cloth Cl...

Страница 33: ...es optimum transmission of the heart rate You may want to buy additional grips or weights for multi gyms recommended accessories on this page Alternatively you can use the QR code provided Of course y...

Страница 34: ...odel name article number serial number exploded drawing and parts list ready The corresponding contact options can be found in chapter 10 of this operating manual NOTICE The serial number of your equi...

Страница 35: ...acer Sleeve Chain Bearing Sleeve Gear wheel Swivel Bushing Stator Connecting Sheet Chain Connector U Bolt U Block Bungee Cord hook Magnet Pedal Strap Seat Bungee Cord Axis Of Connection Lower Die Cast...

Страница 36: ...13 46 69 46 113 45 44 54 47 48 49 49 51 66 51 52 60 53 54 54 55 59 61 65 68 79 72 67 70 73 76 77 78 83 51 82 84 84 85 86 87 39 19 10 88 88 88 88 88 89 20 91 93 93 93 93 93 93 93 111 95 97 98 101 102 1...

Страница 37: ...your equipment can be found on its product website Repair Costs According to our choice there will either be a repair a replacement of individual damaged parts or a complete replacement Spare parts th...

Страница 38: ...force e g hitting kicking falling interventions which were not carried out by one of our authorized service centres unauthorised repair attempts Proof of Purchase and Serial Number Please make sure t...

Страница 39: ...00 Sa 09 00 18 00 PL BE TECHNICAL SUPPORT SERVICE TECHNICAL SUPPORT SERVICE 22 307 43 21 49 4621 42 10 948 Mo Fr 08 00 18 00 Sa 09 00 18 00 02 732 46 77 49 4621 42 10 932 Mo Fr 08 00 18 00 Sa 09 00 18...

Страница 40: ...lubs companies and physio practices with professional equipment for endurance and strength training Sport equipment from renowned manufacturers high quality in house developments and comprehensive ser...

Страница 41: ...41 Notes...

Страница 42: ...42 CVRM2550 Elite Rower Notes...

Страница 43: ...43...

Страница 44: ...TF Taurus Elite Rower...

Отзывы: