Page
12
of
29
Channel Setup
From the
MENU
button, select the
Channel Setup
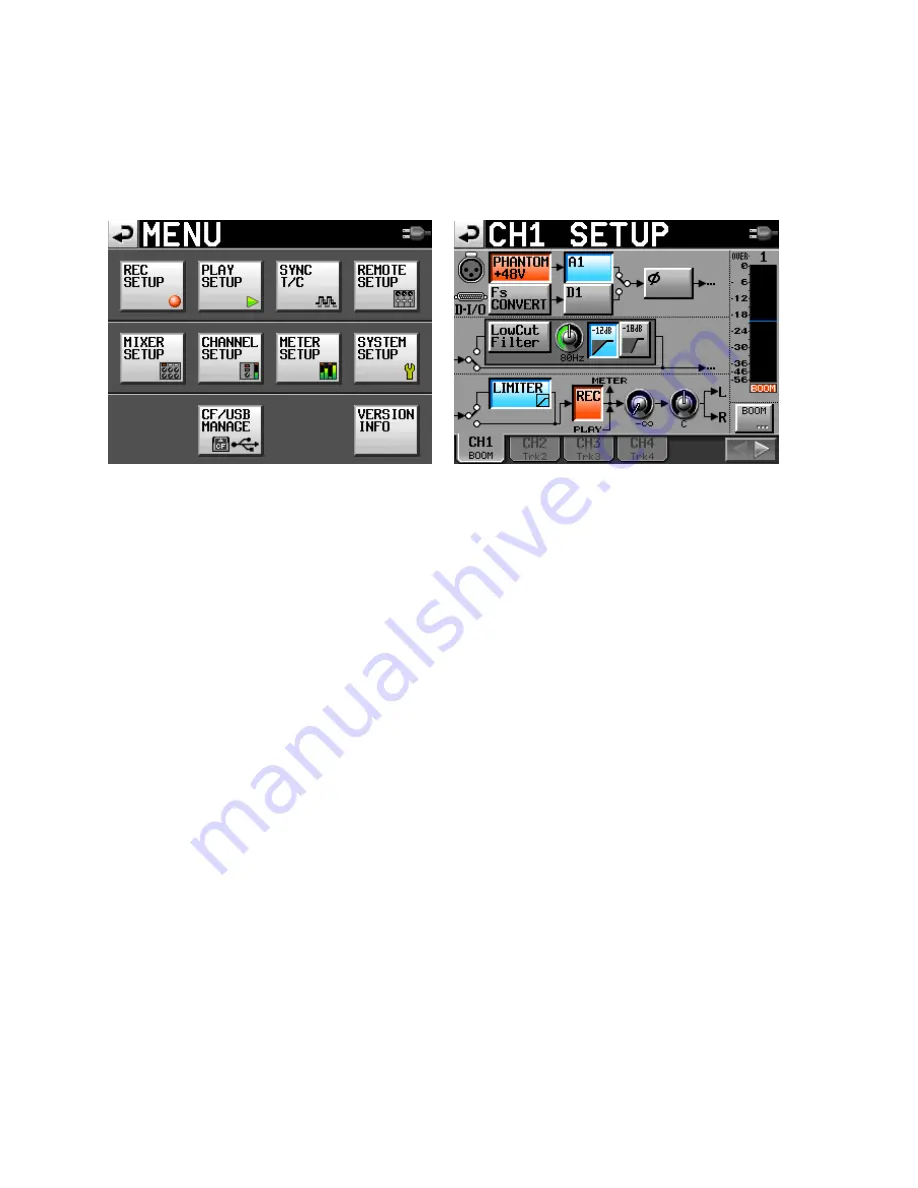
window. The Channel Setup window is a fast and
convenient way to control the settings for each input channel, and is the best way to work with your
channel settings during a session.
The screen of the
Channel setup
window shows tabs for input channels 1-4. Selecting the arrow tab on
the right will bring up channels 5-8, and vice versa.
For each channel, you can turn
Phantom
power on/off; select
analog or digital
input; engage the
phase
reversing tool; engage
low cut
& adjust the low cut parameters; and engage
limiter
. The button marked
“
REC
” will arm or disable the track.
Pressing on the small knob located next to the REC button will activate the (real) knob on the Tascam
located to the right of the display, marked
DATA
. That virtual knob on the screen controls the
output
level
from the channel to the LR master mix, and is linked to the physical DATA knob on the Tascam.
Next to the virtual output level knob is another virtual knob marked
>L/>R
. When this virtual knob is
depressed, it becomes linked to the DATA knob. It is the pan control for the output, and determines the
stereo mix to the master left and right tracks.
Note that for film/video production, we very seldom want to create a (seemingly) screen
balanced, stereo 2-track master for the editor to work with. Instead, fully pan (assign) your input
channels to 100% all the way left, or all the way right, so that there is no overlap of audio onto
both tracks. During the editing process, a hard left or hard right set of dailies can be panned to
screen center as the editor desires. But starting out with two discreet tracks will give the editor
more options and better control. Remember that the eight individual iso tracks often will not be
utilized until after the picture edit is locked, and the workflow goes to audio post production.
On the lower right of the Channel Setup window is a button with the track name or label, just under the
level meter. Pressing that button allows you to instantly rename the track display to something more
meaningful, such as changing “Track 2” to “Boom”, or “Track 5” to “Brad”.


