Targetti Chroma-Cue Скачать руководство пользователя страница 12

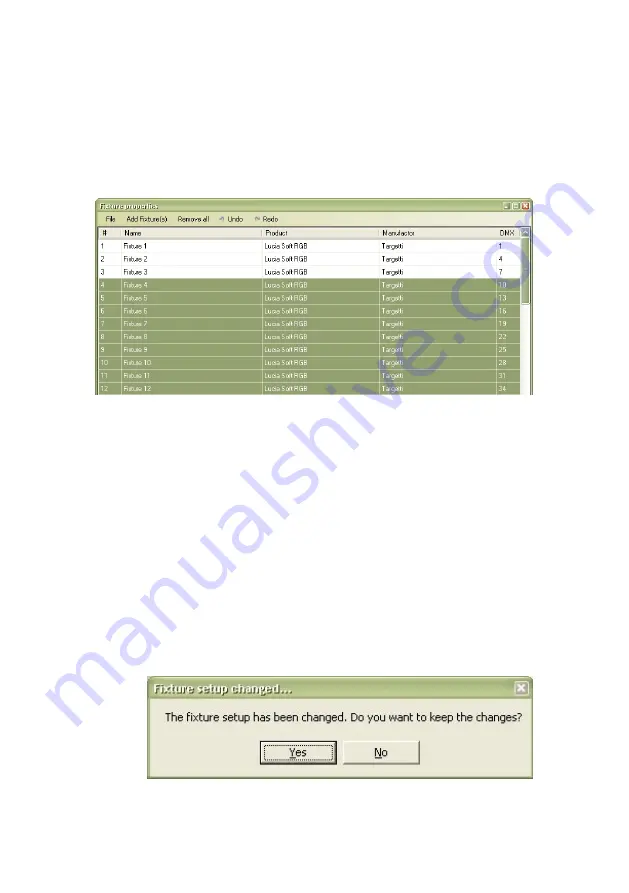
  fixture number (1 to 100) 

  fixture name (user designated) 

 fixture 

type 

 fixture 

manufacturer 

  fixture DMX channel  


10. Repeat step 8 for each type of fixture. The 

CHROMA-CUE may be configured with up to 10 
types of fixtures and a total of up to 100 lights.  

11. (Optional) You can enter names for the fixtures in 

the 

Name

 column to help identify them.  

12. (Optional) If you want to save the fixture setup on 

the computer, select 

File

 > 

Save to file

 from the 

dialog menu. Select the file location and name in the 

Save

 dialog and click 

OK

13. Close the 

Fixture setup

 dialog. Click 

Yes 

at the 

prompt to keep the changes.  


12 

CHROMA-CUE Installation Guide 

Содержание Chroma-Cue

Страница 1: ...Chroma Cue installation guide WWW TARGETTI COM...

Страница 2: ...Dimensions...

Страница 3: ...Contents Dimensions 2 Safety Information 4 Introduction 5 Installation 6 Connections 7 Setup 9 Troubleshooting 14 Specifications 15...

Страница 4: ...rom AC power and contact Targetti Service for assistance Do not install or use the device outdoors Do not spray with or immerse in water or any other liquid Do not remove any covers or attempt to repa...

Страница 5: ...e contents The CHROMA CUE package contains the following items CHROMA CUE Controller 48 V Power over Ethernet POE power supply CD ROM with documentation and Chromatron software 5 m UTP patch cable 1 5...

Страница 6: ...up 3 Fasten the bracket to the wall with four suitable screws not included 4 Plug the included 5 m UTP patch cable into the RJ 45 socket on the back of the controller 5 Place the controller on the bra...

Страница 7: ...o the power supply all 3 LEDs will light for 2 seconds and then the ON LED will illuminate green The CONNECT LED illuminates green when the controller is connected and receiving power Power supply to...

Страница 8: ...ort the signal This is usually accomplished by inserting a suitable 120 ohm termination plug into the DMX output of the last fixture in the line AC power supply cable plug Warning Risk of electric sho...

Страница 9: ...e software as follows 1 Place the CD ROM in the drive If autoplay is enabled an installation dialog opens automatically after loading the CD ROM 2 If the installation dialog does not open you must run...

Страница 10: ...1 If you have not already done so install the Chromatron software 2 Start Chromatron 3 Connect the CHROMA CUE to any USB port on the computer using the included USB cable Do not connect the controlle...

Страница 11: ...ture setup Select Remove all from the dialog menu 8 Add fixtures to the setup Select Add fixture s from the dialog menu Double click the manufacturer name in the Select fixture type dialog then click...

Страница 12: ...s and a total of up to 100 lights 11 Optional You can enter names for the fixtures in the Name column to help identify them 12 Optional If you want to save the fixture setup on the computer select Fil...

Страница 13: ...saved to the controller Click File in the main window Click Save to device Click Yes at the confirmation prompt 15 The CHROMA CUE is now configured and ready for use Before operation the lights must...

Страница 14: ...mory Press and hold the preset button for about 4 seconds until the controller sounds twice Interference in DMX data line Verify that the end of the data line is terminated One or more lights has the...

Страница 15: ...wer consumption 2 W Control and programming Control interface DMX 512 Control channels 512 Maximum number of fixture types 10 Maximum number of fixtures 100 Recallable memories presets 4 Connections A...

Отзывы: