


CHROMA-CUE Installation Guide
11
6. Click
Setup
>
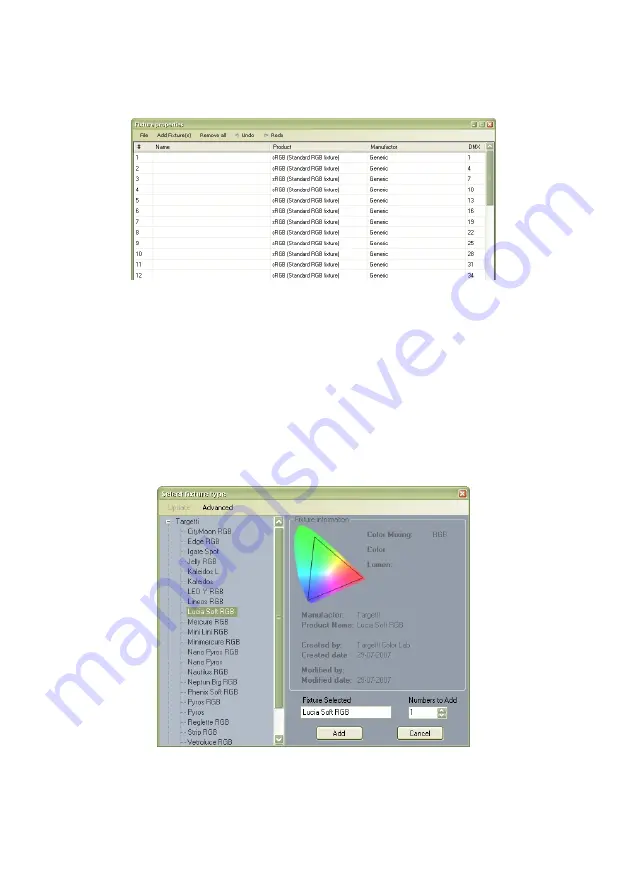
Fixture properties
from the main
menu. The
Fixture properties
dialog opens.
7. If configuring the CHROMA-CUE for the first time,
delete the pre-loaded fixture setup. Select
Remove
all
from the dialog menu.
8. Add fixtures to the setup. Select
Add fixture(s)
from
the dialog menu. Double-click the manufacturer
name in the
Select fixture type
dialog, then click
the model. Enter the quantity of fixtures of this type
in the
Numbers to Add
field. Click
Add
.
9. The quantity of fixtures is inserted starting at the
cursor location. The following fields are displayed:
Содержание Chroma-Cue
Страница 1: ...Chroma Cue installation guide WWW TARGETTI COM...
Страница 2: ...Dimensions...


