background image

22

4:3 PS

4:3 LB

16:9 Wide

Press SETUP to exit

Current selection

Press SETUP to exit

Recording Quality

4 Min.

Auto Chapter

10 Min.

Set Clock

20 Min.

30 Min.

OFF

v

Current selection

v

Record Audio

Recording Setup

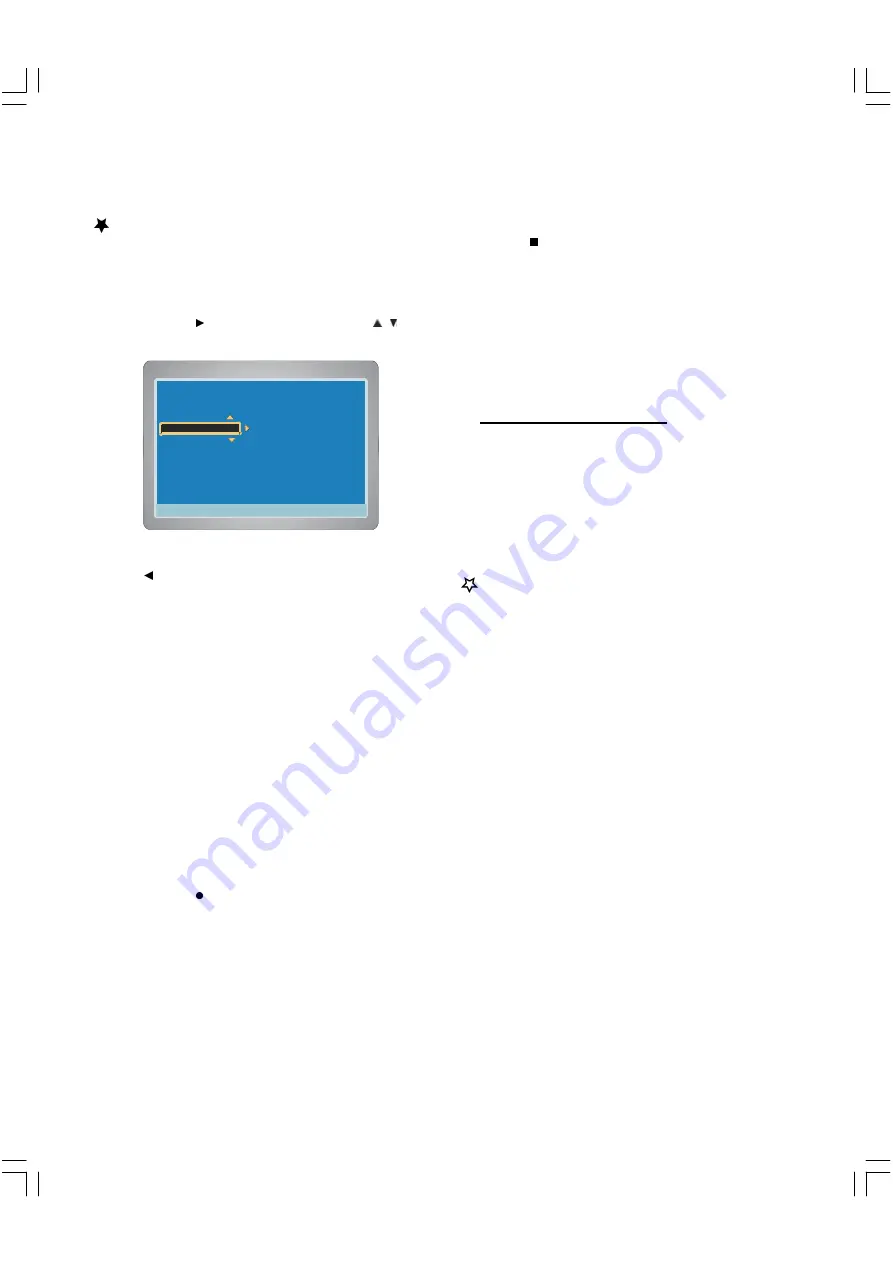
 Setting Auto Chapter

When recording starts, the chapters in the title are made automatically

on the disc by this setting.

1.

Select  “Auto Chapter ”.

2.

Press ENTER or 

to select the sub menu, then press 

 / 

 to

select  the desired time.

3.

Press ENTER, “V ”appears.

4.

Press

 to return to “Auto Chapter ”.

5.

To exit, press SETUP.

Recording TV Programs

Before pressing  TV ,  select  the 

Recording Quality

 ( “HQ ”,   “SP

”,“LP”,  “EP” or “EP+”)first  by setting “Recording Setup ”or by

pressing  REC MODE on the remote control and set 

 Auto Chapter

 .

1.

Press TV to receive the TV program, “MONITOR ”appears briefly

on the TV screen ( indicating the DVD recorder is searching the

input signal which you want to record.).

2.

To select the channel, do one of the following :

Press  C or -.

Press the number button(s).

Examples:

To select Channel 6: Press [6].

To select Channel 12: Press [1] and [2].

To select Channel 110: Press [1], [1] and [0].

The channel number appears on the FL display

.

3.

Press  RECORD    on the unit to start recording.

“RECORDING ”appears briefly on the TV screen.

Elapsed recording time appears on the TV screen.

The REC indicator lights.

Recording continues until you stop the recording or the disc is
full.

Note :
Press DISPLAY repeatedly until the elapsed recording
time disappears on the TV screen, if necessary.

4.

To stop recording

Press

 during recording.

Please wait until “CLOSING ”—> “PLEASE WAIT... ”—

>“STOP” disappears on the TV screen.

Note :

It takes a while to complete closing the disc. You may not watch
TV program while closing.

A title menu screen appears on the TV screen.

The TV program is recorded on the disc.

The additional recording information is also stored on the

disc.

Then the recording is completed.

Notes :

You cannot change the channel or record mode during

recording.

The record time is estimate and actual time may differ.

Recording makes on open space on the disc. Data will not

be overwritten.

You cannot record a program with copy-protection.

 To watch another TV while recording

Press SOURCE repeatedly to select TV source on the screen.

“TV ” appears on the FL display.

Use your original TV remote control to select the channel on your

TV.

Note :

If you do not want to watch TV while recording, you can turn
off the TV. If using a cable box, make sure to leave it on.

Содержание DR-5100x

Страница 1: ...1 DVD RW RW Player Recorder DR 5100x Before connecting operating or adjusting this product please read this instruction booklet carefully and completely Instruction Manual...

Страница 2: ...ed for long periods of time 14 Refer all serving to qualified service personnel Servicing is required when the apparatus has been damaged in any way such as power supply cord or plug is damaged liquid...

Страница 3: ...copyright protection technology must be authorized by Macrovision Corporation and is intended for home and other limited viewing uses only unless otherwise authorized by Macrovision Corporation Rever...

Страница 4: ...o Logic 20 Recording 21 26 Preparations 21 Recording setup 21 22 Setting Recording Qaulity 21 Setting Auto Chapter 22 Recording TV Programs 22 Timer Recording 23 26 Set the record program s first 23 S...

Страница 5: ...a picture piece on a video software or an album etc for a music piece on and audio software Each title is assigned a title number enabling you to locate the title you want Chapter DVD Sections of a pi...

Страница 6: ...t install more than 1 disc on disc tray Do not place the disc on the tray up side down Do not try to close the disc tray when the disc is not installed properly Conventions about this manual Instructi...

Страница 7: ...s to select the previous track or chapter 13 NEXT Press to select the next track or chapter 14 STOP Press to stop playback except for timer recording 15 PLAY PAUSE Press to play or pause the playback...

Страница 8: ...ight audio channel of a VCD disc SLOW select the forward backward slow speed playback PLAY PAUSE press to start or pause playback STOP stops by momentarily or fully PREV SKIP skip to previous chapter...

Страница 9: ...et and the scart socket SCART OUT 4 If your TV supports RGB switch the recorder in OSD to Scart If your TV set have the S Video socket connect your TV with a S Video cable Configuration B D E 1 Insert...

Страница 10: ...you can see the picture from the additional device on your TV set At same time you can recorder the program from the additional device In this case you have the best quality with S Video If you have...

Страница 11: ...D 4 Connect to a camcorder etc by a video s video DV IN To copy camcorder recordings you can use the front sockets These sockets are located behind the flap on the left hand side Best picture Quality...

Страница 12: ...g the TV program 1 Switch power bottom on the back side to on and press SETUP in no disc mode or full stop mode 2 Use to select item you want 3 Press ENTER on remote control to confirm the selection 4...

Страница 13: ...to memorize all the channels available in your area Please wait until the confirmation screen appears Yes is highlighted Note If you don t want it press to select No and then press ENTER 4 Press ENTER...

Страница 14: ...ark Audio Subtitle Parental Control 1 Press SETUP in no disc mode or full stop mode Menu creen appears on the TV screen 2 Press to select Setup Menul then press ENTER or Recording Setup is highlighted...

Страница 15: ...ng from the factory 4 Press repeatedly to select Done 5 Press ENTER the Choose Country screen appears Parental Control MPAA Motion Picture Association of America Guideline is a rating system that prov...

Страница 16: ...time enter 3 3 0 and 8 Because the initial password is set to 3308 before shipping from the factory 4 Press repeatedly to select Done 5 Press ENTER the Choose Rating screen appears 6 Press ENTER or to...

Страница 17: ...then press ENTER or General Setup screen appears 4 Press repeatedly to select the item Setting Menu Language 1 Select Menu Language 2 Press ENTER or to select the sub menu then press to select the de...

Страница 18: ...eturn to TV Display Setting TV Type 1 Select TV Type 2 Press ENTER or to select the sub menu then press to select the appropriate setting for your TV screen size Multi System Select this if the connec...

Страница 19: ...installation description is only for 5 1 receiver connected with 6 RCA connectors See also page 10 Speaker Down Mix Center Rear Subwoofer Center Delay Rear Delay Speaker Test 1 Press SETUP in no disc...

Страница 20: ...en press ENTER or Recording Setup is highlighted 3 Press to select Audio then press ENTER or Audio Setup screen appears Setting Digital Out Digital output selection enables you to switch on or off the...

Страница 21: ...ss the disc tray with your hand 3 Place a DVD RW or DVD R disc label facing up to be recorded on the disc tray 4 Press OPEN CLOSE again to close the disc tray If a blank disc is used for first time TA...

Страница 22: ...FL display 3 Press RECORD on the unit to start recording RECORDING appears briefly on the TV screen Elapsed recording time appears on the TV screen The REC indicator lights Recording continues until...

Страница 23: ...xit Current selection Press SETUP to exit Record Show Verify the settings Press Enter to edit Record Time 00 01 01 01 Frequency Once 2004 01 01 Quality SP 2hr Input Source Tuner Title 20040101 Channel...

Страница 24: ...1 Select Input Source 2 Press ENTER the Input Source screen appears 3 Press to select Tuner Scart Video Scart RGB Rear AV or Front AV 4 Press ENTER or to select DONE then press ENTER the recording in...

Страница 25: ...title screen returns The new title name appears 7 Press to select Cancel then press ENTER The Record Show screen returns After all the item setting are completed press to select Done and then press EN...

Страница 26: ...s to 360 minutes In this one touch recording mode each pressing Record button can add 30 minutes to your record While the longest duration time in this mode is 360 minutes in EP quality Playback Featu...

Страница 27: ...be sure to press the STOP button Otherwise the disc will play continuously Using DVD TITLE menu Some DVDs may contain two or more titles If the disc has a title menu recorded on it you can start play...

Страница 28: ...is not changed to the selected one When a disc supporting closed caption is played the subtitle and the closed caption may overlap each other on the TV screen In this case turn the subtitle off When...

Страница 29: ...u want PROGRAM PXX YY appears on the TV screen The Track No YY is set to the No XX program Note If you make a mistake press CLEAR to eliminate the number you have input 4 Repeat step 3 as above to sel...

Страница 30: ...show the slide show stops s temporarily Pause appears Press ll again to resume the slide show If the picture appears upside down sideways etc Press as follows Rotate it 90 degrees clockwise Rotate it...

Страница 31: ...instructions below to find the registration number of your recorder For more information please visit www divx com 1 Press SETUP in no disc mode or full stop mode Menu screen appears on the TV screen...

Страница 32: ...t Play Edit Titles in Menu screen then press ENTER TITLE MENU appears breifly on the TV screen The title menu screen appears 2 Press to select the TITLE first 3 Press EDIT the edit screen appears 4 Pr...

Страница 33: ...rd on the disc Finish all the editing before you start to finalize the disc 1 Select Finalize Disc then press ENTER a message appears 2 Press to to select Yes Note If it is not necessary select No and...

Страница 34: ...m the protect of this Disc Yes No Protect Disc DVD RW You can protect a disc from accidental erasure or editing 1 Select Protect Disc then press ENTER a message appears 2 Press to to select Yes Note I...

Страница 35: ...or 16 9 Set TV and DVD Recorder to the same picture size Picture Noise interference appears in the picture DVD Recorder is not connected directly with the TV copy protection of DVD is in use If video...

Страница 36: ...ction or change the rating level Dirty Scratched DVD CD Clean DVD CD DVD Audio 24bit 96Kbit or SAC CD This DVD s are not supported by this player DIVX DVD Version 6 x or greater Check on TARGA Homepag...

Страница 37: ...SECAM standard system Tuner channel range VHF 2 13 UHF 14 69 CATV 1 125 RF converter Built in VHF converter Time indication 24 hour system Timer 1 year 15 event programmable Outputs COMPONENT VIDEO OU...

Страница 38: ...TARGA GmbH Lange Wende 43 59494 Soest Germany www targaonline com 1179196...

Отзывы: