GEK-01054
16
Testing the Printer
Installing the Ribbon
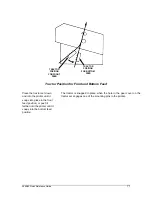
The print head has to be backed away from the striker bar to provide
clearance to slide the ribbon guide onto the print head nozzle. Printers
with dual path paper paths (Front/Bottom and Rear) are equipped with
an auto print gap mechanism. Printers with a single paper path are
shipped with the semi-automatic (manual) gap adjust enabled as the
default setting.
If you have not already done so, apply power to the printer. The print
head will move to the left hand Home position. After initialization, make
sure the printer is Offline.
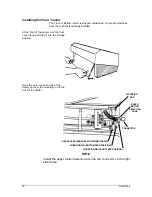
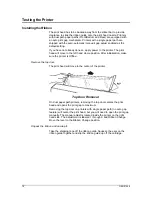
Remove the top door.
The print head will move to the center of the printer.
On dual paper path printers, removing the top door centers the print
head and opens the print gap to maximum.
Removing the top door on printers with single paper path (no auto gap
feature) will center the print head, but you will need to open the print gap
manually. The manual adjust is located inside the printer on the right
hand side. The adjustment is labeled 1 through 6 and Ribbon Change.
Move the lever to the Ribbon Change position.
Unpack the ribbon and unwrap it.
Take the shipping tape off the ribbon guide. Squeeze the ears on the
ribbon guide together and slip the ribbon guide up off the cartridge.
Top Door Removal
Содержание 3860
Страница 1: ...3860 3880 Quick Reference Guide GEK 01056 ...
Страница 2: ...3860 3880 Quick Reference Guide GEK 01056 ...
Страница 42: ...3860 3880 Guide de Référence Rapide GEK 01056 ...
Страница 84: ...3860 3880 Kurzanleitung GEK 01056 ...
Страница 125: ...3860 3880 Guida di Consultazione Rapida GEK 01056 ...
Страница 165: ...3860 3880 Guía de Referencia Rápida GEK 01056 ...

