Options and accessories
User Guide
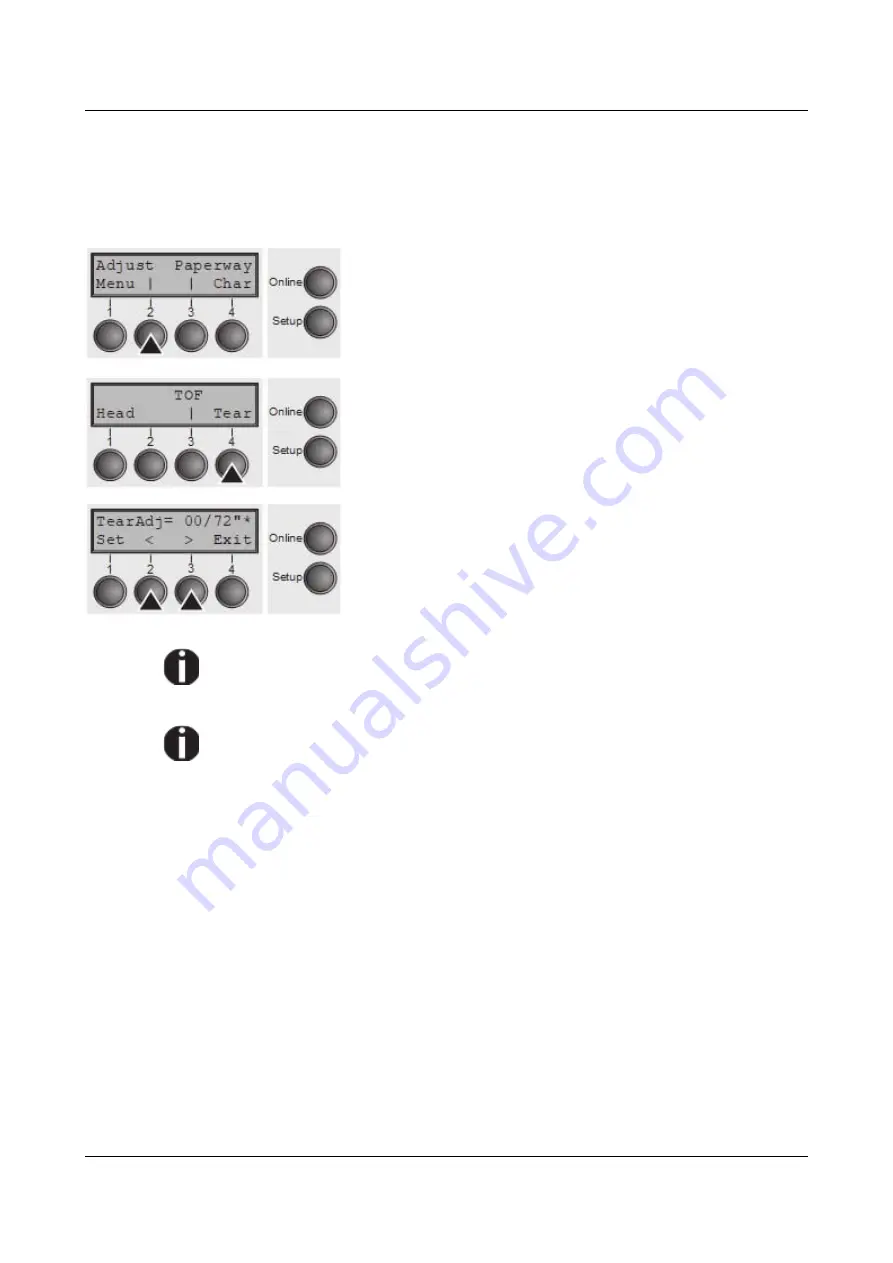
Setting the tear position
If the tear position of the paper is not aligned with the tear edge of the printer, you
can adjust it. Inserted paper needs to be torn off if necessary and retracted to
park position.
Press the
Setup
key. The printer changes to setup mode.
Press the
Adjust
(2) key.
Press the
Tear
(4) key.
Press the
<
(2) or
>
(3) key to move the perforation to the
desired position. Confirm the input by pressing the
Set
(1)
key. Confirm the input again by pressing the
Setup
key.
The printer is reset to the initial status.
The correction made – a maximum of approx. 1" (2.5 cm) in each direction –
will be retained after switching the printer off.
It can be set separately for each paper path.
Make sure that the set form length corresponds to the actual length of the
forms you are using.
40
Содержание 2810
Страница 1: ...User guide Matrix printer 2810 2820 ...
Страница 17: ...User Guide Options and accessories Printer at a glance 9 ...
Страница 18: ...Options and accessories User Guide Printer in tractor mode 10 ...
Страница 52: ...Options and accessories User Guide 46 ...
Страница 62: ...User Guide Options and accessories 59 ...
Страница 83: ...User Guide Options and accessories 81 ...
Страница 90: ...Options and accessories User Guide Menu settings example 88 ...
Страница 96: ...User Guide Options and accessories 95 ...
Страница 108: ...User Guide Options and accessories 107 ...
Страница 129: ...User Guide Options and accessories MTPL standard character set 129 ...
Страница 130: ...User Guide Options and accessories MTPL international substitution characters 131 ...
Страница 131: ...Options and accessories User Guide OCR A character set 132 ...
Страница 132: ...User Guide Options and accessories OCR B character set 133 ...
Страница 168: ...December 2018 DASCOM Europe GmbH v1 2 ...


