


3060386 | Geniox Air Handling Unit - User Manual
ERW maintenance | 4-4
3. Pull the belt tightly around the wheel and the gear reducer’s pulley. Connect both ends of the belt (see above image d. to a.).
4. Pass the belt over the tensioner idler sheave and place the motor to its initial position (a).
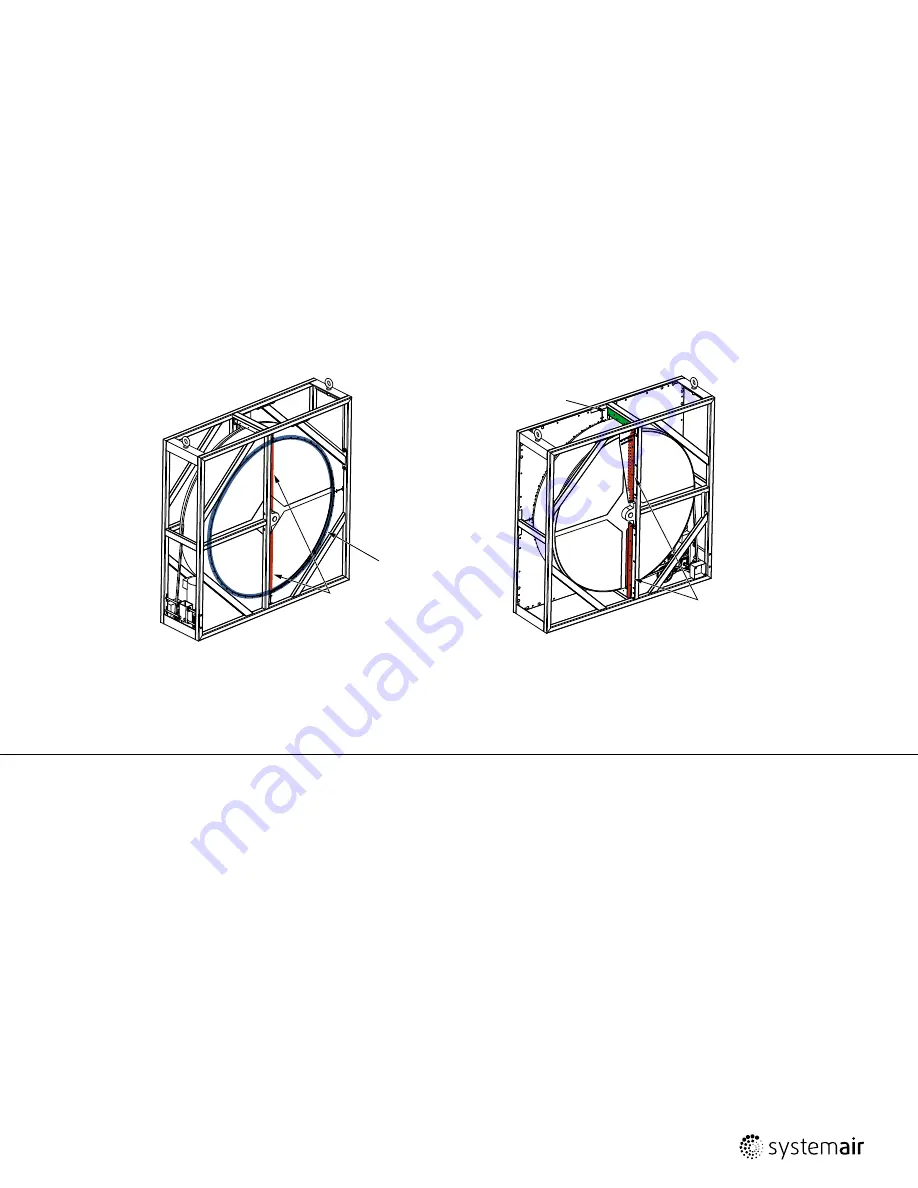
5. Visually inspect that the belt is not twisted around the rotors and is properly located through the side seals. If the belt tension is too
low (see figure), reduce the length of the belt.
4.4
ERW Seals
The patented AirLoopTM labyrinth seals face the media along the center line of the rotor. (Note that center-line for Geniox units is
horizontal as opposed to the vertical example shown) On the side of the wheel and under the middle pillow blocks, low friction seals
are factory install and adjusted. Lastly, the S-type labyrinth peripheral seals are located on the outer edge of rotor and fixed on the face
plate of the wheel. The overview drawing below shows the seal locations.
ID0002
AIRLOOP™
LABYRINTH SEAL
PERIPHERAL
SEAL
SIDE SEAL
AIRLOOP™
LABYRINTH SEAL
Seal Adjustment
The correct adjustment of the AirLoopTM labyrinth seal is obtained by allowing the seal to lightly touch the media before tightening the
screws.
If an initial gap can be seen between the seal and media, the seal is installed too far and should be moved closer until it touches the
media.
If deformation to the lips can be seen, the seal is installed too close and should be moved back until the lips are straight again.
The AirLoopTM labyrinth seal is made of a special material which was specifically chosen to ensure to never damage the media. While
the best seal is obtained when the above steps are followed, if installed too close, the media will simply wear down the seal a little
more. As the wheel turns, the seal will automatically adjust itself to the wheel’s tolerance (approximately 1/32”) for the smallest
possible air leakage and become a non-contact seal that will last throughout the wheel life.
The labyrinth seals must be checked and adjusted prior to start up. The seals should be checked for any loose parts or screws after one
month of operation. Further verifications should be done through a general overview every year.
Содержание Geniox 10
Страница 2: ...Geniox Air Handling Unit User Manual 3060386...
Страница 6: ...Geniox Air Handling Unit User Manual 3060386...
Страница 35: ...3060386 Geniox Air Handling Unit User Manual Star up adjustments use and commissioning 29...
Страница 51: ...Annex Geniox Air handling unit User Manual EN Document in original language Part number of this manual 3060386...
Страница 61: ...3060386 Geniox Air Handling Unit User Manual ERW maintenance 4 8...
Страница 62: ...Geniox Air Handling Unit User Manual 3060386 5 1 Roof curb master tables...
Страница 63: ...3060386 Geniox Air Handling Unit User Manual Roof curb master tables 5 2...
Страница 64: ...Geniox Air Handling Unit User Manual 3060386 5 3 Roof curb master tables...
Страница 65: ...3060386 Geniox Air Handling Unit User Manual Roof curb master tables 5 4...
Страница 66: ...Systemair NA 8 Rouse Street Tillsonburg ON N4G 5W8 Toll free 800 688 6363...