background image

Quick Installation Guide 

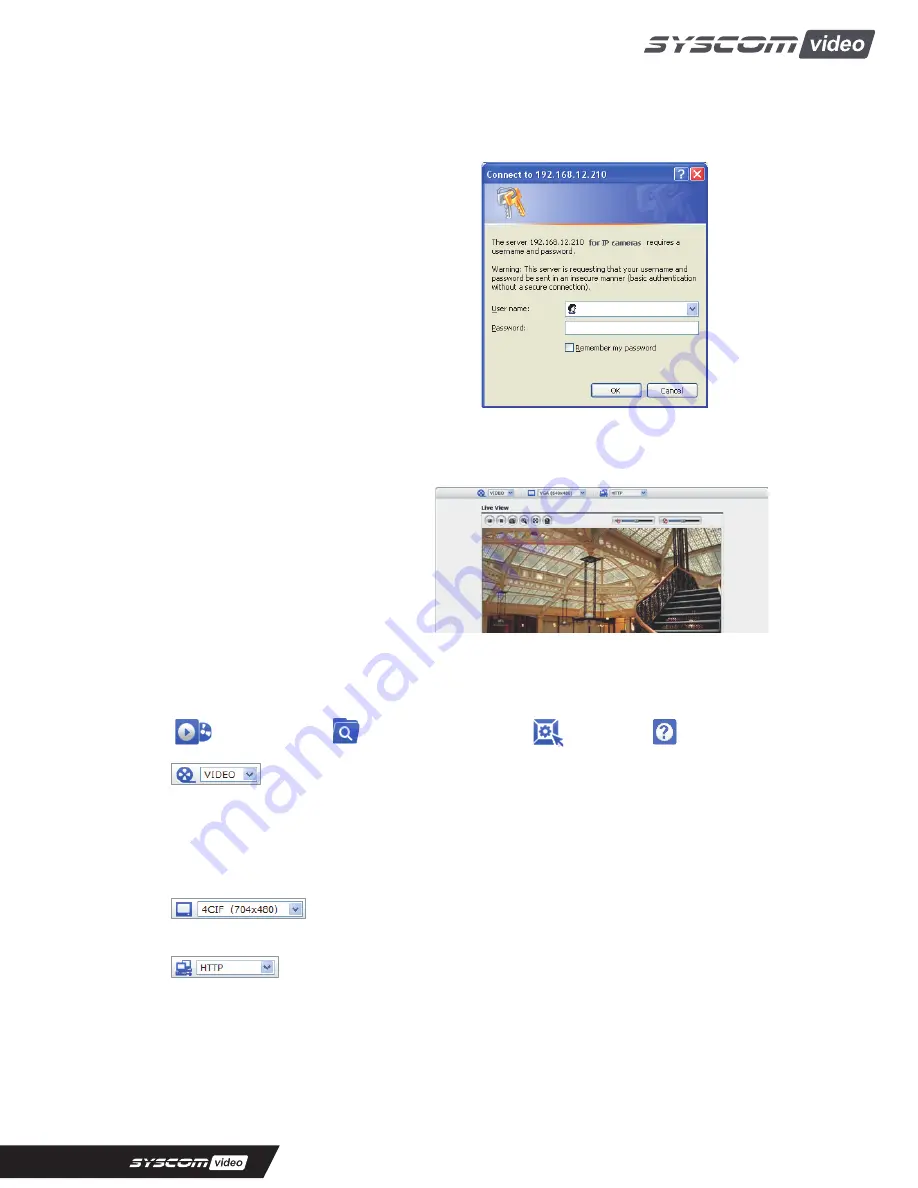
3.3 Setting the admin password over a secure connection 

To gain access to the product, the password for 

the default administrator user must be set. This 

is done in the “Admin Password” dialog, which is 

displayed when the network 

camera 

is accessed 

for the setup at the first time. Enter your admin 
name and password, set by the administrator. 

Note: The default administrator username and 

password is “admin”. If the password is lost, the 

Network Camera must be reset to the factory 
default settings. See “3.6 Resetting to the Factory 

Default Settings”.

3.4 Live View Page 

The live view page comes in eight screen 

modes: 1920x1080, 1280x1024, 1280x720, 

720x480(576), 640x480, 352x240(288) 

and 320x240. Users are allowed to select 
the most suitable one out of those modes. 

Please, adjust the mode in accordance with 

your PC specifications and monitoring

purposes.

1)  General controls 

           Live View Page       Search & Playback Page       Setup Page       Help Page 


    The video drop-down list allows you to select a customized or pre-programmed 

video stream on the live view page. Stream profiles are configured under Setup > Basic 
Configuration > Video & Image. For more information, please see “3.5.1 Basic Configuration > 
Video & Image” of User’s Manual. 

                    The resolution drop-down list allows you to select the most suitable one 
out of video resolutions to be displayed on live view page. 

                 The protocol drop-down list allows you to select which combination of 
protocols and methods to use depends on your viewing requirements, and on the properties of 
your network. 


10

Содержание Motorized Full-HD IR Bullet Network Camera

Страница 1: ...Quick Installation Guide Motorized Full HD IR Bullet Network Camera Please read this manual thoroughly before use and keep it handy for future reference ...

Страница 2: ... full frame rate Motion JPEG and H 264 or MPEG 4 video streams The alarm input and alarm output can be used to connect various third party devices such as door sensors and alarm bells Installation Steps Follow these steps to install the network camera on your local network LAN 1 Check the package contents against the list below 2 Connect the Network Camera See page 3 3 Set an IP address See page 8...

Страница 3: ...Main Power 2pin terminal DC12V 2A 24W with Heater or DV12V 320mA 3 8W without Heater 2 Black Ethernet RJ 45 port compatible with 10 100Mbps having PoE functionality Modular Jack Parts and Description Carefully remove the contents from the box and verity that nothing was damaged in shipment 3 ...

Страница 4: ...era Dimension See the diagrams below for the exact dimension of the NUT 4201D IR Bullet network cameras Dimensions Unit mm Base Installation Cable through the wall with the mount base There are two ways of installing the camera 4 ...

Страница 5: ...nnect connection cable and network lines D Fit the screw holes of the mount base into the plastic anchors E Screw up the mount screws M5x20 F Adjust the camera suitably and fasten the mount screws M6x16 to fix the camera 2 Installation 2 Using the conduit knockout punched with Mount Base A Drill the mounting location using the template sheet or the bottom of the mount base as a template B Insert t...

Страница 6: ...tly connection to PC while a direct cable is used for connection to a hub You can also use a router featuring PoE Power over Ethernet to supply power to the camera Micro SD memory slot on the Rear Board Remove the rear cap of the camera to insert the SD memory card Connecting the Power Connect the power of DC12V for the network camera Connect the positive pole to the position and the negative pole...

Страница 7: ...ge Camera ID and IP Address You can change the Name or Title and IP address of the camera Using the buttons on the controller you can change the parameters 5 Select SAVE or CANCEL to exit the Main Menu Video Output is also used for an easy zoom and focus control when installing lens Video Output is restricted to VGA 640x480 resolution Zoom Focus Control The camera enters Zoom and Focus control mod...

Страница 8: ... the Network Camera device to the network and power up 2 Start SmartManager utility Start All programs SmartManager SmartManager the main window will be displayed after a short while any network devices connected to the network will be displayed in the list 3 Select the camera on the list and click right button of the mouse You can see the pop up menu below 4 Select Assign IP You cam see a Assign ...

Страница 9: ...ew or Setup to enter web page 4 The network camera s Live View page appears in your browser 3 2 Access from the internet Access from the internet once connected the Network Camera is accessible on your local network LAN To access the network camera from the Internet you must configure your broadband router to allow incoming data traffic to the network camera To do this enable the NAT traversal fea...

Страница 10: ...20x480 576 640x480 352x240 288 and 320x240 Users are allowed to select the most suitable one out of those modes Please adjust the mode in accordance with your PC specifications and monitoring purposes 1 General controls Live View Page Search Playback Page Setup Page Help Page The video drop down list allows you to select a customized or pre programmed video stream on the live view page Stream prof...

Страница 11: ...Video Streams The network camera provides several images and video stream formats Your requirements and the properties of your network will determine the type you use The Live View page in the network camera provides access to H 264 MPEG 4 and Motion JPEG video streams and to the list of available video streams Other applications and clients can also access these video streams images directly with...

Страница 12: ... Adjusting Focus Click button for far focus and click button to near focus Note Click the button in the live screen to set the focus to the optimum position 3 6 Resetting to the factory default settings To reset the Network Camera to the original factory settings go to the Setup System Maintenance web page described in 3 5 6 System Maintenance of the User s Manual or use the Reset button on the ne...

Страница 13: ...ep the Reset button pressed during about 2 seconds 4 Release the Reset button 5 The network camera resets to factory defaults and restarts after completing the factory reset 6 Close the rear cap of the camera CAUTION When performing a Factory Reset you will lose any settings you have saved 3 7 More Information For more information please see the Network Camera User s Manual which is available on t...

Отзывы: