


TermiCom XPe
WWW.SYMCOD.COM
11
How to install your TermiCom XPE
The support provided with TermiCom XPE permit to install the unit on a wall or on a table. Once
fixed, the angle of TermiCom XPE can be easily adapted to the needs of each user, no need to do a new
adjustment of the screws (see
TermiCom fixation/handling)
IMPORTANT: The TermiCom should not be cover while ON. The back of the TermiCom should not
be placed flat on a table (or other surfaces), the back of the unit is acting as a heat dissipater.
Respect a
minimum of 2” between the bottom of TermiCom XPE and any surface.
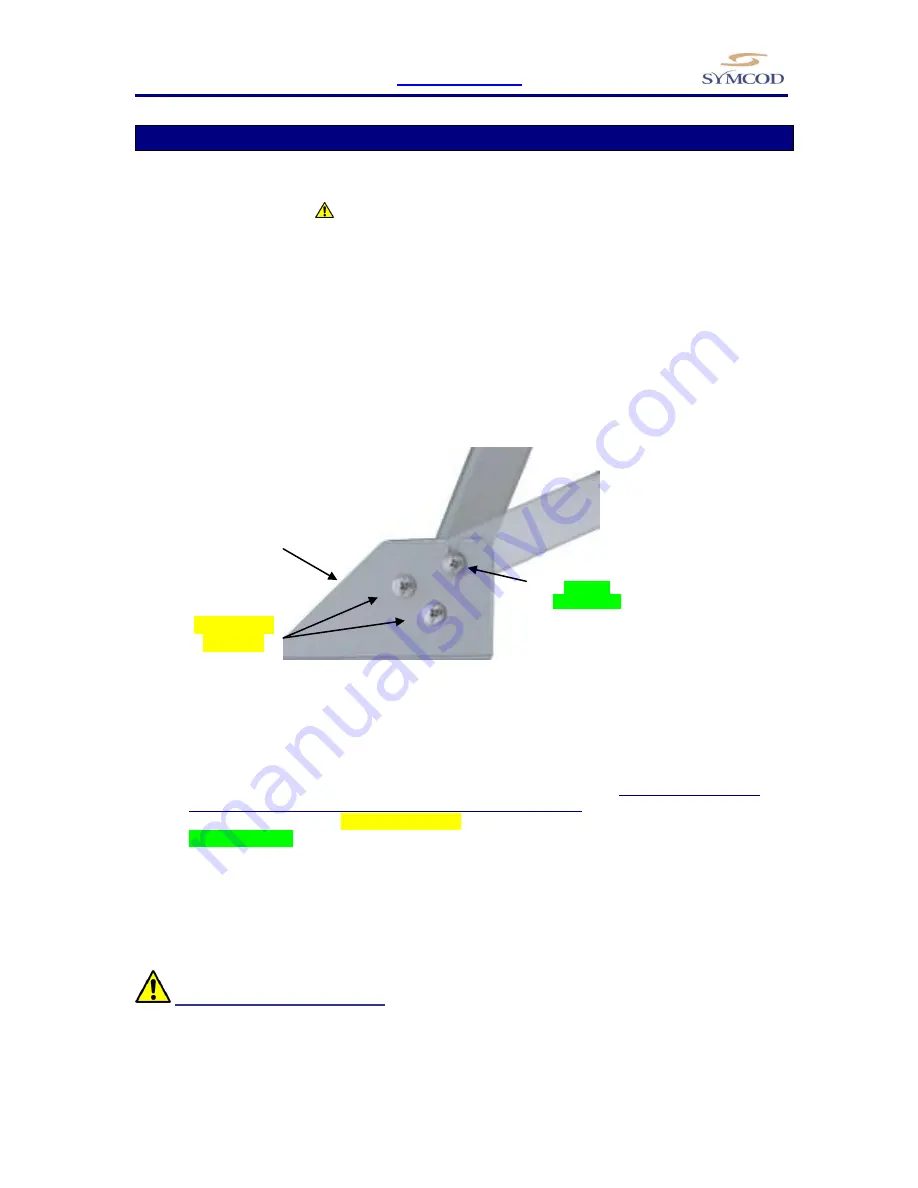
How to install TermiCom XPE
Figure 1
Base support TermiCom XPe
Side view
1.
Determine the appropriate emplacement (plane & motionless surface).
Be sure to choose a fixed
and solid plane surface able to support the weight of the TermiCom.
2.
On the base support (D), completely unscrew screw A (wall mount) or the screw B (desk top).
Partially unscrew the screw C (see figure 1).
3.
Separate the base support (D) from the TermiCom XPe.
Fix the base support (D) at the chosen emplacement.
Replace XPe TermiCom on its base support in the desired position (Wall mount or
desktop) and fixed the corresponding screw, A for wall mount, B for desktop.
Tighten the screws on each side of the base support.
WARNING: fixation & handling
Choose a fixed and solid plane surface able to support the weight of the TermiCom (approximately 10
Pounds/4.54Kg). Handle the TermiCom safely in order to avoid any back wound.
Wallmount
position
Desktop
position
Completely
unscrew
Partially
unscrew (C)
(A) Wallmount
screw
(B) Desktop screw
OR
(D) Base support


