background image

Keychain Barcode Scanner User Guide 


Page 11 

5.


If the scanner is connected, all the products stored are automatically transferred to 
your order. A “processing…please wait” message is displayed while the data is 

transferred to your order. Once the transfer is completed, your order page is 
refreshed and displays the newly added items from the scanner. The last item 

scanned is displayed at the top of your order page. If the scanner is not connected, a 
message “Device is not detected. Please connect the scanner to the computer” is 

displayed. Once the scanner is connected, the items stored in the scanner are 
automatically transferred to your order. However, if there are no products stored in 

the scanner, a message “No items are present on scanner. Please scan your items 
and re-upload” is displayed. 

N

OTE

:

 All items are automatically removed from the scanner device once they have 

successfully been transferred to your order, and are displayed at the top. Items scanned 
that are not recognized in the Web Site Catalog are displayed in red. 

6.


Review the order and click 

check out

 to submit the order. 

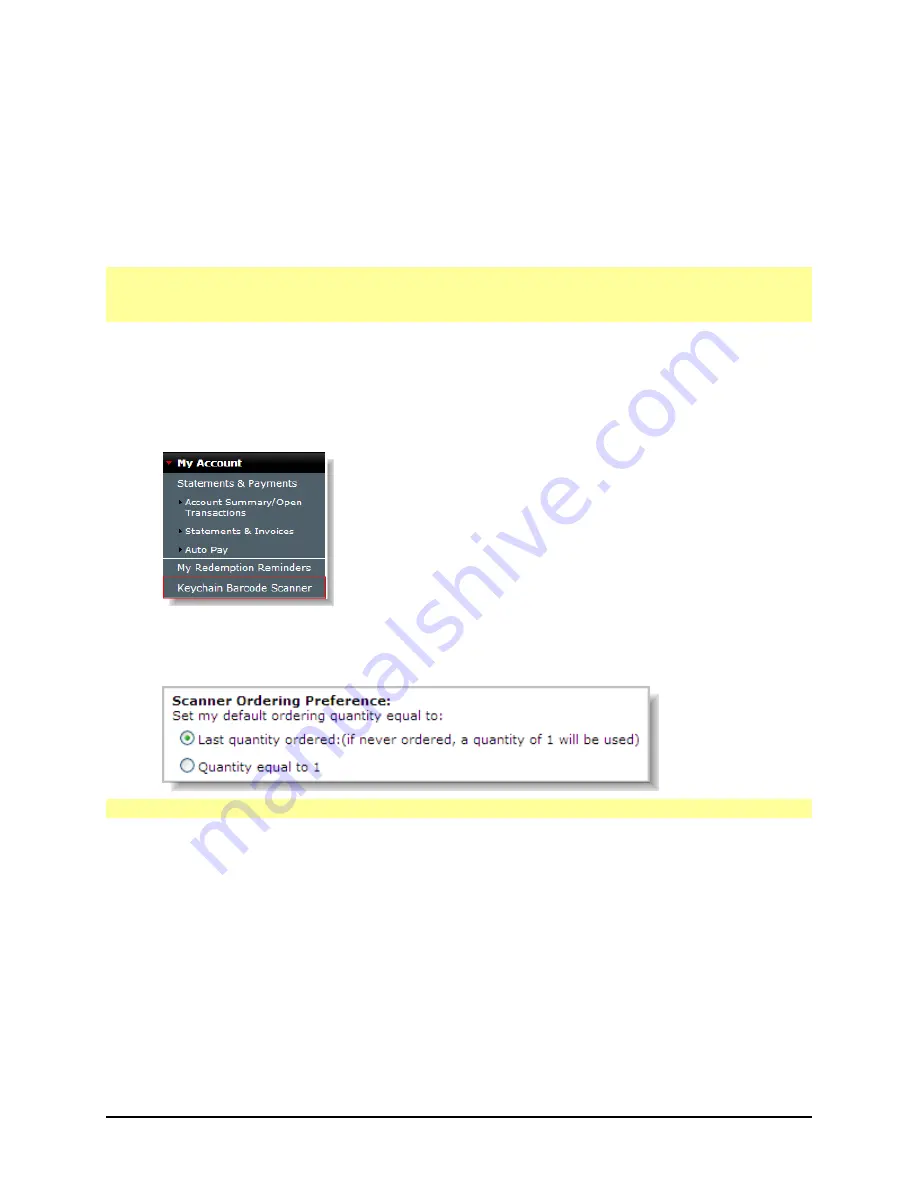
Setting Keychain Barcode Scanner Ordering Preferences 

To set the scanner default ordering quantity: 

1.


Click 

Keychain Barcode Scanner

 on the left of the My Account Page. 


2.


Select the default ordering preference: 

ƒ


Last quantity ordered (a value of 1 if the item has never been ordered) 

ƒ


Set Quantity to 1. 


N

OTE

:

 All quantity values scanned will override the default settings in the this page. 

Содержание Keychain Barcode Scanner

Страница 1: ...Keychain Barcode Scanner User Guide June 2010...

Страница 2: ...2010...

Страница 3: ...ing Item Barcodes 10 Scanning Item Codes and Ordering Products 10 Setting Keychain Barcode Scanner Ordering Preferences 11 Using the Scanner with ArubA eZ 12 Setting up the Scanner 12 Enabling Your Sc...

Страница 4: ...iew the Setup Instructions enclosed with your scanner before using it on the Web Site or ARUBA eZ Scanner Features Small and lightweight Fits onto a keychain and easily carried in pocket or purse Allo...

Страница 5: ...rchased the Barcode Keychain Scanner is packaged with a serial communication cable or a USB communication cable set the USB Driver Installation CD a Read Me First an Owner s Guide and Setup Instructio...

Страница 6: ...B CD ROM to install the Scanner USB Driver Windows 98 or Me Serial Connection only Windows 2000 Windows XP or newer Serial and USB Connection Hard Disk with at least 75MB of free space Internet Connec...

Страница 7: ...arcode and at a slight angle 3 Connect the scanner to the computer using a USB or Serial cable If using the USB Connector you must install the USB driver from the enclosed CD See the Setup Instruction...

Страница 8: ...nnection used To setup your scanner see the Setup Instructions enclosed with the scanner or see the Online Help Enabling the Scanner Before using the Keychain Barcode Scanner to add products to your o...

Страница 9: ...ctiveX Controls must be enabled to download Scanner Software 5 Click Yes and continue with the installation NOTE This installation may take a few seconds and is required in order for your scanner to b...

Страница 10: ...using the USB Connector you must install the USB driver from the enclosed CD See the Setup Instructions enclosed with your scanner 2 Go to the My Order Page 3 Click Upload Scanned Items 4 The scanned...

Страница 11: ...order However if there are no products stored in the scanner a message No items are present on scanner Please scan your items and re upload is displayed NOTE All items are automatically removed from...

Страница 12: ...nner to add products to your Order Form you must enable the scanner To enable your scanner 1 Open ARUBA EZ by double clicking the ARUBA EZ Shortcut Icon on your PC Desktop NOTE If you do not see the A...

Страница 13: ...y To print a list of barcode labels 1 Select Print Barcodes from the File Menu and then select Labels or Tags 2 Click the Print button on the pop up window 3 Close the pop up window 4 Click the Close...

Страница 14: ...Commerce Support at 1 800 711 6032 4 Click the Upload Scanned Products Button on the Order Form 5 If the scanner is connected all the products stored are automatically transferred to the Order Form An...

Страница 15: ...ting Barcodes with ARUBA EZ To delete previously scanned products 1 Print Quantities by selecting Print Barcodes from the File Menu then select Quantities 2 Click the Print button from the pop up wind...

Страница 16: ......

Отзывы: