

- 30 -
EN
9J27
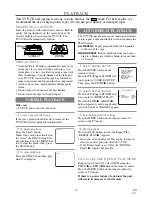
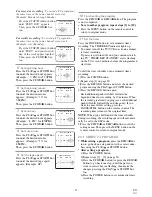
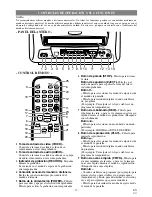
1)Abra la tapa del compartimiento de las pilas del
mando a distancia presionándola en el sentido de
la flecha.
2)Inserte 2 pilas tamaño “AA” en el compartimiento
de las pilas, en el sentido indicado por las marcas
de polaridad (+/-).
3)Vuelva a poner la tapa.
INSTALACIÓN DE LAS PILAS
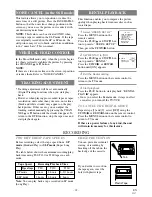
MODO DE ENTRADA EXTERNA
Cuando utilice una señal de entrada externa (otra
videograbadora o una videocámara), conecte los
cables de salida de audio/vídeo del equipo de repro-
ducción a las tomas AUDIO IN/VIDEO IN de su
televisor/videograbadora. Y luego pulse el botón
CHANNEL
K
o
L
hasta que “AUX” aparezca en la
pantalla.
Usted puede programar el temporizador para que
explore todos los canales que puedan recibirse en su
zona.
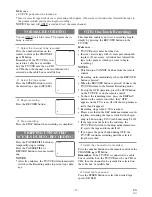
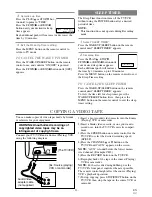
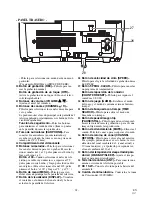
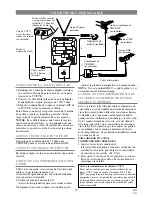
CONEXION MOVIL
1)La antena de interiores incluída es adecuada para
usar cuando el vehículo está inmóvil. Para obtener
una mejor recepción en ruta, utilice una antena de
VHF/UHF para TV móvil de alta calidad.
2)Enchufe el cordón para batería de automóvil al conec-
tor DC13.2V (12V) en la parte posterior de la
TV/VCR. Luego conecte el otro extremo en el zócalo
para el encendedor de cigarrillos del automóvil.
ADVERTENCIA: El conductor nunca debe ver
programas del televisor o del videobgrabadora
mientras está conduciendo un vehículo.
PRECAUCIÓN: Si usted usa la TV/VCR con el
motor del vehículo apagado, recargue la batería
del vehículo aprox. cada 4 horas de uso, para
evitar que ésta se agote. Cuando termine de usar
la TV/VCR, siempre desenchufe el cordón para
la batería del automóvil del zócalo del encende-
dor de cigarrillos.
DC13.2V
ANT.
Antena de VHF/UHF
para TV móvil
(no incluído)
Cordón para la batería
del automóvil
Al zócalo del encendedor
de cigarrillos el cordón
para la batería del coche
NOTAS:
• Confirme que su vehículo tiene un sistema eléctrico
a tierra negativo de 13.2 (12) voltios.
• Confirme que está usando sólo el cordón provisto
para la batería del automóvil. El uso de otro cordón
puede dañar su TV/VCR.
• Asegúrese que no haya cenizas ni otro restos en el
zócalo del encendedor.
• Asegúrese de introducir completamente el enchufe
del cordón de la batería del automóvil en el zócalo
del encendedor de cigarrillos.
• Siempre desenchufe primero del zócalo del
encendedor de cigarrillos el cordón para la batería
del coche, antes de desconectarlo de la TV/VCR.
• Antes de usar la alimentación de CA, usted debe
desconectar de la TV/VCR el cordón para la batería
del automóvil.
• Solamente reemplace un fusible por otro del mismo
tipo
5A, 250V.
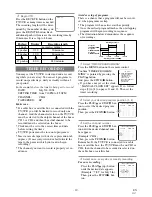
• Asegúrese de que el cable de CA esté bobinado
como se muestra más abajo.
1
Enchufe el cordón de alimentación
del televisor/videograbadora
Enchufe el cordón de alimentación del
televisor/videograbadora en una toma de
CA estándar.
NOTA:
•
Si aparecen algunas cifras en la esquina
de la pantalla, pulse el botón POWER sin desench-
ufar el cordón de alimentación.
SELECCION DE IDIOMA


