SWEEX RO003 - QUICK_START_GUIDE Скачать руководство пользователя страница 17

English version

18

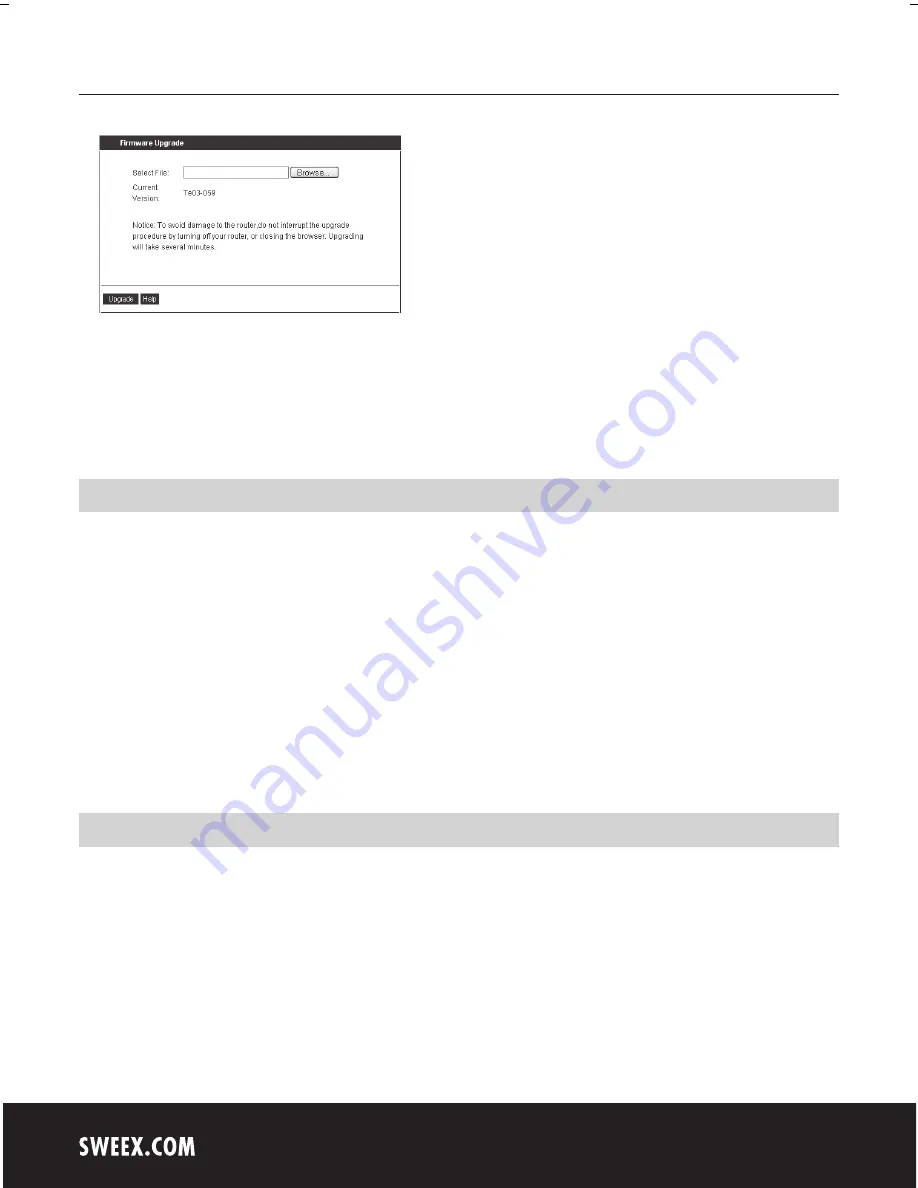
Here the firmware of the router can be upgraded. New firmware can be downloaded from the Sweex website under ”Service and support”. If the firmware file is 
zipped, make sure you select and extract the file first on a location on your computer where you can retrieve it easily. 

Now click “Browse” (Browse) and select the extracted firmware file. In most cases the name of this file will start with “Sweex_Firmware_RO003…”.
In order to start the firmware upgrade, click “Upgrade”. Do not interrupt this procedure. This may harm the router. Wait for the upgrade to be completed 
confirmed by a message. The connection between the computer and the router will be briefly interrupted.

Resetting the router to its factory settings

The Sweex Broadband Router can be reset to its factory settings in two different ways.

Note! After the reset, all settings which apply to your connection and network need to be reconfigured. After the reset, the router will restart. During start-up, 
the factory settings are reloaded and the computer will lose connection with the router for around 30 seconds. After this, the router can be accessed via the 
default IP address (192.168.23.1).
 
Method 1: The reset button is located at the rear of the router. Use a pointy device to press the button. Press and hold the button for 10 seconds. The router 
will restart. 

Method 2: Left in the column, click “System Tools” and then “Restore Factory Setting”. Click “Restore” to start the reset. 

Additional tips and further explanation to the remaining functions of the router can be found in the English manual on the CD-ROM.

Warranty

For most Sweex products a warranty period of 3 years applies. On Graphics Cards and Consumer Electronics Sweex offers 2 years of warranty. We do not give 
support or warranty on supplied software, rechargeable batteries and batteries. Transaction of warranty only takes place at the sales point where the product 
is bought.

All brand names and associated rights mentioned in this manual are and stay property of the rightful owner.

Содержание RO003 - QUICK_START_GUIDE

Страница 1: ...or in the direct vicinity of heating elements Do not use the Sweex Broadband Router in extremely dusty or moist surroundings Protect the product against powerful shocks or jolts they may damage the i...

Страница 2: ...ter and connect it to the rear of the modem using a network cable RJ 45 UTP You can select any of the ports 1 2 3 and 4 The corresponding light at the front will be lit In the event the light fails to...

Страница 3: ...the router Windows Vista In the bottom left of your screen go to Start Start Control Panel Control Panel Click on View network status and tasks View network status and tasks Left in the column click...

Страница 4: ...LAN Connection LAN Connection or Wireless Network connection Wireless Network connection and select Properties Properties The following screen appears Now select Internet Protocol Version 4 TCP IPv4 a...

Страница 5: ...o to Start Control Panel Then go to Network and Internet Connections Open Network Connections Or if the Windows classic style is used Start Settings Network Connections Right click LAN Connection or W...

Страница 6: ...automatically Click OK twice The network settings for Windows 2000 have now been configured correctly The correct settings for the Internet browser will be discussed later in this manual Internet brow...

Страница 7: ...If this login screen fails to appear recheck the settings of your Internet browser as described above Also check the IP address of your computer In this IP address only the digits after the last dot...

Страница 8: ...riptions The applicable settings are listed for each subscription form In the event that your subscription is not listed consult your Internet provider for the router settings which correspond to your...

Страница 9: ...ch on the modem and wait until it is fully started up and all the correct lights are lit 5 Reconnect the network cable between the modem and the router via the WAN port of the router The WAN light sho...

Страница 10: ...s to appear You have now completed the configuration and are ready to surf the Internet i If your IP address continues to be displayed as 0 0 0 0 click on Renew If after 1 minute your IP address still...

Страница 11: ...password 6 Click on Next Click Save to save the settings 7 In order to check whether the Internet connection has been set up successfully go to the status screen by clicking Status left in the column...

Страница 12: ...use a PPTP connection 4 Under PPTP Account enter the user name you received from your provider 5 Under PPTP Password enter the corresponding password and click on Next 6 In the next window click Next...

Страница 13: ...e Internet connection has been set up successfully go to the status screen by clicking Status left in the column The WAN IP section will display your Internet IP address It can sometimes take up to 1...

Страница 14: ...me IP address as registered in the router The router may assign a different IP address to the computer so that the forwarding or DMZ command no longer applies to that computer 1 The port settings can...

Страница 15: ...computers for which you want to open ports by means of the Forwarding or DMZ feature Complete the steps in chapter Configuring the computer to connect to the router Instead of selecting Obtain an IP...

Страница 16: ...can be changed by clicking System Tools and then Change Password left in the column In order to change the user name and password settings enter your new user name under Username and your current pas...

Страница 17: ...nfigured After the reset the router will restart During start up the factory settings are reloaded and the computer will lose connection with the router for around 30 seconds After this the router can...

Отзывы: