


Design and specifications are subject to change without notice.
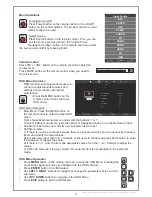
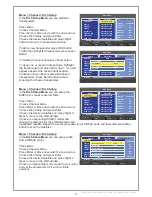
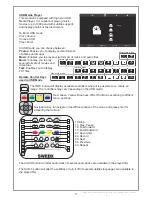
USB Media Player
This product is equipped with high end USB
Media Player. It is capable of playing music,
movies (up to 1080p and with subtitle support),
and display photos or text documents.
To Enter USB mode
Press Source
Choose USB
Press Enter
In USB mode you can choose between:
Photos:
Enables you to display several formats
of photos and images
Music:
Enables you to play several formats of music and audio files
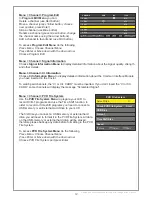
Movie:
Enables you to play
several formats of movies and
video files
Text:
Enables you to display
TXT files
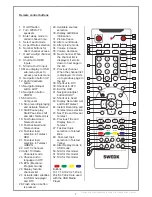
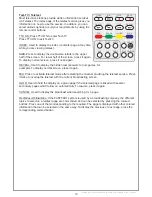
Remote Control Keys
used in USB Mode
The INFO button will display available controllers where it is possible to i.e. rotate an
image. The controllers may vary depending on the USB mode.
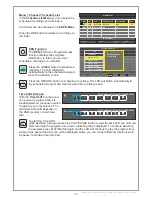
Red, Green, Yellow, Blue have diffrent functions acoording to diffrent
menu postions.
Navigation Key to navigate in the diffrent postion of the menu and press enter for
activating the function.
16.Stop
17. Play, Pause
18. Fast forward
19. Fast Backward
43. Record list
44. Record
45. Next
46. Previous
49. Repeat
The AUDIO button will alter audio track (if several audio tracks are available in the played file).
The SUB-T button will alter the subtitles or turn it off (if several subtitles languages are available in
the played file).
BLUE
YELLOW
GREEN
RED
13
Disk C:
Move
Menu
MENU
Play
OK
Exit
EXIT
MOVIE
INFO.
Repeat A..
Goto TL.
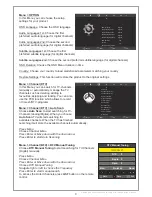
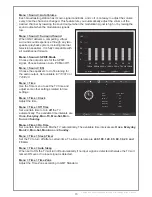
Music info menu
Repeat A..
Music
Playlist
Info.
Rotate
Rotate
Goto TL.
A
Move view
Zoom in
Zoom out
Picture info menu
Slow Fo..
Prev Page
Prev.
Next
Stop
Playlist
Music
Info.
Prev Page
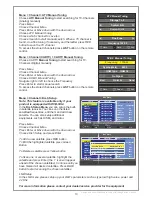
Text info menu
Repeat A..
Set A
Playlist
Info.
Slow Fo..
Step Fo..
Goto TL.
AB
Move view
Zoom in
Zoom out Aspect Re..
Video info menu
ENTER
TTX ON
MIX
SIZE
HOLD
CANCEL
INDEX
TIME
REVEAL
RED
GREEN
YELLOW
BLUE
S.SELECT
PIP
POSITION
SIZE
AUDIO
SUB-T
TV/RD
FAV
LIST
EPG
16
18
19
17
43
45
46
44
20
21
47
48
22
23
24
25
26
27
49
50
51
52
17


