background image

ASSEMBLY INSTRUCTIONS:


1:  Rear Tire Assembly: 

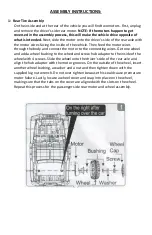
On the inside and at the rear of the vehicle you will find two motors. First, unplug 

and remove the driver’s side rear motor. 

NOTE: If the motors happen to get 

reversed in the assembly process, this will make the vehicle drive opposite of 

what is intended.

 Next, slide the motor onto the driver’s side of the rear axle with 

the motor wires facing the inside of the vehicle. Then feed the motor wires 

through the body and connect the motor to the connecting wires. Get one wheel 

and add a wheel bushing to the wheel and screw hub adaptor to the inside of the 

wheel with 4 screws. Slide the wheel onto the driver’s side of the rear axle and 

align the hub adaptor with the motor grooves. On the outside of the wheel, insert 

another wheel bushing, a washer and a nut and then tighten down with the 

supplied lug nut wrench. Do not over tighten because this could cause premature 

motor failure. Lastly, locate a wheel cover and snap into place on the wheel, 

making sure that the tabs on the cover are aligned with the slots on the wheel. 

Repeat this process for the passenger side rear motor and wheel assembly. 


Содержание Thar XL

Страница 1: ...ions Please read this instruction manual carefully It is important to read and follow all the steps during assembly to ensure proper operation and safety of the child Please keep this manual for futur...

Страница 2: ...se make sure that the child uses caution to avoid falls and collisions which could cause injury to the child or third party Do not pick up vehicle by steering wheel Do not pick up battery by wires or...

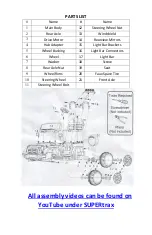
Страница 3: ...arview Mirrors 4 Hub Adapter 15 Light Bar Brackets 5 Wheel Bushing 16 Light Bar Connectors 6 Wheel 17 Light Bar 7 Washer 18 Screw 8 Rear Axle Nut 19 Seat 9 Wheel Rims 20 Faux Spare Tire 10 Steering Wh...

Страница 4: ...he motor to the connecting wires Get one wheel and add a wheel bushing to the wheel and screw hub adaptor to the inside of the wheel with 4 screws Slide the wheel onto the driver s side of the rear ax...

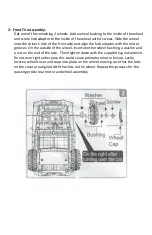
Страница 5: ...h the motor grooves On the outside of the wheel insert another wheel bushing a washer and a nut on the end of the axle Then tighten down with the supplied lug nut wrench Do not over tighten because th...

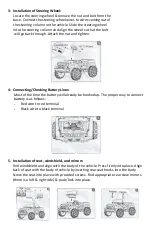
Страница 6: ...ecting Checking Battery Lines Most of the time the battery will already be hooked up The proper way to connect battery is as follows Red wire to red terminal Black wire to black terminal 5 Installatio...

Страница 7: ...re cover to the body of vehicle Press down until you hear a click Note This cover does not actually open or contain a spare tire SYNCING THE REMOTE CONTROL 1 Install batteries into the remote 2 Remote...

Страница 8: ...ND DISPOSAL Over time all batteries naturally lose their ability to hold a charge Depending on the amount of use and driving conditions the battery should function for one to three years To replace an...

Страница 9: ...to go to next song hold button to decrease volume Pause Button Press button to pause music press button again to restart music Power Display Displays the battery power level Music Button Press button...

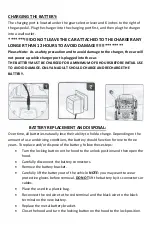
Страница 10: ...pen the battery Battery contains lead acid and other materials that are toxic and corrosive Do not open the charger Exposed wiring and circuitry inside case could cause electric shock NEVER allow a ch...

Страница 11: ...eat such as stoves and heaters Plastic parts may melt Recharge the battery after each use Only an adult should handle the battery Recharge the battery at least once a month when not being used Do not...

Страница 12: ...the battery Charge the battery Do not exceed max weight limit Use on flat surfaces Avoid using car in harsh conditions Noise coming from motor gearbox area Gear in motor gearbox broken Hub adapters s...

Отзывы: