4-5
Chapter 4: Chassis Setup and Maintenance
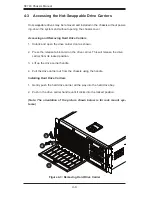
Removing the Dummy Drive
Installing the Hard Drive
1
2
1
3
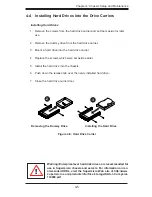
4-4 Installing Hard Drives into the Drive Carriers
Installing Hard Drives
Remove the screws from the hard drive carrier and set them aside for later
1.
use.
Remove the dummy drive from the hard drive carrier.
2.
Mount a hard drive into the hard drive carrier
3.
Replace the screws which were set aside earlier.
4.
Install the hard drive into the chassis.
5.
Push down the release tab over the newly installed hard drive.
6.
Close the hard drive carrier door.
7.
Figure 4-5: Hard Drive Carrier
Warning! Enterprise level hard disk drives are recommended for
use in Supermicro chassis and servers. For information on rec-
ommended HDDs, visit the Supermicro Web site at http://www.
supermicro.com/products/nfo/files/storage/SAS-1-CompList-
110909.pdf
!
Содержание SC743i-465B
Страница 19: ...3 5 Chapter 3 Chassis Components Power Fail Indicates a power failure to the system s power supply units...
Страница 20: ...SC743 Chassis Manual 3 6 Notes...
Страница 42: ...SC743 Chassis Manual 4 22 Notes...
Страница 48: ...SC743 Chassis Manual 5 6 Figure 5 3 Mounting the Chassis into a Rack Inner Rails Outer Rail Assemblies...
Страница 64: ...SC743 Chassis Manual C 10 Notes...
Страница 103: ...F 9 Appendix F SATA 743 Backplane Specifications Notes...

