Chapter 6: Advanced Chassis Setup
6-11
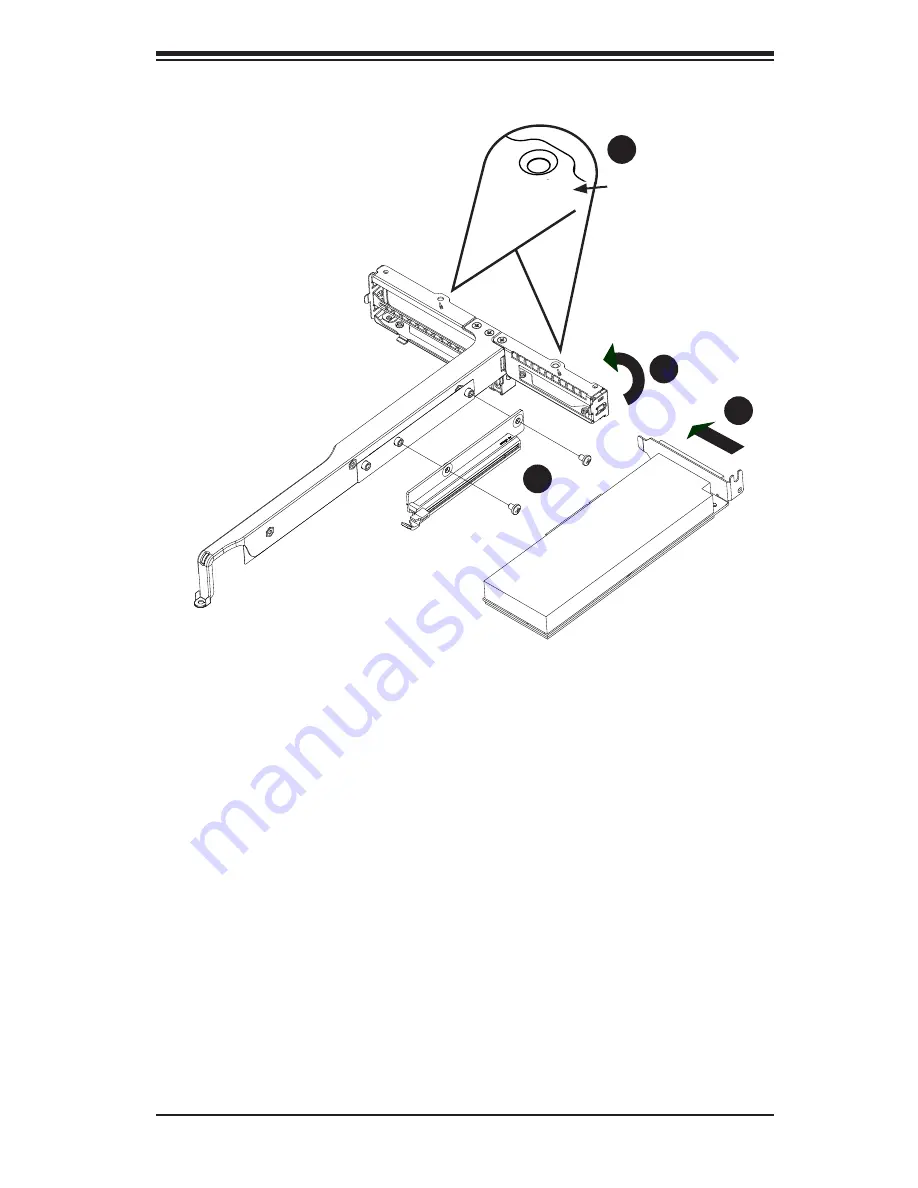
Figure 6-9. Left Riser Card Bracket and Installing a Low-Profile Card
Screwdriver
Icon
1
5
4
3
Installing a Low Profile Expansion Card
1. Power down the system and remove the chassis cover.
2. Remove the left riser card bracket from the chassis by unscrewing only those
screws indicated by the screwdriver icon. Lift the bracket from the chassis.
3. Install the riser card on the bracket using the two screws provided.
4. Open the latch on the end of the bracket.
5. Install the expansion card by sliding the card into the slot in the riser card and
close the bracket latch over the end of it.
6. Reseat the riser card bracket assembly while placing the riser card into the
expansion slot on the motherboard.
7. Secure the bracket to the chassis with the screws.
8. Replace the chassis cover and power up.
Содержание 1022GG-TF
Страница 1: ...SUPER A Server 1022GG TF USER S MANUAL Revision 1 0b ...
Страница 30: ...3 4 A Server 1022GG TF User s Manual Notes ...
Страница 50: ...4 20 A Server 1022GG TF User s Manual Notes ...
Страница 59: ...Chapter 5 Advanced Serverboard Setup 5 9 5 5 Adding Extension Cards See Chapter 6 Advanced Chassis Setup ...
Страница 83: ...Chapter 6 Advanced Chassis Setup 6 5 Figure 6 3 Removing a Hard Drive Tray 1 1 1 2 ...
Страница 114: ...7 22 A Server 1022GG TF User s Manual Notes ...
Страница 116: ...A 2 A Server 1022GG TF User s Manual Notes ...
Страница 121: ...C 3 Appendix C System Specifications Notes ...


