50
Chapter 3: Maintenance and Component Installation
3.7 System Cooling
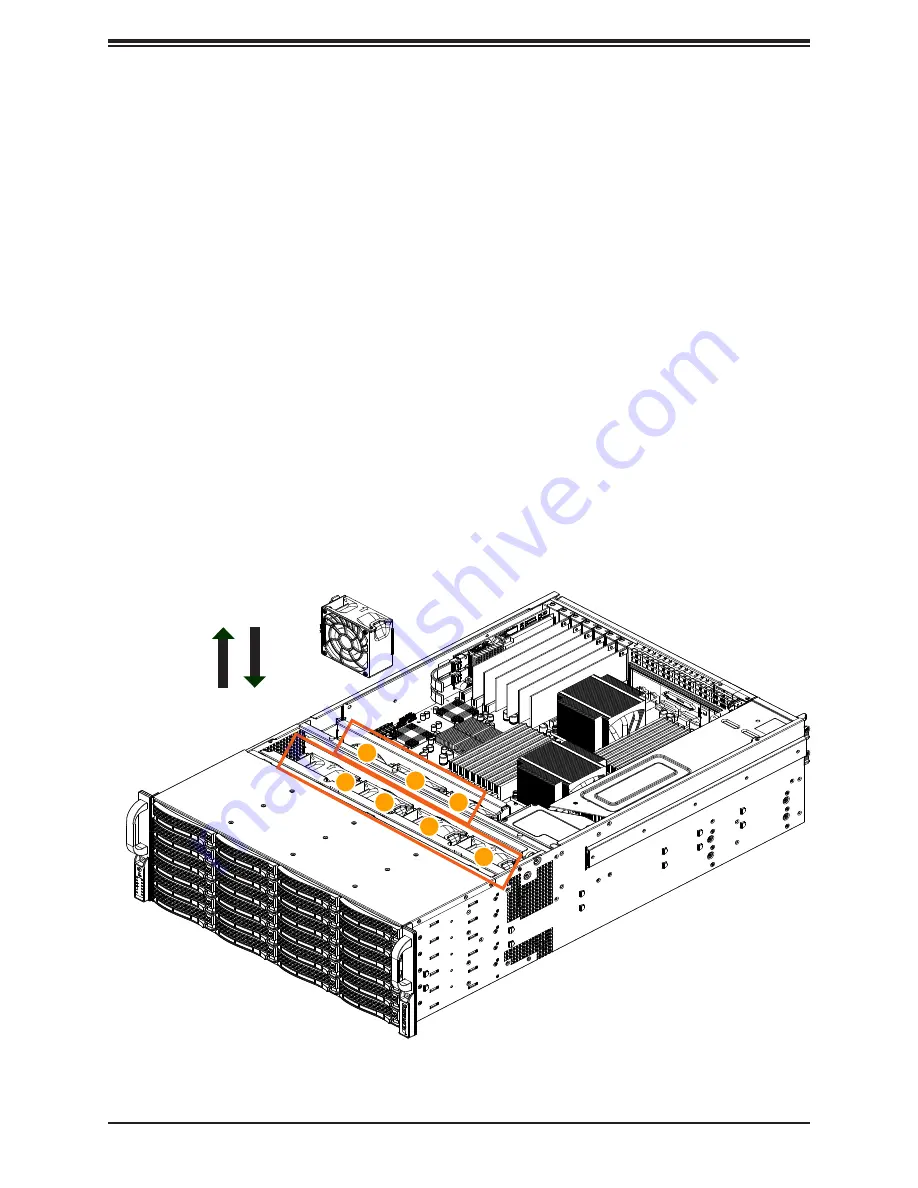
Seven 8-cm heavy duty fans provide the cooling for the system. Fan speed is controlled by
system temperature using the BMC. If a fan fails, the remaining fans will ramp up to full speed
and the system will continue to operate. Replace any failed fan at your earliest convenience
with the same type and model.
Make sure the chassis top cover makes a good seal for proper air circulation.
Figure 3-7. Fan Positions
1
3
2
4
6
5
7
2. Insert a drive into the carrier with the connector end toward the rear of the carrier. Align
the drive in the carrier so that the screw holes line up. Note that there are holes in the
carrier marked “SATA” to aid in correct installation.
3. Secure the drive to the carrier with four M3 screws as illustrated below. These screws
are included in the chassis accessory box.
4. Insert the drive carrier with the disk drive into its bay, keeping the carrier oriented so
that the hard drive is on the top of the carrier and the release button is on the right side.
When the carrier reaches the rear of the bay, the release handle will retract.
5. Push the handle in until it clicks into its locked position


