


7
Connect Tahoma® to Active Internet Connection Via Ethernet
(Adapter Sold Separately)
NOTE
: An internet connection is required. TaHoma® does not support local control to operate any RTS products
without an internet connection.
Follow the steps below to connect TaHoma® using the TaHoma® Ethernet Adaptor:
An Ethernet connection method provides more reliability and stability when compared to a Wi-Fi connection.
All Wi-Fi connections are prone to radio interference from other radio frequencies in the air or items with metallic
properties.
The Ethernet connection is now complete.
To change to Wi-Fi connection, refer to the Connect via Wi-Fi section of this Guide. To add a motor, refer to the
COMMISSIONING section of this Guide.
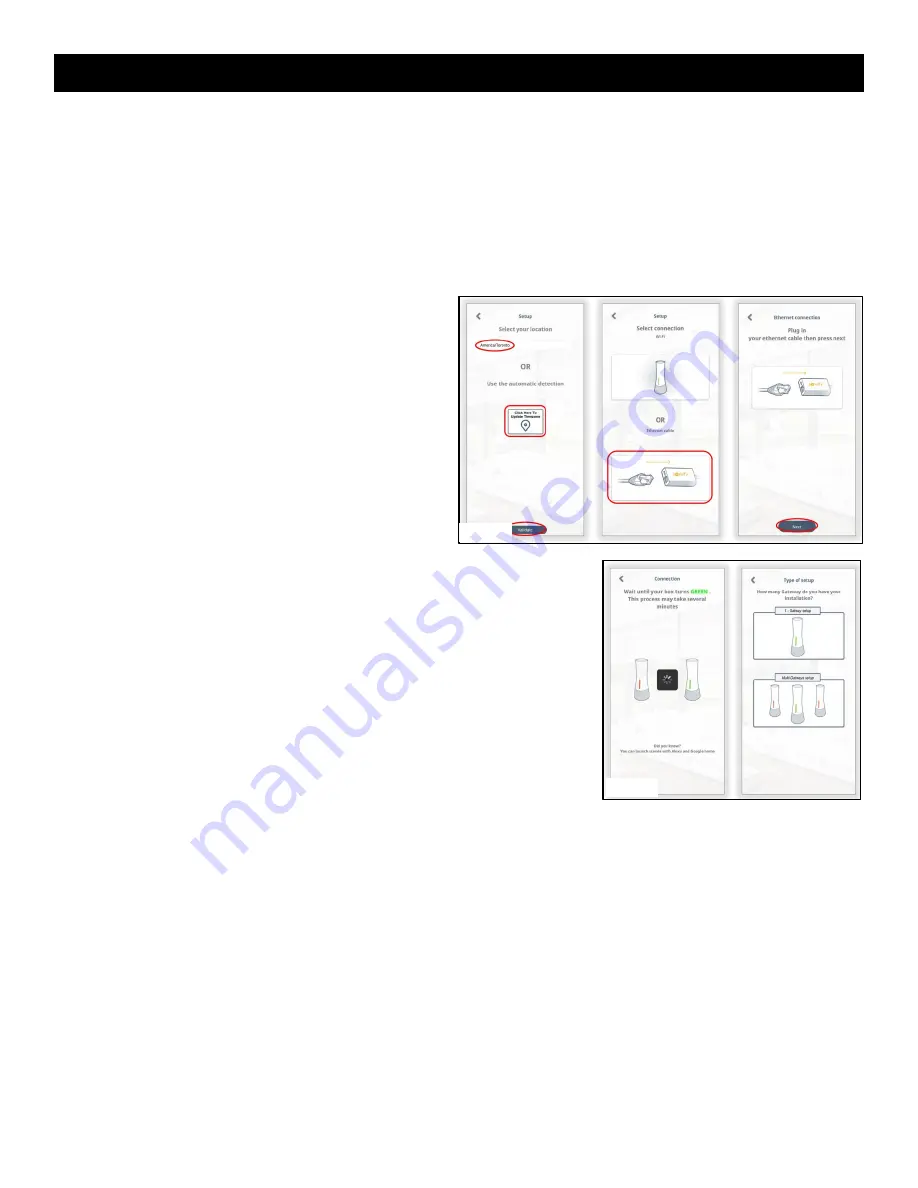
24. Login to the Somfy® TaHoma® North America App.
25. Select location.
OR
Select "Click Here to Update Timezone".
Select "Validate".
26. Select “Ethernet Cable”.
27. Plug in the network cable to the TaHoma® Ethernet
Adaptor (#1870470 sold separately), select "Next".
LED indicator will change from RED to GREEN
stating that it is now connected.
LED will then change to RED followed by ORANGE
during the update process. Once complete, LED will
change to GREEN.
This may take several minutes.
28. Select “Type of setup”:
One TaHoma® setup (single room control).
OR
Multi-TaHoma® setup (whole house control).
Figure 16
Figure 17


