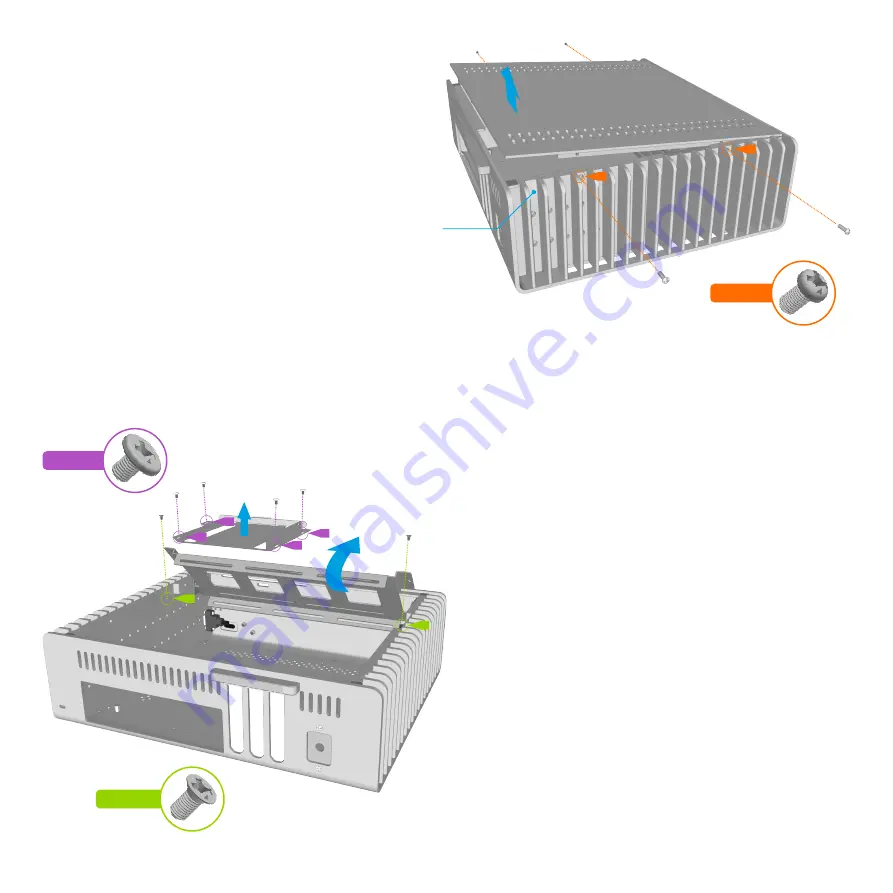
Removing the Top Panel
The top panel is held in place by a total of 4 screws, 2 from each side of the
case which are accessible between the fins of the heatsink.
Remove all 4 screws and lift the top panel away from the case. There is a
cutout either side of the case to assist with lifting the top panel.
Open the Drive Tray
The drive tray has a swivel design that rotates upwards and towards the
front of the case. It is locked in place by 2 screws, I either side of the tray.
Remove these 2 screws and rotate the tray until it makes contact with the
front of the case. This will allow you full clearance inside the case so that
you can easily install the components.
If you have the Optical version of the FC9, you should also remove the
optical drive mounting bracket by removing the additional 4 screws as
shown.
4
Cutout
CS-M3 x 6
PH-M3x8
TC-M3x3
CS-M3x5
Содержание FC9A
Страница 1: ......
Страница 16: ...Designed in Europe Made in China Copyright 2014 Streacom All Rights Reserved ...


