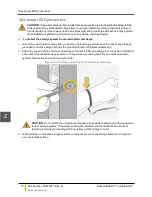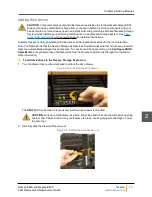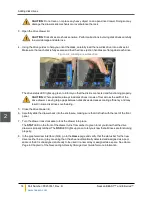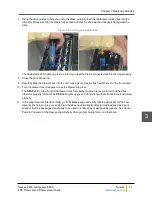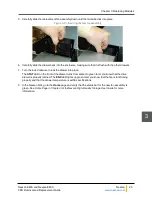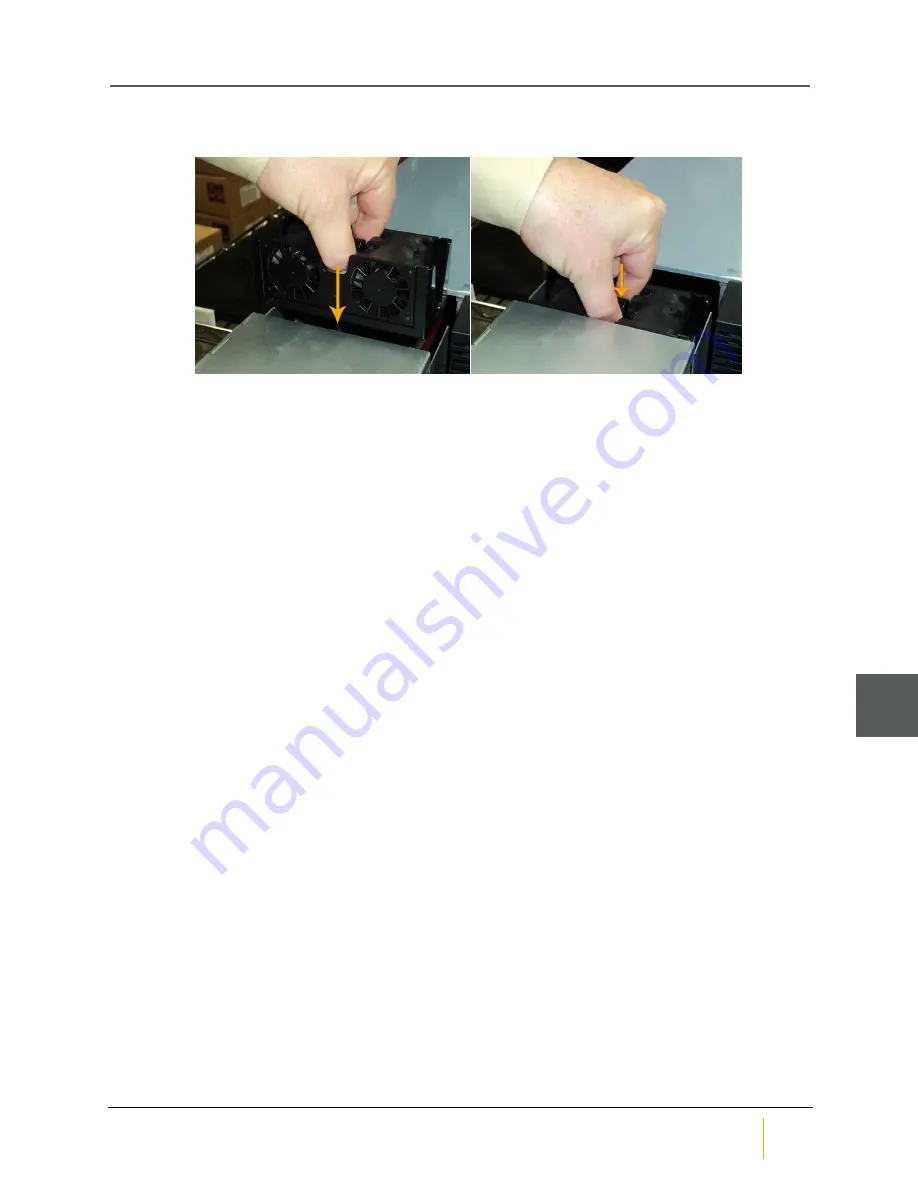
5. Carefully slide the replacement fan assembly down until the two tabs click into place.
Figure 3-13: Inserting the rear fan assembly
6. Carefully slide the drawer back into the enclosure, making sure that it is flush with the other drawers.
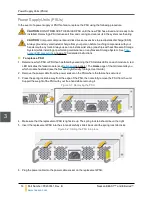
7. Turn the lock clockwise to lock the drawer into place.
The
STAT
LED on the front of the drawer turns from amber to green to let you know that the drive
drawer is properly latched. The
ENV
LED lights up green to let you know that the fan is functioning
properly and that the drawer temperature is within specifications.
8. In the Nexsan GUI, go to the
Home
page and verify that the status bar for the new fan assembly is
green. See
Home Page
in
Chapter 3
of the
Nexsan High-Density Storage User Guide
for more
information.
Chapter 3: Replacing Modules
Nexsan E48X and Nexsan E60X
FRU Removal and Replacement Guide
Nexsan
25
3
Содержание Nexsan E48X
Страница 4: ...Glossary 27 Contents iv Part Number P0450141 Rev B www nexsan com Nexsan BEAST and E Series...
Страница 8: ...About this manual viii Part Number P0450141 Rev B www nexsan com Nexsan BEAST and E Series...
Страница 18: ...Physical characteristics 1 10 Part Number P0450141 Rev B www nexsan com Nexsan BEAST and E Series...
Страница 34: ...Rear drive drawer fan assembly 3 26 Part Number P0450141 Rev B www nexsan com Nexsan BEAST and E Series...


