stewmac.com
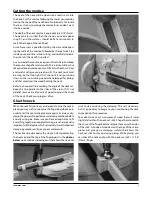
The heel of the neck will be glued into a mortise cut into
the body. Cut this mortise following the marks you made by
tracing the shape of the neck heel onto the body. Cut inside
the lines; it’s easy to enlarge the mortise, but you don’t want
it to be oversize.
The depth of the neck mortise is approximately 3/16" (5mm).
The depth is less critical than the shape: you need a good,
snug fit, and the surfaces should be flat and smooth, to
match the shape of the neck heel.
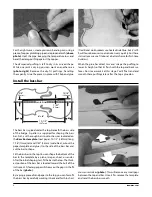
A small razor saw is good for starting the cuts and deepen-
ing the walls of the mortise, followed by sharp chisels. Stay
inside your pencil lines while cutting, and carefully increase
the size until the neck fit is perfect.
As you create the mortise, keep your chisels sharp and keep
the mortise shape flat and smooth. This is tricky cutting, but
take your time and remove only a little bit with each cut. Slow
and careful will give you great results. The neck joint must
be snug, but not too tight. If it’s too tight it will put undue
stress on the surrounding wood when clamped for gluing,
and that could split the wood holding the neck.
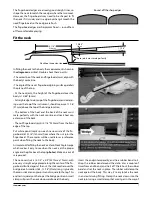
Refer to your pencil line marking the angle of the neck set.
Keep this line parallel to the sides of the violin. If it’s not
parallel, remove tiny amounts of wood to adjust the angle
of the neck. Check your progress often.
When the neck fit is correct, you are ready to glue the neck in
place (you may wish to spot-glue the fingerboard back on in
order to test the centerline alignment again). As always, dry-
clamp the glue joint to perfect your clamping methods before
actually using glue. Make sure you have enough time to fit
everything together and apply clamping pressure (especially
important with hide glue, which sets quickly). A well-rehearsed
clamping procedure will give you accurate results.
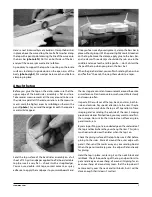
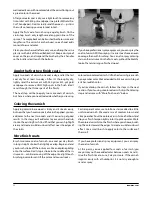
The neck can be clamped with a single C-clamp contacting
the heel cap and the top of the fingerboard. In the
photos
below
we’ve made a clamping caul that allows the neck-set
Glue the neck
Cutting the mortise
stick to stay on during the clamping. This isn’t necessary,
but it’s a good way to keep an eye on maintaining the neck
angle during this procedure.
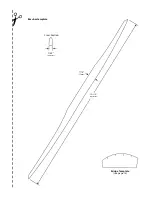
To make this caul, cut two pieces of wood that will stand
slightly taller than the neck-set stick. Shape them to match
the curve of the fingerboard, and glue them onto the sides
of the stick. A bridge of wood across the tops of these two
pieces will give you a clamping surface that allows the
neck-set stick to stay on during gluing. While gluing, you
can check the neck angle with the neck-set stick’s 1-1/16"
(27mm) finger.
9
Содержание 5342
Страница 1: ...Violin Kit 5342 Assembly Instructions www stewmac com ...
Страница 2: ......
Страница 9: ... ...
Страница 10: ......
Страница 23: ......


