stewmac.com
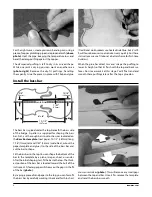
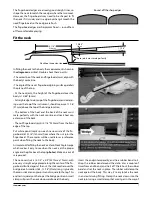
lin reamer makes this easy). Don’t ream much! Test often!
When the endpin fits, remove it until after the finish has
been applied.
Now you’re ready for finishing!
The endpin mounting hole is pre-drilled, but will need to
be reamed to accept the endpin. It won’t take much to
shape the hole to fit the peg; you can do this with a bit of
sandpaper wrapped around the tip of the peg itself (a vio-
Install the endpin
When the wood is dry, scrape or sand it again, smoothing
away the fibers that are raised by dampening the wood.
Mask off the notch you cut for the tailgut saddle, to keep it
free of finish (for a good glue joint later).
Many makers remove the fingerboard and spot-glue on
a temporary “dummy” board that stops at the end of the
neck heel (tape can be used to mask it off). This protects the
neck’s gluing surface during finishing, and the absence of
the fingerboard’s overhang makes finishing the top easy.
The violin is now “in the white” and ready for careful wood
preparation before finishing. Prepping a violin is enjoyable,
and involves scraping, filing, sanding, and more scraping.
Final-scraping leaves a smooth surface without the scratches
of sandpaper, and it exposes the wood grain nicely for
finishing. Scraping takes some practice, and your scraper
must be sharp.
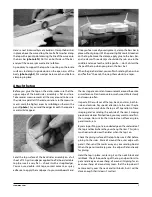
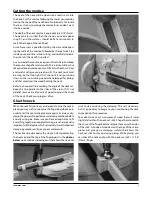
Shape the overhang of the top and back using a file, knife,
scraper, and sandpaper
(photo)
. Use these same tools to
remove all scratches from the sides, top, and back. After
thoroughly prepping the surfaces, dampen the wood with
a rag dipped in hot water and well squeezed-out to raise
the grain (dampen the wood, don’t wet it).
Wood and finish preparation
You can also stain the wood or tint the varnish to achieve a
specific color or shade using Stewart-MacDonald’s ColorTone
concentrated liquid stains. In the finish steps shown here, we
tint the varnish. For a first-time builder, however, the best
finishing plan is the simplest, so if this is your first finishing
project we recommend that you apply uncolored varnish.
We recommend Behlen Violin Varnish, a traditional finish
that can be sprayed, brushed, or rubbed onto the instru-
ment. Varnish is a good choice for a first-time violin builder;
it’s easy to apply, builds quickly, and dries to a hard luster. It
has a slight amber tint that is typical for violins.
It’s important to clean and dust your finishing room before
applying varnish. This is to avoid raising dust that can settle
on the surface while the varnish is curing (varnish is a slow-
curing finish).
Applying varnish
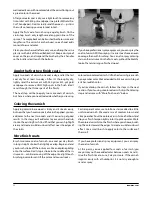
varnish into the wood using circular, figure-eight motions.
Watch for wet areas, and wipe them up with the tampon.
Never stop moving with the varnish-wet rag, or it will stick.
You will end up using very little finish, and the wood will be
Thin the varnish with denatured alcohol such as Behlen’s
Behkol to make a 4:1 mixture (4 parts varnish and 1 part
Behkol). Apply the varnish with a “tampon” made of a lint-
free cloth wrapped tightly around a cotton ball. Rub the
Seal the wood
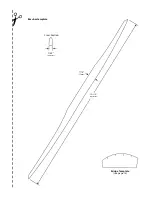
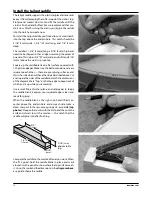
To hold the saddle for carving, use a scrap of wood with a
raised stop on one end that you can butt the saddle against.
This will keep your fingers safely away from the cutting
tools.
Once the saddle is shaped and fits the notch well, set it aside.
It will be glued in after finishing the violin.
11
Содержание 5342
Страница 1: ...Violin Kit 5342 Assembly Instructions www stewmac com ...
Страница 2: ......
Страница 9: ... ...
Страница 10: ......
Страница 23: ......


