background image


Manuel d'utilisation (Version : B) 

34 

Type SF


4.  Chargez ou déchargez la marchandise placée le plus près de l'extrémité du 

plancher de chargement. 


5.  Placez l'interrupteur du BDC, qui se trouve du côté droit du boîtier de commande, 

sur "1" pour désactiver le BDC et placez le niveleur de quai en position de 

stationnement, voir la section Replacer le niveleur de quai en position de 

stationnement (à la page 32). 


Содержание SF 2522

Страница 1: ... 2015 Stertil B V 06000800 Laadbrug Dock Leveller Überladebrücke Niveleur de quai Typ e SF Gebruiksaanwijzing Operation Manual Bedienungsanleitung Manuel d utilisation ...

Страница 2: ...tallation date Installationsdatum Date d installation Serienummer Serial number Ordnungsnummer Numéro de série Operating instructions for the Stertil dock leveller of type Bedienungsvorschriften für die Überladebrücke von Stertil typ Mode d emploi pour le niveleur de quai Stertil type ...

Страница 3: ...cheefstand 16 2 3 7 Onderhoudssteun 16 2 3 8 Veiligheidsmarkeringen 18 2 4 Vergrendelen en labelen 19 2 5 Milieu aspecten 19 2 5 1 Verwijdering 19 2 5 2 REACH verklaring 19 2 6 Opleidings en trainingsniveaus 20 3 Omschrijving 21 3 1 Technische specificaties 21 3 2 Productidentificatie 22 3 3 Beoogd gebruik 23 3 4 Werkingsprincipe 23 3 4 1 BDC optie 24 3 4 2 AR optie 24 3 4 3 PLS optie 24 3 5 Funct...

Страница 4: ...motor loopt niet 40 7 1 2 Het dek stijgt niet voldoende hoewel de motor loopt 41 7 1 3 De lip van de laadbrug schuift niet voldoende uit 41 7 1 4 De lip is uitgeschoven voordat het dek omhoog gaat 41 7 1 5 Het dek daalt niet of daalt niet voldoende 41 7 1 6 Het dek volgt de bewegingen van de truck niet 42 7 1 7 Het dek ligt niet gelijk met het perronplatform in ruststand 42 7 1 8 De lip beweegt ni...

Страница 5: ... de Klantenservice van Stertil B V De informatie in deze handleiding is toegespitst op het bedoelde gebruik van het product Indien de producten onderdelen van de producten of procedures op een andere wijze worden gebruikt dan in deze handleiding beschreven dan dient een bevestiging te worden verkregen van de juistheid en geschiktheid van dit gebruik Noch aan deze handleiding noch aan de documentat...

Страница 6: ...ellen kunnen worden gegarandeerd Als Stertil niet wordt betrokken bij het opnieuw in bedrijf stellen dan is Stertil niet aansprakelijk voor vorderingen van derden die ontstaan uit het opnieuw in bedrijf stellen 1 5 Naleving van normen De laadbrug is getest gecertificeerd en in overeenstemming bevonden met de Machinerichtlijn 2006 42 EC De bedieningskast is getest gecertificeerd en in overeenstemmi...

Страница 7: ...operator of monteur moet uitvoeren in een specifieke volgorde zijn genummerd 1 Zet de hoofdschakelaar aan Opsommingstekens worden gebruikt voor items of handelingen Bedieningstoetsen of touchscreenknoppen staan altijd tussen haakjes Start Enter 2 n Let op Biedt aanvullende informatie die handig is om een taak uit te voeren of problemen te vermijden c Pas op Waarschuwt voor een situatie waarbij mat...

Страница 8: ...ze handleiding Voor routinematige bediening van de machine dient de operator over voldoende technische kennis en ervaring te beschikken om de toegewezen taken uit te voeren in staat zijn risico s te herkennen en te voorkomen deze handleiding gelezen te hebben en de inhoud ervan te begrijpen adequaat getraind te zijn de procedures in deze handleiding te kunnen volgen 1 10 Bijbehorende machinedocume...

Страница 9: ...van deze handleiding vereist is In de volgende tabel worden de belangrijkste wijzigingen van elke versie van deze handleiding beschreven Versie Vanaf serienummer Wijzigingen 0 141147 Oorspronkelijke uitgave A 165561 Bijgewerkt volgens de nieuwe machinerichtlijn B 193462 Nieuwe indeling handleiding extra informatie toegevoegd CTL unit toegevoegd 1 12 Toevoegingen op de handleiding Indien u toevoegi...

Страница 10: ...e liplengtes geavanceerde bedieningskasten De fabrikant is gerechtigd om de technische documentatie samen te stellen Ondergetekende U Bijlsma directeur voor dit doel gemachtigd door Stertil B V verklaart hiermee dat de laadbrug zoals hiervoor omschreven voldoet aan de fundamentele veiligheidseisen zoals vastgesteld in De Machinerichtlijn 2006 42 EC en EN 1398 2009 De Laagspanningsrichtlijn 2006 95...

Страница 11: ...gewaarborgd De veiligheid van anderen is gewaarborgd Voorkom schade aan de machine Houdt u altijd aan de lokale veiligheids en gezondheidsprocedures protocollen en eventuele extra lokale regels wetten en voorschriften in aanvulling op de veiligheidsvoorschriften van de fabrikant Lees regelmatig de veiligheidsvoorschriften ongeacht of u dagelijks of af en toe met de machine werkt ...

Страница 12: ...or dat de machine compleet is voordat u deze gaat bedienen Het bedienen van een machine waaraan onderdelen ontbreken kan ernstige schade veroorzaken Let op alle stickers met veiligheids en gevaarinformatie Vervang onmiddellijk waarschuwings en of veiligheidsstickers als deze ontbreken of onleesbaar zijn Voer geen taken uit waarvoor u niet bevoegd bent Alleen expliciet opgeleid en bevoegd personeel...

Страница 13: ...he delen Houd lang haar bedekt wanneer u werkt rond bewegende onderdelen 2 3 Veiligheidsvoorzieningen De laadbrug heeft de volgende veiligheidsvoorzieningen Noodstopschakelaar op pagina 13 Automatisch veiligheidssysteem op pagina 14 Dwarsverkeerpoten op pagina 14 Teenbeschermers op pagina 15 Scheefstand op pagina 16 Veiligheidscircuit op pagina 15 Onderhoudssteun op pagina 16 Veiligheidsmarkeringe...

Страница 14: ...ftruck op de laadbrug dan wordt het veiligheidssysteem automatisch geactiveerd n Opmerking Het automatisch veiligheidssysteem wordt alleen geactiveerd als de feitelijke belasting op de laadbrug 25 van de nominale belasting overschrijdt Nadat de lading is verwijderd kunt u de laadbrug resetten door kort op de bedieningsknop te drukken d Waarschuwing Als het automatisch veiligheidssysteem is geactiv...

Страница 15: ... gemonteerd over de gehele lengte van de laadbrug Deze minimaliseren het gevaar van beklemming of amputatie voor iedereen nabij de laadbrug De teenbeschermers zijn geel en zwart gestreept voor maximale zichtbaarheid en minimaal struikelrisico Teenbeschermers 2 3 5 Veiligheidscircuit De laadbrug kan alleen worden bediend met een gesloten veiligheidscircuit D D De primaire functie van het veiligheid...

Страница 16: ...scheefstand is 75 125 mm dit hangt af van het type laadbrug n Opmerking De maximale torsieflexibiliteit wordt bepaald door de grootte van de laadbrug Met een grotere laadbrug is een grotere scheefstand mogelijk 2 3 7 Onderhoudssteun Tijdens reparaties afstellingen onderhoud of het reinigen van de laadbrug onder het dek dient de specifieke onderhoudssteun geplaatst te worden c Let op Operators word...

Страница 17: ...et dat u onder het dek moet komen dient u daartoe bevoegd te zijn en moet u altijd de onderhoudssteun gebruiken Onderhoudssteun Deze onderhoudssteun voorkomt onverwachte bewegingen van de laadbrug tijdens activiteiten onder het dek zie Plaatsen van de onderhoudssteun op pagina 36 ...

Страница 18: ...t van de diverse veiligheidsstickers die worden gebruikt op of in de machine Van elke sticker wordt de plaats aangegeven Pictogram Omschrijving Locatie Gebruik tijdens het werk altijd de onderhoudssteun Onderkant van de dekbalk rechts van de onderhoudssteun Obstakel risico voor struikelen vallen en botsen Op de teenbeschermers Werk volgens de voorschriften in de handleiding Foutieve bediening of o...

Страница 19: ...naar en of gebruiker verantwoordelijk voor een veilige demontage van de machine en voor het afvoeren van de onderdelen overeenkomstig de ter plaatse geldende wetten of verordeningen 2 5 2 REACH verklaring De REACH verordening werd van kracht op 1 juni 2007 Het doel van de REACH verordening is een hoog beschermingsniveau voor de menselijke gezondheid en voor het milieu tegen chemische stoffen te ga...

Страница 20: ...ining door de supervisor Supervisor Middelbare beroepsopleiding en training na de installatie van de machine door de installatiemedewerkers Onderhoudsmonteur Middelbare beroepsopleiding n Let op Raadpleeg in geval van twijfel altijd de servicedienst van uw leverancier dealer Neem voor meer informatie over deze en andere mogelijke trainingen contact op met uw leverancier dealer ...

Страница 21: ...522 SF 4022 SF 4522 Capaciteit Zie typeplaat Netvoeding 3 x 380 415V 50 Hz 3 x 220 240V 50 Hz optie Andere configuraties netvoeding op verzoek Stuurspanning 24 V Geluidsniveau 74 dB A Installatie Binnen Elektrische motor IP 54 volgens EN 60529 Bedieningskast IP 55 volgens EN 60529 Andere componenten IP 55 volgens EN 60529 Bedrijfstemperatuur laadbrug 40 C tot 50 C Voor het werken met de machine on...

Страница 22: ...de typeplaat staan de volgende gegevens Data Betekenis TT Typecode DDDD Nominale lengte en breedtecode dek LL Nominale lengtecode lip SSSSSS Serienummer CCCC Capaciteit dynamisch MM YYYY Productiemaand en jaar PPP Instelling overdrukventiel NxUUU Netspanning FF Netfrequentie W WW Nominaal opgenomen vermogen De gegevens op de typeplaat zijn nodig voor het bepalen van de afmetingen van de putten en ...

Страница 23: ...zoals trucks semi opleggers wissellaadbakken en containers 3 4 Werkingsprincipe De laadbrug wordt bediend met de bedieningskast De basisbedieningskast heeft slechts één knop Als deze ingedrukt wordt gehouden 1 Stijgt het dek naar de hoogste stand 2 Wordt de lip uitgeklapt en de dwarsverkeerpoten ingetrokken 3 Als de knop wordt losgelaten daalt het dek tot de lip op de laadvloer van de truck rust O...

Страница 24: ...et de SSC en SMC bedieningskasten niet op de basiskast 3 4 3 PLS optie De Park Limit Switch PLS detecteert de ruststand van de leveller en kan gebruikt worden als extra veiligheidsvoorziening Met de PLS kan de besturing van de deur worden uitgeschakeld als het dek niet in de ruststand staat 3 5 Functionele beschrijving De laadbrug type SF is een leveller met een hangend frame en een scharnierende ...

Страница 25: ...dleiding Versie B 25 Type SF 1 Dek met teenbeschermers 2 Lip 3 Subframe 4 Voorste dwarsbalk 5 Hydraulische pompunit 6 Hoofdcilinder 7 Lipcilinder 8 Onderhoudssteun 9 Dwarsverkeerpoot Hoofdcomponenten van de laadbrug ...

Страница 26: ...talleerde bedieningskast 4 1 1 Bedieningspaneel De laadbrug wordt bediend met de bedieningskast De basisbedieningskast heeft slechts één knop Deze functie is beschreven in Uitvoeren van procedures zie Bedrijfsprocedures op pagina 30 De geavanceerde bedieningskasten hebben extra knoppen Voor sommige opties is een extra knop nodig op de bedieningskast zie Knoppen en functies bedieningspaneel op pagi...

Страница 27: ... Schakelaar zijkant AAN UIT Wordt gebruikt voor opties als opblaasbare shelters en BDC 4 optio neel Auto Return Zet het dek terug in de parkeer standby stand 5 optio neel Deur open dicht stop Alleen mogelijk als de deur wordt bestuurd door bedieningskast 6 optio neel Interne verkeerslichten Geeft aan of laden en lossen is toegestaan deur open leveller in truck of niet LED A optioneel Storing statu...

Страница 28: ...Bedieningshandleiding Versie B 28 Type SF LED C optioneel status LED groen De groene LED geeft aan dat de deur bediend kan worden ...

Страница 29: ...l aan hangt 1 Schakel de elektrische voeding in door de hoofdschakelaar op 1 te zetten 2 Druk kort op de knop dek omhoog om de stuurstroom te activeren d Waarschuwing Gebruik de hoofdschakelaar niet tijdens normaal bedrijf Schakel de machine alleen op 0 in geval van nood of een gevaarlijke situatie 5 2 2 Herstart na noodstop of spanningsverlies Herstarten na een noodstop of spanningsverlies 1 Cont...

Страница 30: ... kan de verticale bewegingen van de truck niet langer volgen Dit kan leiden tot gevaarlijke situaties of schade aan de apparatuur d Waarschuwing Zet de machine alleen op 0 in geval van nood of een gevaarlijke situatie 5 4 Bedrijfsprocedures 5 4 1 Laadbrug in laad losstand brengen Om de laadbrug in laad losstand te brengen 1 Schakel de machine in zie Inschakelen op pagina 29 2 Plaats de truck met o...

Страница 31: ...waartekracht tot de uitgeklapte lip op de laadvloer van de truck rust 6 Zorg dat de lip voldoende steun heeft min 100 mm op de laadvloer van de truck Door de scheefstand kan de laadbrug zich aanpassen aan een ongelijkmatig geladen truck n Opmerking De maximale torsieflexibiliteit wordt bepaald door de grootte van de laadbrug Met een grotere laadbrug is een grotere scheefstand mogelijk ...

Страница 32: ...positie kunnen komen 2 Laat de knop dek omhoog los De leveller daalt tot de ruststand met de lip in verticale positie d Waarschuwing Als het dek niet teruggaat naar de ruststand gelijk aan het niveau van het dock platform gebruik de leveller dan niet tot het probleem is opgelost Zie Probleemoplossing zie Foutoplossing op pagina 40 voor meer informatie d Waarschuwing Zorg dat de laadbrug in de rust...

Страница 33: ...nt van de bedieningskast op 0 om BDC te activeren 2 Druk op Dek omhoog als het dek zijn hoogste stand heeft bereikt en de lip iets is uitgeklapt ca 5 graden dan wordt de pomp automatisch uitgeschakeld 3 Laat de knop Dek omhoog los Het dek daalt naar de laagste stand met hangende lip ...

Страница 34: ... dichtst bij het eind van de laadvloer ligt 5 Zet de BDC schakelaar aan de rechterkant van de bedieningskast op 1 om BDC te deactiveren en zet het dek terug in de ruststand zie Terugzetten van de laadbrug in de ruststand zie Laadbrug terugbrengen naar ruststand op pagina 32 ...

Страница 35: ...te worden uitgevoerd Ten gevolge van laadverschillen en omgevingsinvloeden hebben bepaalde onderdelen mogelijk meer of minder onderhoud nodig dan gespecificeerd n Opmerking De onderhoudsprocedures verwijzen indien nodig naar speciale instructies 6 2 Wanneer u onderhoud uitvoert Let dan op het volgende Als u twijfelt of u een bepaalde handeling moet uitvoeren neem dan contact op met uw locale Stert...

Страница 36: ...gen van de laadbrug tijdens activiteiten onder het dek Raadpleeg voor het plaatsen van de onderhoudssteun de paragraaf Plaatsen van de onderhoudssteun op pagina 36 Plaatsen van de onderhoudssteun Plaatsen van de onderhoudssteun 1 Houd de knop dek omhoog ingedrukt om het dek naar de hoogste stand te brengen met de lip geheel uitgeklapt 2 Als het dek in de hoogste stand staat zet u de hoofdschakelaa...

Страница 37: ...aar op 0 Het dek blijft in de hoogste stand staan 3 Laat de knop dek omhoog los 4 Verwijder de splitpen en de borgpen 5 Schuif de beweegbare buis van de onderhoudssteun naar boven tot deze de minimale lengte heeft 6 Plaats de borgpen terug in het best passende gat en borg dit met de splitpen 7 Plaats de onderhoudssteun terug in de ophangbeugel onder het dek 6 2 2 Verwijderen van afval Verwijder sm...

Страница 38: ...emonteur Jaarlijkse controle Servicehandleiding n Opmerking Wij raden u met klem aan een onderhoudscontract af te sluiten Raadpleeg uw leverancier dealer over jaarlijks onderhoud en reparaties aanpassingen 6 3 1 Visuele inspectie d Waarschuwing Het is operators niet toegestaan inspecties uit te voeren onder de leveller dit mag alleen gedaan worden door gekwalificeerd personeel Tijdens een visuele ...

Страница 39: ...dure of schema Neem contact op met uw leverancier dealer als u onregelmatigheden vindt bij het smeren van onderdelen 6 3 3 Reinigen Reinig de scharnieren en de put als dat nodig is d Waarschuwing Gebruik bij het reinigen van de put altijd de onderhoudssteun Zie Let op veiligheid c Let op Vermijd scharnieren en elektrische systemen bij hogedrukreiniging ...

Страница 40: ... en onderhoud kunnen leiden tot schade aan goederen of lichamelijk letsel Raadpleeg uw dealer leverancier voor de juiste instellingen 7 1 1 Het dek gaat niet omhoog als dek omhoog wordt ingedrukt want de motor loopt niet Oorzaak Oplossing Geen netvoeding Schakel de netvoeding in Geen netspanning Neem contact op met uw lokale serviceafdeling De deur is niet open of niet ver genoeg open Open de deur...

Страница 41: ... optionele BDC is nog ingeschakeld De lip is niet volledig uitgeklapt Schakel de BDC uit Andere oorzaak Neem contact op met uw lokale serviceafdeling 7 1 4 De lip klapt uit voordat het dek omhoog gaat Oorzaak Oplossing Er staat een last op het dek Verwijder de last van het dek Er is een obstructie Verwijder de obstructie Andere oorzaak Neem contact op met uw lokale serviceafdeling 7 1 5 Het dek da...

Страница 42: ...mhoog om de stuurstroom te activeren Andere oorzaak Neem contact op met uw lokale serviceafdeling 7 1 7 Het dek ligt niet gelijk met het perronplatform in ruststand Oorzaak Oplossing Er is een obstructie Verwijder de obstructie Dwarsverkeerpoten zijn niet goed geplaatst Druk op dek omhoog om het dek te laten stijgen Laat los om het dek te laten zakken naar de ruststand Andere oorzaak Neem contact ...

Страница 43: ...okale serviceafdeling 7 1 11 De deur gaat niet open Oorzaak Oplossing Geen netvoeding Schakel de netvoeding in Geen netspanning Neem contact op met uw lokale serviceafdeling Indien geïnstalleerd is het vracht wagenblokkeersysteem in gebruik Schakel het vrachtwagenblokkeer systeem in Andere oorzaak Neem contact op met uw lokale serviceafdeling 7 1 12 De deur gaat niet dicht Oorzaak Oplossing Het de...

Страница 44: ... Technische ondersteuning Als de tips in dit hoofdstuk uw vraag niet beantwoorden of uw probleem niet oplossen neem dan contact op met uw plaatselijke Stertil servicevienst of distributeur Zie voor een volledige lijst van Stertil distributeurs en locale servicediensten de website van Stertil www stertil nl ...

Страница 45: ...gen naar ruststand 28 30 32 Doel van onderhoud 33 Dwarsverkeerpoten 12 13 E EG Conformiteitsverklaring 9 F Foutoplossing 30 FOUTOPLOSSING 38 Functionele beschrijving 22 G Garantie en aansprakelijkheid 5 Gegevens van de fabrikant 5 Gevaren 12 H Handelsmerken 6 Herstart na noodstop of spanningsverlies 27 Het dek daalt niet of daalt niet voldoende 39 Het dek gaat niet omhoog als dek omhoog wordt inge...

Страница 46: ...U Uitschakelen 28 Uitschakelen in een noodsituatie 28 Uitschakelen in een normale situatie 28 V Veel voorkomende storingen en oplossingen 38 Veiligheid 27 33 VEILIGHEID 10 Veiligheidscircuit 12 14 Veiligheidsmarkeringen 12 16 Veiligheidsvoorzieningen 12 Vergrendelen en labelen 17 Versiehistorie 7 Verwijderen van afval 35 Verwijderen van de onderhoudssteun 35 Verwijdering 17 Visuele inspectie 36 Vo...

Страница 47: ...gs 13 2 3 4 Toe guards 14 2 3 5 Safety Circuit 14 2 3 6 Lateral tilt torsion 15 2 3 7 Maintenance support 15 2 3 8 Safety signs 17 2 4 Lock out tag out 18 2 5 Environmental aspects 18 2 5 1 Disposal 18 2 5 2 REACH declaration 18 2 6 Training levels 19 3 Description 20 3 1 Technical specifications 20 3 2 Product identification 21 3 3 Intended use 22 3 4 Operating principle 22 3 4 1 BDC option 22 3 ...

Страница 48: ...37 7 1 1 The deck does not rise when deck up is pressed because the motor is not running 37 7 1 2 The deck does not rise sufficiently even though the motor is running 38 7 1 3 The lip of the dock leveller does not sufficiently extend 38 7 1 4 The lip is extended before the deck rises 38 7 1 5 The deck does not descend or does not descend sufficiently 38 7 1 6 The deck does not follow the truck s m...

Страница 49: ...ed by the manufacturer In the event that the products parts of the products or procedures are applied in any way other than that described in this manual then confirmation must be obtained as to the correctness and suitability of that use No rights may be derived from this manual or from the documentation supplied together with the product Supplier is bound by no agreement other than the order con...

Страница 50: ...ssioning 1 5 Compliance with standards The dock leveller has been tested certified and found to comply with the Machinery directive 2006 42 EC The control box has been tested certified and found to comply with the Low Voltage Directive 2006 95 EC the EMC Directive 2004 108 EC The product complies with all applicable CE directives and therefore bears a CE plate 1 6 Manufacturers details If you need...

Страница 51: ...een buttons are always shown between brackets Start Enter 2 n Note Provides additional information that is helpful to do a task or to avoid problems c Caution Warns of a situation that may cause material damage if one does not follow the safety instructions d Warning Warns of a situation that may cause physical injury and or material damage if one does not obey the safety instructions w Danger War...

Страница 52: ... carry out the assigned tasks be able to recognize and prevent hazards have read this manual and must understand the contents have been adequately trained be able to follow the procedures in this manual 1 10 Related documents machine This manual is part of the documentation set for the machine This set consists of the following documents Operator Manual included with machine This manual contains a...

Страница 53: ...on new version of this manual is required The following table describes the main changes for each document version of this manual Version From serial number Changes 0 141147 Original edition A 165561 Updated in accordance with the new Machine Directive B 193462 New manual organization extra information added CTL unit added 1 12 Supplements to the manual If you receive any supplements to the manual...

Страница 54: ...Switch PLS several lip lengths advanced control boxes The manufacturer is authorized to constitute the technical documentation Signed U Bijlsma director authorized for this purpose by Stertil B V hereby declares that the dock leveller as described above conforms with the fundamental safety requirements as set down in the Machinery directive 2006 42 EC and EN 1398 2009 the Low Voltage Directive 200...

Страница 55: ...ulations The guidelines provided by professional associations The machine manual must be available at the machine at all times Read the operating instructions before you operate or maintain the machine Make sure you have obtained read and understood all instructions Make sure you have obtained read and understood any additional instructions for special accessories for the machine Carry out all wor...

Страница 56: ... applicable laws rules and regulations may carry out maintenance service and repair of the machine Stay away from moving machine parts Do not wear rings watches jewelery ties or loose sleeves when working around moving mechanical parts Keep long hair covered when working around moving mechanical parts 2 3 Safety features The dock leveller has the following safety features Emergency stop switch on ...

Страница 57: ...ith a forklift truck on the dock leveller the automatic safety device is automatically activated n Note The automatic safety device only activates if the actual load on the dock leveller exceeds 25 of the nominal load After the load has been removed reset the dock leveller by briefly pressing on the control button d Warning If the automatic safety device is activated in a panic stop situation alwa...

Страница 58: ...the dock leveller They minimize the risk on entrapment or amputation for all persons near the dock leveller The toe guards are marked in yellow and black stripes to maximize visibility and to minimize tripping hazards Toe guards 2 3 5 Safety Circuit The dock leveller can only be operated with a closed safety circuit D D The primary use of the safety circuit D D is to connect a door switch to make ...

Страница 59: ... lateral tilt torsion is 75 125 mm this depends on the type of dock leveller n Note The maximum torsional flexibility is determined by the size of the dock leveller With a larger dock leveller more lateral tilt torsion is possible 2 3 7 Maintenance support During repairs adjustments maintenance or cleaning of the dock leveller beneath the deck a specific maintenance support must be placed c Cautio...

Страница 60: ...ust go underneath the deck this must be done by qualified personnel and always use the maintenance support Maintenance support This maintenance support prevents unexpected movements of the dock leveller during activities beneath the deck see Place the maintenance support on page 33 ...

Страница 61: ...h sign the location is indicated Pictogram Description Location Lifting point Centered on the lifting beam Always use the maintenance support when servicing Underside of the deck beam on the right side of the maintenance support see SF operator manual for the location Obstacle risk of tripping falling and collision On the toe guards Operate according to directions in manual Incorrect operation or ...

Страница 62: ...useful life the owner and or user is responsible for the safe disassembly of the machine and for the disposal of the components in accordance with the local laws or regulations 2 5 2 REACH declaration The REACH regulation became effective on 1st June 2007 The aim of the REACH regulation is to ensure a high level of protection of human health and the environment from chemical substances Stertil B V...

Страница 63: ...rained by the supervisor Supervisor Intermediate vocational education level and trained after the installation of the machine by the installation personnel Maintenance engineer Intermediate vocational education level n Note In case of doubt always consult the Service Department of your supplier dealer For more information about this and other possible trainings contact your supplier dealer ...

Страница 64: ...F 2822 SF 3022 SF 3522 SF 4022 SF 4522 Capacity See type plate Mains supply 3 x 380 415V 50 Hz 3 x 220 240V 50 Hz option Other mains supply configuration on request Control voltage 24 V Sound level 74 dB A Installation Indoor Electric motor IP 54 in accordance with EN 60529 Control box IP 55 in accordance with EN 60529 Other components IP 55 in accordance with EN 60529 Operating temperature dock l...

Страница 65: ...ate The following data are present on the type plate Data Meaning TT Type code DDDD Nominal deck length and width code LL Nominal lip length code SSSSSS Serial number CCCC Capacity dynamic MM YYYY Month and year of production PPP Setting pressure relief valve NxUUU Mains voltage FF Mains frequency W WW Nominal power consumption The data on the type plate is required to determine the pit dimensions...

Страница 66: ...ly 1 The deck rises to the highest position 2 The lip is extended and the cross traffic legs are retracted 3 When the button is released the deck lowers until the lip rests on the loading floor of the truck Optional advanced control boxes see Control components on page 24 are available with An integrated control of the dock door An integrated control of an inflatable shelter An Auto Return button ...

Страница 67: ...not in parked position 3 5 Functional description The dock leveller SF type is a leveller with a hanging type frame and a swing lip The SF type is designed for installation in an open pit The platform is positioned by means of one hydraulic cylinder at the front The platform can twist smoothly to both sides to adapt itself to uneven loaded trucks see Lateral tilt torsion on page 15 During the load...

Страница 68: ...ontrol box 4 1 1 Operator panel The dock leveller is operated with the control box The basic control box has one button only Its function is described in Running procedures on page 27 The advanced control boxes have extra buttons Some options require an extra button on the control box see Operator panel buttons and functions on page 24 All control boxes have a main power switch 4 1 2 Operator pane...

Страница 69: ... BDC 4 optional Auto Return Returns the deck to parked standby position 5 optional Door open close stop Only possible when door is controlled by control box 6 optional Inside traffic lights Signals if loading and unloading is allowed door open leveller in truck or not LED A optional Fault status LED red This red LED will light up if a fault has occurred When the fault is corrected the LED will go ...

Страница 70: ... tag out sign is attached 1 Switch on the main power supply by switching the main switch to 1 2 Briefly push deck up to activate the control current d Warning Do not use the main switch during normal operation Only switch to 0 in case of an emergency or a dangerous situation 5 2 2 Restart after emergency stop or power loss To start after an emergency stop or a power loss 1 Check that it is safe to...

Страница 71: ...onger follow the vertical movements of the truck This could lead to dangerous situations or damage to the equipment d Warning Only switch to 0 in case of an emergency or a dangerous situation 5 4 Running procedures 5 4 1 Bringing the dock leveller in loading unloading position To bring the dock leveller in loading unloading position 1 Switch on the machine see Switch on on page 26 2 Position the t...

Страница 72: ...extended lip rests on the loading floor of the truck 6 Make sure that the lip has sufficient support min 100 mm on the loading floor of the truck The lateral tilt torsion allows the dock leveller to adjust to an unevenly loaded truck n Note The maximum torsional flexibility is determined by the size of the dock leveller With a larger dock leveller more lateral tilt torsion is possible ...

Страница 73: ...der for the cross traffic legs to get into position 2 Release deck up The leveller will descend to the parked position with the lip in vertical position d Warning If the deck does not return to the parked position level with dock platform do not use the leveller until the problem is solved See Troubleshooting on page 37 for more information d Warning Make sure the dock leveller is in the parked po...

Страница 74: ... of the control box to 0 to activate BDC 2 Press Deck up after the deck has reached its highest position and the lip has extended slightly approx 5 deg the pump shuts off automatically 3 Release deck up The deck descends to its lowest position The lip stays pendant below docking level ...

Страница 75: ...load the cargo closest to the end of the loading floor 5 Switch the BDC switch at the right hand side of the control box to 1 to deactivate BDC and return the deck to the parked position see Returning the dock leveller to the parked position on page 29 ...

Страница 76: ...turning it to that condition Corrective maintenance is done after malfunctions have occurred d Warning Only authorized personnel is allowed to carry out maintenance d Warning Always follow maintenance instructions n Note All maintenance actions described must be done on schedule Due to load differences and environmental influences certain parts may require more or less maintenance than specified n...

Страница 77: ...s the responsibility of those in charge of preparing or surveying work to take the necessary steps to guarantee safe working conditions d Warning Always use the maintenance support during cleaning beneath the deck of the dock leveller The maintenance support prevents unexpected movements of the dock leveller during activities beneath the deck To place the maintenance support refer to section Place...

Страница 78: ...at the highest position switch the main switch to 0 The deck will stay in the highest position 3 Release deck up 4 Remove the spring cotter and remove the locking pin 5 Slide the movable tube of the maintenance support upwards until you have the minimum length 6 Place the locking pin back in the best fitting hole and secure it with the spring cotter 7 Place the maintenance support back into its br...

Страница 79: ...ed to have a maintenance contract Consult your supplier dealer about annual maintenance and repairs adjustments 6 3 1 Visual inspection d Warning Operators are not allowed underneath the leveller for inspections this may only be done by qualified personnel During a visual inspection Check all visible wires and cables for damage Check the visible part of the hydraulic system for leakage Check the d...

Страница 80: ... 36 Type SF 6 3 3 Cleaning Clean the hinges and pit when necessary d Warning Always use the maintenance support when cleaning the pit See Pay attention to safety c Caution Avoid hinges and electric system when pressure cleaning ...

Страница 81: ...tments repairs and maintenance can cause damage to goods or personal injury Consult your dealer supplier for the correct settings 7 1 1 The deck does not rise when deck up is pressed because the motor is not running Cause Solution No mains supply Switch on the mains supply No mains voltage present Contact your local service department The door is not open or not open enough Open the door If instal...

Страница 82: ...optional BDC still switched on The lip does not extend completely Switch off BDC Other cause Contact your local service department 7 1 4 The lip is extended before the deck rises Cause Solution There is a load on the deck Remove the load from the deck There is an obstruction Remove the obstruction Other cause Contact your local service department 7 1 5 The deck does not descend or does not descend...

Страница 83: ...ck platform in parked position Cause Solution There is an obstruction Remove the obstruction Cross traffic legs are not positioned correctly Press deck up to let the deck rise Release to let the deck descend into parked position Other cause Contact your local service department 7 1 8 The lip does not move to the vertical parked position Cause Solution There is an obstruction Remove the obstruction...

Страница 84: ...em Other cause Contact your local service department 7 1 12 The door does not close Cause Solution The deck is not in parked position Press deck up to let the deck rise Release to let the deck descend into parked position Other cause Contact your local service department 7 2 Technical support If the tips provided in this chapter do not answer your question or solve your problem please contact your...

Страница 85: ...pport 12 14 Manufacturers details 5 O Operating instructions for the Stertil dock leveller of type SF 1 Operating principle 21 Operation elements 26 OPERATION ELEMENTS 23 OPERATION PROCEDURES 25 Operator panel 23 Operator panel buttons and functions 23 P Pay attention to safety 32 Place the maintenance support 15 32 36 PLS option 22 Preventive maintenance schedule 34 Product identification 20 R RE...

Страница 86: ...es not close 39 The door does not open 39 The lip does not move to the vertical parked position 38 The lip is extended before the deck rises 37 The lip of the dock leveller does not sufficiently extend 37 The optional AR does not function correctly SF service 39 The optional BDC does not function correctly 38 Toe guards 12 13 Trademarks 6 Training levels 18 Troubleshooting 28 TROUBLESHOOTING 36 V ...

Страница 87: ...ungsanpassung 17 2 3 7 Wartungsstütze 17 2 3 8 Warnschilder 18 2 4 Lockout Tagout 19 2 5 Umweltaspekte 20 2 5 1 Entsorgung 20 2 5 2 REACH Erklärung 20 2 6 Ausbildungsniveaus 21 3 Beschreibung 22 3 1 Technische Daten 22 3 2 Produkterkennung 23 3 3 Verwendungszweck 24 3 4 Funktionsprinzip 24 3 4 1 BDC Option 25 3 4 2 AR Option 25 3 4 3 PLS Option 25 3 5 Funktionsbeschreibung 25 4 Bedienelemente 27 4...

Страница 88: ...nd auch wenn der Motor läuft 42 7 1 3 Die Lippe der Überladebrücke wird nicht ausreichend ausgefahren 42 7 1 4 Die Lippe wurde herausgefahren bevor die Plattform angehoben wurde 42 7 1 5 Die Plattform senkt sich nicht oder nicht ausreichend 44 7 1 6 Die Plattform folgt den Bewegungen des LKW nicht 44 7 1 7 Die Plattform stimmt nicht mit der Rampen Plattform in der Parkposition überein Error Bookma...

Страница 89: ...nen ohne dabei zuvor gelieferte Produkte ändern zu müssen Die in diesem Handbuch bereitgestellten Daten entsprechen dem derzeitigen Erkenntnisstand Diese Daten können ohne vorherige Ankündigung künftig geändert werden Für Informationen zu Einstellungen Wartungen oder Reparaturen die nicht in diesem Dokument beschrieben werden wenden Sie sich bitte an die Kundendienstabteilung von Stertil B V Die I...

Страница 90: ...lle anwendbaren örtlichen Gesetze und Bestimmungen eingehalten werden 1 3 Garantie und Haftung Bezüglich der anwendbaren Garantie und Haftung beziehen Sie sich bitte auf die Auftragsbestätigung und die Lieferbedingungen 1 4 Wiederinbetriebnahme Im Falle einer Wiederinbetriebnahme z B bei einem Standortwechsel der Maschine oder einer Eigentumsübertragung sind Sie VERPFLICHTET sich an Stertil und de...

Страница 91: ...Benutzerhandbuch Version B 7 Type SF 1 6 Herstellerangaben Bitte wenden Sie sich an Ihr regionales Service Center wenn Sie Unterstützung benötigen ...

Страница 92: ...34 444 Fax 31 0 512 332 638 E Mail info stertil nl Internet www stertil nl 1 7 Warenzeichen Alle in diesem Handbuch genannten Warenzeichen sind eingetragene Warenzeichen der entsprechenden Lieferanten 1 8 Typografische Konventionen in der Dokumentation In diesem Handbuch werden folgende Symbole verwendet um den Leser auf besonders wichtige Punkte hinzuweisen Handlungen die der Bediener oder Techni...

Страница 93: ...g der Sicherheitsvorschriften Materialschäden verursachen kann d Warnung Warnt vor einer Situation die bei Nichtbeachtung der Sicherheitsvorschriften Personenschäden verursachen kann w Gefahr Warnt vor einer Situation die bei Nichtbeachtung der Sicherheitsvorschriften schwere Personen und oder Materialschäden verursachen kann Fettgedruckter Text wird für Untertitel Überschriften oder für Informati...

Страница 94: ...eil der gesamten Maschinendokumentation Die Dokumentation enthält folgende Dokumente Benutzerhandbuch mitgeliefert Dieses Handbuch enthält alle Informationen die für den Betrieb der Maschine erforderlich sind In diesem Handbuch werden auch bedienerbezogene Wartungsarbeiten beschrieben Installation und Service und Handbuch erhältlich auf Anfrage Dieses Handbuch enthält die für einen reibungslosen B...

Страница 95: ...Aufbau des Handbuchs zusätzliche Informationen hinzugefügt CTL Einheit hinzugefügt 1 12 Handbuchergänzungen Wenn Sie von Stertil Ergänzungen zu diesem Handbuch erhalten müssen diese umgehend in das Handbuch eingefügt werden 1 13 Aufbewahrung des Handbuchs Stertil geht davon aus dass eine Ausgabe dieses Handbuchs den Nutzern Bedienern und Servicetechnikern der Maschine zur Verfügung steht und eine ...

Страница 96: ... Laschenlängen erweiterte Schaltkastenen Der Hersteller ist zur Erstellung der technischen Dokumentation berechtigt Der Unterzeichnete U Bijlsma Direktor zu diesem Zweck autorisiert von Stertil B V erklärt hiermit dass die Überladebrücke wie oben beschrieben folgenden zugrundliegenden Sicherheitsanforderungen entspricht Die Maschinenrichtlinie 2006 42 EC und EN 1398 2009 Die Niederspannungsrichtli...

Страница 97: ...nd Bestimmungen zusätzlich zu den folgenden Sicherheitsanweisungen des Herstellers Weitere Regeln und Richtlinien können unter anderem sein Lokale Gesundheits und Sicherheitsbestimmungen Die von Arbeitsverbänden ausgegebenen Richtlinien Das Maschinenhandbuch muss an der Maschine jederzeit verfügbar sein Lesen Sie die Betriebsanweisungen durch bevor Sie mit der Maschine arbeiten oder Wartungsarbeit...

Страница 98: ...hne dass eine vorhergehende schriftliche Erlaubnis der Herstellers Lieferanten dazu vorliegt Das gilt auch für die Installation und Einstellung von Sicherheitsgeräten 2 2 Gefahren Nur speziell geschulte Techniker die mit den jeweiligen Gesetzen Regeln und Vorschriften vertraut sind dürfen die Maschine warten pflegen und reparieren Halten Sie sich von beweglichen Maschineteilen fern Tragen Sie kein...

Страница 99: ...zu gefährlichen Situationen oder zu Schäden führen kann 2 3 2 Arbeitssicherung Wenn der LKW beim Laden oder Entladen mit einem Gabelstapler auf der Überladebrücke losfährt wird automatisch die Automatische Sicherheitsvorrichtungaktiviert n Hinweis Die Automatische Sicherheitsvorrichtungwird nur aktiviert wenn die Ladung auf der Überladebrücke 25 über der Nennladung liegt Nachdem die Ladung entfern...

Страница 100: ...situation Ergreifen Sie sofort die notwendigen Maßnahmen die im Abschnitt Die Plattform stimmt nicht mit der Rampen Plattform in der Parkposition überein siehe Die Plattform stimmt nicht mit der Rampen Plattform in der Parkposition überein auf Seite 44 beschrieben sind 2 3 4 Zehenschutz Ein Zehenschutz ist an beiden Seiten der Überladebrücke auf der gesamten Länge der Überladebrücke vorhanden Er m...

Страница 101: ...Die Torsionsflexibilität der Plattform ermöglicht es dass die Lasche der Überladebrücke immer in Kontakt mit der Ladeoberfläche bleibt auch wenn die Oberfläche nicht gerade ist 75 125 mm Seitliche Neigungsanpassung Die maximal seitliche Neigungstorsion beträgt 75 125 mm je nach Überladebrückentyp n Hinweis Die maximale Torsionsflexibilität wird durch die Größe der Überladebrücke bestimmt Mit einer...

Страница 102: ...ngsstütze verhindert unbeabsichtigtes Bewegen der Überladebrücke bei Aktivitäten unter der Plattform siehe Anbringen der Wartungsstütze auf Seite 37 2 3 8 Warnschilder Die Überladebrücke hat Sicherheitshinweise n Hinweis Überprüfen Sie regelmäßig ob sich alle Sicherheitshinweise an der richtigen Stelle an der Überladebrücke befinden Wenn Hinweise verschwunden oder beschädigt sind bringen Sie neue ...

Страница 103: ...rz und Stoßgefahr An dem Zehenschutz Bedienung gemäß Anweisungen im Handbuch Eine fehlerhafte Bedienung oder eine fehlerhafte Wartung kann zu Verletzungen oder Schäden führen An der rechten Seite der Brücke an der oberen linken Seite des Zehenschutzes 2 4 Lockout Tagout Lockout Tagout Verfahren sind Sicherheitsmaßnahmen die ein Einschalten der Stromversorgung der Anlage während der Durchführung vo...

Страница 104: ...ACH Erklärung Die REACH Bestimmungen wurden am 01 Juni 2007 eingeführt Der Zweck der REACH Bestimmungen ist die Gewährleistung eines hohen Schutzes der menschlichen Gesundheit und der Umwelt vor chemischen Substanzen Stertil B V stellt Artikel konform mit der aktuellen Überarbeitung der REACH Bestimmungen her und ist nachgeschalteter Anwender chemischer Substanzen Stertil B V ist entschlossen die ...

Страница 105: ...ult Vorgesetzter Mittlere Stufe der Berufsausbildung und nach der Installation der Anlage vom Montagepersonal geschult Wartungstechniker Mittlere Stufe der Berufsausbildung n Hinweis Bei Zweifeln wenden Sie sich immer an die Serviceabteilung Ihres Zulieferers Händlers Für ausführlichere Informationen hierüber oder über weitere mögliche Schulungen wenden Sie sich bitte an Ihren Zulieferer Händler ...

Страница 106: ...ität Siehe Typenschild Netzanschluss 3 x 380 415 V 50 Hz 3 x 220 240 V 50 Hz Option Weitere Netzanschlusskonfigurationen auf Anfrage Steuerspannung 24 V Schallpegel 74 dB A Installation In der Halle Elektromotor IP 54 in Übereinstimmung mit EN 60529 Schaltkasten IP 55 in Übereinstimmung mit EN 60529 Weitere Komponenten IP 55 in Übereinstimmung mit EN 60529 Betriebstemperatur Überladebrücke 40 C bi...

Страница 107: ...ild befindet sich am vorderen Winkel des Unterrahmens Ort des Typenschildes Auf dem Typenschild werden folgende Angaben gemacht Daten Bedeutung TT Typencode DDDD Nominalcode Plattformlänge und breite LL Nominalcode Laschenlänge SSSSSS Seriennummer CCCC Kapazität dynamisch MM YYYY Monat und Jahr der Herstellung PPP Einstellung Überdruckventil NxUUU Netzspannung FF Netzfrequenz ...

Страница 108: ...den werden LKW genannt Wenn die Bezeichnung LKW auftaucht umfasst sie alle möglichen Straßentransportmittel wie LKW Semi Trailer Wechselbrücken und Container 3 4 Funktionsprinzip Die Überladebrücke wird über die Schaltkasten gesteuert Die BasisSchaltkasten hat nur einen Schalter wenn dieser gedrückt gehalten wird 1 Die Plattform steigt zur höchsten Position 2 Die Lasche ist ausgefahren und die Que...

Страница 109: ... durch einmaliges Drücken des AR Schalters in die Parkposition zurück Die Option ist mit SSC und SMC Schaltkastenen erhältlich nicht in Basis Schaltkasten enthalten 3 4 3 PLS Option Der Park Limit Switch PLS erkennt die Parkposition der Brücke und kann als zusätzliches Sicherheitsgerät genutzt werden Mit dem PLS ist es möglich die Steuerung der Tür zu deaktivieren wenn sich die Plattform nicht in ...

Страница 110: ... sich die Brücke selbst einer unterschiedlichen Bodenhöhe des LKW an 1 Plattform mit Zehenschutz 2 Lippe 3 Unterrahmen 4 Vorderer Winkel 5 Hydraulikpumpeneinheit 6 Hauptzylinder 7 Lippenzylinder 8 Wartungsstütze 9 Querverkehrstützbein Hauptkomponenten der Überladebrücke ...

Страница 111: ...tallierten Schaltkasten 4 1 1 Bedienpult Die Überladebrücke wird über die Schaltkasten gesteuert Die BasisSchaltkasten hat nur einen Schalter Seine Funktion wird im Abschnitt Betriebsverfahren auf Seite 31 beschrieben Die erweiterten Schaltkastenen haben weitere Schalter Einige Optionen erfordern einen weitere Schalter auf der Schaltkasten siehe Bedienpult Schaltfläche und Funktionen auf Seite 28 ...

Страница 112: ...ss gesichert werden 2 Plattform aufwärts Für normalen Betrieb drücken Kurz drücken um verschiedene Funktionen zu aktivieren 3 optional Seitenschalter EIN AUS Für Optionen wie aufblasbare Torabdichtung und BDC 4 optional Auto Return Führt die Plattform in die Park Position Ruhezustand zurück 5 optional Tür öffnen schließen anhalten Nur möglich wenn die Tür über die Schaltkasten gesteuert wird 6 opt...

Страница 113: ...iese rote LED leuchtet wenn ein Fehler aufgetreten ist Wenn der Fehler behoben wurde erlischt die LED LED B optional Status LED grün Die grüne LED zeigt an dass die Brücke bedient werden kann LED C optional Status LED grün Die grüne LED zeigt an dass die Tür bedient werden kann ...

Страница 114: ... die Netzanschluss ein indem Sie den Hauptschalter auf 1 stellen 2 Drücken Sie kurz auf Plattform aufwärts um die Steuerspannung zu aktivieren d Warnung Verwenden Sie den Hauptschalter nicht im normalen Betrieb Schalten Sie nur dann auf 0 wenn ein Notfall oder eine Gefahrensituation vorliegt 5 2 2 Neustart nach einen Notstopp oder einem Stromausfall Neustart nach einen Notstopp oder einem Stromaus...

Страница 115: ...egungen des LWK auszugleichen Das kann zu Gefahrensituationen und Schäden an den Geräten führen d Warnung Schalten Sie nur dann auf 0 wenn ein Notfall oder eine Gefahrensituation vorliegt 5 4 Betriebsverfahren 5 4 1 Überladebrücke in Lade Entladeposition bringen Überladebrücke in Lade Entladeposition bringen 1 Maschine einschalten siehe Einschalten auf Seite 30 2 Richten Sie den LKW mit geöffneten...

Страница 116: ...te Lippe auf dem LKW Boden aufliegt 6 Achten Sie darauf dass die Lippe auf der Ladefläche des LKW ausreichend gestützt ist min 100 mm Die seitliche Neigungstorsion ermöglicht es der Überladebrücke sich an einen ungleichmäßig beladenen LKW anzupassen n Hinweis Die maximale Torsionsflexibilität wird durch die Größe der Überladebrücke bestimmt Mit einer größeren Überladebrücke ist eine höhere seitlic...

Страница 117: ...n Position gebracht werden können 2 Plattform aufwärts lösen Die Brücke wird mit vertikaler Lippe auf der Parkposition abgesenkt d Warnung Wenn sich die Plattform nicht in die Parkposition bewegt eine Höhe mit Rampen Plattform verwenden Sie die Brücke nicht weiter bis das Problem behoben ist Siehe Problemlösungen siehe Problemlösung auf Seite 41 für weitere Informationen d Warnung Achten Sie darau...

Страница 118: ...s BDC zu aktivieren 2 Drücken Sie auf Plattform aufwärts Nachdem die Plattform die höchste Position erreicht hat und die Lippe etwas ausgeklappt wurde etwa 5 Grad schaltet sich die Pumpe automatisch ab 3 Plattform aufwärts lösen Die Plattform sinkt zur untersten Position an Die Lippe bleibt hängend unter der Rampenhöhe ...

Страница 119: ...t die sich am nähesten zum Ende des Ladebodens befindet 5 Schalten Sie den BDC Schalter an der rechten Seite der Schaltkasten auf 1 um BDC zu deaktivieren und führen Sie die Plattform zur Parkposition zurück siehe Die Überladebrücke zur Parkposition zurückfahren auf Seite 33 ...

Страница 120: ... sind erforderlich nachdem Störungen aufgetreten sind d Warnung Wartungen dürfen nur von entsprechend befugtem Personal durchgeführt werden d Warnung Halten Sie sich immer an die Warnungsanweisungen n Hinweis Alle beschriebenen Wartungsarbeiten müssen planmäßig erfolgen Aufgrund unterschiedlicher Belastungen und Umgebungsbedingungen kann es sein dass manche Teile mehr oder weniger Wartungsarbeiten...

Страница 121: ...t vorhanden sind d Warnung Es liegt in der Verantwortung der Verantwortlichen für die Vorbereitung und Überwachung von Arbeiten die hierfür erforderlichen Maßnahmen zu treffen um sichere Arbeitsbedingungen zu gewährleisten d Warnung Verwenden Sie bei Reinigungsarbeiten unter der Plattform der Überladebrücke immer die Wartungsstütze Die Wartungsstütze verhindert unbeabsichtigtes Bewegen der Überlad...

Страница 122: ...tütze Zum Entfernen der Wartungsstütze 1 Halten Sie Plattform aufwärts gedrückt um die Plattform auf die höchste Position bei vollständig ausgefahrener Lippe zu fahren 2 Wenn sich die Plattform an der höchsten Position befindet schalten Sie den Hauptschalter auf 0 Die Plattform bleibt in der höchsten Position 3 Plattform aufwärts lösen 4 Entfernen Sie den Federstecker und den Sicherungsstift 5 Sch...

Страница 123: ...artungsabläufe die in den folgenden Abschnitten beschrieben werden Intervall Aktion Referenz Täglich Bediener Inspektion auf sichtbaren Schäden Sichtprüfung auf Seite 39 Wöchentlich Bediener Prüfung aller Funktionen der Überladebrücke auch der wenig genutzten Jährlich Servicetechniker Eine jährliche Überprüfung Service Anleitung n Hinweis Es wird empfohlen einen Wartungsvertrag abzuschließen Wende...

Страница 124: ...chen Teile Plattform Lippe Bewegbares Zehenschutzblech CTL Einheit 6 3 2 Schmierung c Achtung Versuchen Sie nicht Öl oder Fett an Komponenten anzubringen die im Wartungsablauf oder plan nicht erwähnt sind Wenden Sie sich an Ihren Lieferanten Händler wenn Sie fehlerhafte Angaben zur Schmierung einzelner Teile bemerken 6 3 3 Reinigung Reinigen des Scharniers und der Grube d Warnung Verwenden Sie bei...

Страница 125: ...arstellen und zu Schäden an den Waren führen Bitte wenden Sie sich für die korrekten Einstellungen an Ihren Händler Lieferanten 7 1 1 Die Plattform wird nicht angehoben wenn Plattform aufwärts gedrückt wird weil der Motor nicht läuft Ursache Lösung Kein Hauptstrom Schalten Sie den Hauptstrom ein Keine Netzspannung vorhanden Wenden Sie sich an Ihre Serviceabteilung vor Ort Die Tür ist nicht offen o...

Страница 126: ... Lippe der Überladebrücke wird nicht ausreichend ausgefahren Ursache Lösung Es befindet sich ein Hindernis im Weg Entfernen Sie das Hindernis Der optionale BDC ist immer noch eingeschaltet Die Lippe kann nicht ganz ausgeklappt werden BDC ausschalten Anderer Grund Wenden Sie sich an Ihre Serviceabteilung vor Ort 7 1 4 Die Lippe wurde herausgefahren bevor die Plattform angehoben wurde Ursache Lösung...

Страница 127: ...Benutzerhandbuch Version B 43 Type SF Anderer Grund Wenden Sie sich an Ihre Serviceabteilung vor Ort ...

Страница 128: ...wegungen des LKW nicht Ursache Lösung Es befindet sich ein Hindernis im Weg Entfernen Sie das Hindernis Das Sicherheitsventil im Hauptzylinder ist blockiert Drücken Sie ein oder mehrere Male kurz auf Plattform aufwärts Es gab einen Stromausfall 1 Schalten Sie den Hauptschalter auf die Position 1 2 Drücken Sie kurz auf Plattform aufwärts um die Steuerspannung zu aktivieren Anderer Grund Wenden Sie ...

Страница 129: ...icht an die vertikale Park Position Ursache Lösung Es befindet sich ein Hindernis im Weg Entfernen Sie das Hindernis Anderer Grund Wenden Sie sich an Ihre Serviceabteilung vor Ort 7 1 9 Das optionale BDC funktioniert nicht richtig Ursache Lösung Der optionale BDC Schalter befindet sich in der Position AUS Schalten Sie den BDC Schalter in die Position EIN Anderer Grund Wenden Sie sich an Ihre Servi...

Страница 130: ...ließen Ursache Lösung Die Plattform befindet sich nicht in der Parkposition Drücken Sie auf Plattform aufwärts damit die Plattform abgehoben wird Lösen Sie die Taste damit sich die Plattform in die Parkposition bewegen kann Anderer Grund Wenden Sie sich an Ihre Serviceabteilung vor Ort 7 2 Technischer Support Bitte wenden Sie sich an Ihren örtlichen Stertil Kundendienst oder Lieferanten falls die ...

Страница 131: ... die Plattform angehoben wurde 39 Die Plattform folgt den Bewegungen des LKW nicht 40 Die Plattform hebt sich nicht ausreichend auch wenn der Motor läuft 39 Die Plattform senkt sich nicht oder nicht ausreichend 39 Die Plattform stimmt nicht mit der Rampen Plattform in der Parkposition überein 13 40 Die Plattform wird nicht angehoben wenn Plattform aufwärts gedrückt wird weil der Motor nicht läuft ...

Страница 132: ...T 10 Sicherheitseinrichtungen 12 Sicherheitsschaltkreis 12 14 Sichtprüfung 36 Start 27 Steuerkomponenten 21 24 T Technische Daten 19 Technischer Support 4 42 Typografische Konventionen in der Dokumentation 6 U ÜBER DIESES HANDBUCH 4 Umweltaspekte 17 35 V Versionsverlauf 8 Verwendungszweck 21 W Warenzeichen 6 Warnschilder 12 16 Wartungsstütze 12 15 Wiederinbetriebnahme 5 Z Zehenschutz 12 13 Zeitplä...

Страница 133: ...15 2 3 5 Circuit de sécurité 15 2 3 6 Torsion due à l inclinaison latérale 16 2 3 7 Béquille de maintien 17 2 3 8 Signes de sécurité 18 2 4 Procédure de verrouillage marquage 19 2 5 Aspects environnementaux 19 2 5 1 Élimination 19 2 5 2 La déclaration REACH 19 2 6 Niveaux de formation 20 3 Description 21 3 1 Spécifications techniques 21 3 2 Identification du produit 22 3 3 Utilisation prévue 23 3 ...

Страница 134: ...ns 40 7 1 1 Le tablier ne monte pas lorsque le bouton monter tablier est enfoncé parce que le moteur ne fonctionne pas 40 7 1 2 Le tablier ne monte pas suffisamment pourtant le moteur fonctionne 41 7 1 3 La lèvre du niveleur de quai ne se prolonge pas suffisamment 41 7 1 4 La lèvre s est prolongée avant la montée du tablier 41 7 1 5 Le tablier ne descend pas ou ne descend pas suffisamment 41 7 1 6...

Страница 135: ...V Les informations contenues dans ce document concernent uniquement l usage du produit prévu par le fabricant Si les produits leurs pièces ou les procédures qui s y rapportent sont utilisés de toute autre façon que celle décrite dans ce manuel une validation doit être obtenue concernant la justesse et la pertinence de ce nouveau type d utilisation Aucun droit ne pourra découler du contenu de ce ma...

Страница 136: ...la machine ou d un transfert de propriété vous devez contacter le Stertil et le sous traitant pour examiner les procédures et les conditions générales le contrat d entretien etc de sorte qu une fois la remise en service le bon fonctionnement et la sécurité de la machine soient garantis Si le Stertil n est pas impliqué dans une remise en service alors il n est pas responsable des réclamations de ti...

Страница 137: ...32 638 Courriel info stertil nl Internet www stertil nl 1 7 Marques commerciales Toutes les marques commerciales mentionnées dans ce manuel sont des marques commerciales déposées de leurs fournisseurs 1 8 Conventions dans le document Dans ce manuel les symboles suivants sont utilisés pour attirer l attention du lecteur sur des points particulièrement importants Les actions que l opérateur ou l ing...

Страница 138: ...structions 1 9 À qui est destiné ce manuel Ce manuel est destiné aux opérateurs du niveleur de quai de type SF Tous les opérateurs du niveleur de quai doivent lire attentivement les chapitres suivants et suivre scrupuleusement les instructions Après lecture de ce manuel vous pourrez le consulter à tout moment La table des matières et l index vous permettront de retrouver des informations précises ...

Страница 139: ...1 Historique de la version Nous avons mis tout en oeuvre pour que ce manuel soit aussi correct et complet que possible Si vous trouvez des erreurs ou si des informations font défaut signalez le à Stertil Veuillez signaler toute erreur ou omission à Stertil En outre pendant la durée de vie de la machine des améliorations techniques peuvent nous conduire à réviser ce manuel C est alors à la discréti...

Страница 140: ...SF 1 13 Rangement du manuel Le Stertil s attend à ce qu une copie de ce manuel soit accessible à l utilisateur aux opérateurs de la machine et une copie devrait toujours être disponible lors de l utilisation ou de l entretien de la machine ...

Страница 141: ...itch PLS plusieurs longueurs de lèvres boîtiers de commande évolués Le fabricant est habilité à constituer la documentation technique Le soussigné U Bijlsma directeur habilité à cette fin par Stertil B V déclare par la présente que le niveleur de quai décrit ci dessus est conforme aux exigences de sécurité fondamentales décrites par La directive Machines 2006 42 CE et EN 1398 2009 La directive Bas...

Страница 142: ...s Respectez toujours les procédures protocoles et autres règles lois et régulations locales portant sur la sécurité et la santé ainsi que les consignes de sécurité indiquées par le fabricant Respectez toujours les procédures protocoles et autres règles lois et régulations locales portant sur la sécurité et la santé ainsi que les consignes de sécurité indiquées par le fabricant Lisez régulièrement ...

Страница 143: ... Effectuez tous les travaux sur la machine comme décrit dans le manuel Ne démarrez ou n utilisez jamais une machine endommagée Assurez vous toujours que la machine est complète avant de la faire fonctionner Le fonctionnement de la machine avec des composants manquants peut causer de graves dommages Respectez toutes les indications de danger ou de sécurité Remplacez immédiatement toutes les signes ...

Страница 144: ...rité Le niveleur de quai dispose des dispositifs de sécurité suivants Interrupteur d arrêt d urgence à la page 13 Dispositif automatique de sécurité à la page 14 Pieds de trafic transversal à la page 14 Protège pieds à la page 15 Torsion due à l inclinaison latérale à la page 16 Circuit de sécurité à la page 15 Béquille de maintien à la page 16 Signes de sécurité à la page 18 d Avertissement Il es...

Страница 145: ...st activé automatiquement n Remarque Le dispositif automatique de sécurité s active uniquement si la charge réelle sur le niveleur de quai excède de 25 la charge nominale Une fois que la charge a été retirée réinitialisez le niveleur de quai en appuyant brièvement sur le bouton de commande d Avertissement Lorsque le dispositif automatique de sécurité a été activé dans une situation d urgence faite...

Страница 146: ...e pieds sont installés sur la longueur totale de chaque côté du niveleur de quai Ils réduisent au minimum le risque de happage ou d amputation des personnes se trouvant à proximité du niveleur de quai Les protège pieds sont signalés par des bandes alternantes noires et jaunes pour optimiser leur visibilité et minimiser les risques de trébuchement Protège pieds 2 3 5 Circuit de sécurité Le niveleur...

Страница 147: ...hargement même lorsque la surface de chargement n est pas de niveau 75 125 mm Torsion due à l inclinaison latérale La torsion maximale due à l inclinaison latérale est de 75 à 125 mm selon le type de niveleur de quai n Remarque La flexibilité maximale en torsion est définie par la taille du niveleur de quai Plus le niveleur de quai est important plus la torsion due à l inclinaison latérale est pos...

Страница 148: ...ent recommandé aux opérateurs de ne pas se rendre sous le niveleur de quai c Attention Si une situation exige l intervention sous le niveleur de quai confiez la tâche à un technicien qualifié et utilisez toujours la béquille de maintien Béquille de maintien La béquille de maintien évite les mouvements imprévisibles du niveleur de quai pendant les travaux effectués en dessous voir la section Mise e...

Страница 149: ...utilisées sur ou dans le niveleur de quai L emplacement de chaque signe est indiqué Pictogramme Description Emplacement Utilisez toujours la béquille de maintien pour procéder à des réparations En dessous du longeron du tablier du côté droit de la béquille de maintien Obstacle risque de trébucher de chuter ou de rentrer en collision Sur les protège pieds Utilisez la machine selon les instructions ...

Страница 150: ...urée de vie opérationnelle le propriétaire et ou l utilisateur est responsable du démontage de la machine et de l élimination de ses composants en accord avec les lois et les réglementations locales en vigueur 2 5 2 La déclaration REACH L ordonnance européenne REACH est entrée en vigueur le 1er juin 2007 Cette ordonnance a pour objectif d assurer un degré élevé de protection de la santé humaine et...

Страница 151: ...Niveau intermédiaire de l enseignement secondaire professionnel et formé après l installation de la machine par le personnel qui a effectué l installation Ingénieur de maintenance Niveau intermédiaire de l enseignement secondaire professionnel n Remarque En cas de doute veuillez toujours vous adresser au Département d entretien de votre fournisseur distributeur Pour en savoir plus à ce sujet et su...

Страница 152: ...ignalétique L alimentation électrique 3 x 380 415V 50 Hz 3 x 220 240V 50 Hz en option D autres configurations d alimentation sont disponibles à la demande Tension de commande 24 V Niveau sonore 74 dB A Installation À l intérieur Moteur électrique IP 54 conformément à EN 60529 Boîtier de commande IP 55 conformément à EN 60529 Autres composants IP 55 conformément à EN 60529 Température de fonctionne...

Страница 153: ...nt de la plaque signalétique Les informations suivantes sont indiquées sur la plaque signalétique Données Signification TT Code du type DDDD Code de la longueur et de la largeur nominale du tablier LL Code de la longueur nominale de la lèvre SSSSSS Numéro de série CCCC Capacité dynamique MM YYYY Mois et année de fabrication PPP Réglage de la pression de la soupape de surpression NxUUU Tension du r...

Страница 154: ...nsemble du matériel des transports routiers tels que les camions les semi remorques les caisses mobiles et les conteneurs 3 4 Principes de fonctionnement La commande du niveleur de quai passe par le boîtier de commande Le boîtier de commande de base est équipé d un seul bouton s il est enfoncé continuellement 1 Le tablier montera jusqu à la position la plus élevée 2 La lèvre se prolonge et les béq...

Страница 155: ...ment ou le déchargement avec une seule touche de bouton AR Cette option est disponible avec les boîtiers de contrôle SSC et SMC pas avec le boîtier de commande de base 3 4 3 PLS en option Le Park Limit Switch PLS interrupteur détecteur de position détecte la position de stationnement du niveleur de quai et peut être utilisé en tant que dispositif de sécurité supplémentaire Le PLS permet de désacti...

Страница 156: ... le niveleur de quai s ajuste par rapport aux mouvements du plancher du camion 1 Tablier équipé de protège pieds 2 Lèvre 3 Châssis 4 Traverse 5 Pompe hydraulique 6 Vérin principal 7 Vérin pour la lèvre 8 Béquille de maintien 9 Pieds de trafic transversal Principaux composants du niveleur de quai ...

Страница 157: ...ommande du niveleur de quai passe par le boîtier de commande Le boîtier de commande de base est équipé d un seul bouton Sa fonction est décrite dans Procédures de fonctionnement à la page 30 Les boîtiers de commande évolués sont équipés de boutons poussoirs supplémentaires Certaines options nécessitent un bouton supplémentaire voir la section Fonctions et commandes de la console de l opérateur à l...

Страница 158: ...Manuel d utilisation Version B 27 Type SF 4 1 2 Fonctions et commandes de la console de l opérateur ...

Страница 159: ... et le BDC 4 en option Retour auto Replace le tablier en position de stationnement au repos 5 en option Porte ouverte fermée arrêt Uniquement possible lorsque la porte est commandée par le boîtier de commande 6 en option Lumières de trafic interne Signaux indiquant si le chargement et le déchargement sont autorisés porte ouverte niveleur de quai dans le camion ou non DEL A en option DEL de statut ...

Страница 160: ...mez l alimentation secteur en positionnant l interrupteur principal sur 1 2 Appuyez un court instant sur le bouton monter tablier pour activer le courant de commande d Avertissement N utilisez pas l interrupteur principal dans le cadre d une opération normale Positionnez l interrupteur uniquement sur 0 en cas d urgence ou dans une situation dangereuse 5 2 2 Démarrage après un arrêt d urgence ou un...

Страница 161: ...s le cadre d une opération normale du niveleur de quai Le niveleur de quai ne pourra plus suivre les mouvements verticaux du camion Ceci pourrait provoquer des situations dangereuses ou des dommages matériels d Avertissement Placez uniquement l interrupteur sur 0 en cas d urgence ou en présence d une situation dangereuse 5 4 Procédures de fonctionnement 5 4 1 Placer le niveleur de quai dans une po...

Страница 162: ... ce que le camion ne puisse s écarter du quai pendant l opération de chargement ou de déchargement 5 Relâchez le bouton monter tablier Le tablier descendra par gravité jusqu à ce que la lèvre prolongée se repose sur le plancher du camion 6 Assurez vous que la lèvre a assez d assise min 100 mm sur le plancher de chargement du camion La torsion due à l inclinaison latérale permet au niveleur de quai...

Страница 163: ...quai afin que les pieds de trafic transversal puissent se mettre en place 2 Relâchez le bouton monter tablier Le niveleur de quai redescendra dans la position de stationnement et la lèvre se mettra en position verticale d Avertissement Si le tablier ne revient pas dans la position de stationnement de niveau avec la plateforme du quai n utilisez plus le niveleur de quai jusqu à ce que le problème s...

Страница 164: ...tiver le BDC 2 Appuyez sur le bouton monter tablier la pompe s arrête automatiquement lorsque le tablier atteint la position la plus élevée et que la lèvre s est légèrement prolongée d environ 5 degrés 3 Relâchez le bouton monter tablier Le tablier descendra jusqu à la position la plus basse La lèvre reste pendante sous le niveau du quai ...

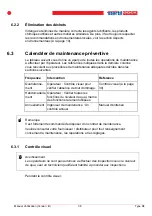
Страница 165: ...s de l extrémité du plancher de chargement 5 Placez l interrupteur du BDC qui se trouve du côté droit du boîtier de commande sur 1 pour désactiver le BDC et placez le niveleur de quai en position de stationnement voir la section Replacer le niveleur de quai en position de stationnement à la page 32 ...

Страница 166: ...ce corrective se fait lorsque les dysfonctionnements ont eu lieu d Avertissement Seul le personnel agréé est autorisé à effectuer les travaux de maintenance d Avertissement Suivez toujours les consignes de maintenance n Remarque Tous les travaux de maintenance décrits doivent être réalisés en respectant le calendrier Compte tenu des différences de charge d utilisation et des facteurs environnement...

Страница 167: ...s les dispositifs de sécurité sont maintenus en place d Avertissement Il est de la responsabilité de ceux qui sont en charge de la préparation et ou de la supervision des travaux de prendre les mesures nécessaires pour assurer des conditions de travail sûres d Avertissement Utilisez toujours la béquille de maintien pour procéder au nettoyage en dessous du tablier du niveleur de quai La béquille de...

Страница 168: ... maintien Enlever la béquille de maintien Pour enlever la béquille de maintien 1 Appuyez continuellement sur le bouton monter tablier pour placer le tablier dans la position la plus élevée avec la lèvre entièrement prolongée 2 Lorsque le tablier atteint la position la plus élevée placez l interrupteur principal sur 0 Le tablier restera alors dans cette position 3 Relâchez le bouton monter tablier ...

Страница 169: ...dans les sections suivantes Fréquence Intervention Référence Quotidienne ment Opérateur Contrôle visuel pour vérifier l absence de tout dommage Contrôle visuel à la page 38 Hebdomadaire ment Opérateur Vérifier toutes les fonctions du niveleur de quai même des fonctions rarement utilisées Annuellement Ingénieur de maintenance Un contrôle annuel Manuel d entretien n Remarque Il est fortement recomma...

Страница 170: ...obiles tablier lèvre lamelles coulissantes béquilles 6 3 2 Lubrification c Attention N appliquez pas d huile ou de graisse sur une pièce qui n est pas citée dans la procédure de maintenance ou dans le calendrier Contactez votre fournisseur distributeur en cas d anomalie lors de la lubrification d une pièce 6 3 3 Nettoyage Nettoyez les charnières et la fosse en cas de besoin d Avertissement Utilise...

Страница 171: ...vent provoquer des blessures corporelles ou des dommages matériels Consultez votre distributeur fournisseur pour obtenir les réglages corrects 7 1 1 Le tablier ne monte pas lorsque le bouton monter tablier est enfoncé parce que le moteur ne fonctionne pas Cause Solution Absence d alimentation électrique Branchez l alimentation électrique Absence de tension du réseau Contactez le service technique ...

Страница 172: ...DC en option est toujours activé La lèvre ne se prolonge pas entièrement Mettez le BDC hors tension Autre cause Contactez le service technique local 7 1 4 La lèvre s est prolongée avant la montée du tablier Cause Solution Le tablier est chargé Enlevez la charge du tablier Il y a un obstacle Enlevez l obstacle Autre cause Contactez le service technique local 7 1 5 Le tablier ne descend pas ou ne de...

Страница 173: ...ourant de commande Autre cause Contactez le service technique local 7 1 7 Le tablier n est pas au même niveau que la plateforme du quai lorsqu il est en position de stationnement Cause Solution Il y a un obstacle Enlevez l obstacle Les pieds de trafic transversal ne sont pas positionnées correctement Appuyez sur le bouton monter tablier pour faire monter le tablier Relâchez le bouton pour permettr...

Страница 174: ...Manuel d utilisation Version B 43 Type SF ...

Страница 175: ...s Cause Solution Absence d alimentation électrique Branchez l alimentation électrique Absence de tension du réseau Contactez le service technique local S il est installé le dispositif de blocage pour camionsest il employé Mettez le dispositif de blocage pour camionsen œuvre Autre cause Contactez le service technique local 7 1 12 La porte ne se ferme pas Cause Solution Le tablier n est pas en posit...

Страница 176: ...pitre ne répondent pas à votre question ou ne résolvent pas votre problème contactez votre service après vente ou le distributeur local du Stertil Pour une liste complète des distributeurs et des services après vente locaux du Stertil veuillez consulter le site Web du Stertil sur Internet www stertil nl ...

Страница 177: ... Enlever la béquille de maintien 37 Erreurs fréquentes et solutions 40 F Fonctions et commandes de la console de l opérateur 26 27 G Garantie et responsabilité 5 H Historique de la version 8 I Identification du produit 22 INSPECTION ET ENTRETIEN 35 Interrupteur d arrêt d urgence 13 Introduction 29 L La déclaration REACH 19 La lèvre du niveleur de quai ne se prolonge pas suffisamment 41 La lèvre ne...

Страница 178: ...e quai dans une position de chargement déchargement 30 PLS en option 24 Principes de fonctionnement 23 Procédure de verrouillage marquage 19 Procédures de fonctionnement 26 30 PROCÉDURES OPÉRATIONNELLES 29 Protège pieds 13 15 Q Quand vous effectuez la maintenance 36 R Rangement du manuel 9 Remise en service 5 Replacer le niveleur de quai en position de stationnement 30 32 34 Résolution des problèm...

Страница 179: ......

Страница 180: ...Manufactured by STERTIL B V P O Box 23 9288 ZG Kootstertille Holland Telephone 31 0 512334444 Telefax 31 0 512332099 Website www stertil nl Email dp stertil nl ...

Отзывы: