PP500 LED lighting controllers - User Manual
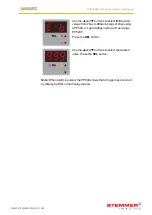
Use the
p
and
q
buttons to select
SPu
and
press the
SEL
button.
bri
is displayed. Press the
SEL
button.
Use the
p
and
q
buttons to set the intensity
from 1% to 999%, and press the
SEL
button.
deL
is displayed. Press the
SEL
button to set
up the delay time as described in
Section 9.6,
Setting pulse delay and width times
.
PUL
is displayed. Press the
SEL
button to set
up the pulse width time as described in
Section
9.6, Setting pulse delay and width times
.
—
26
—
PP500 LED lighting controllers - User Manual
Your PP500 is ready to use.
9.6
Setting pulse delay and width times
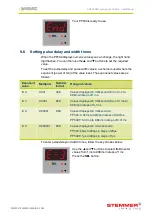
When the PP500 displays numeric values you can change, the right hand
digit flashes. You can then use the
p
and
q
buttons to set the required
value.
To set the pulse delay and pulse width values, a scheme is used where the
exponent (power of ten) of the value is set. The exponenet values are as
follows:
Exponent
value
Multiplier
Number
format
Range of values
E-3
0.001
999.
Values displayed in milliseconds from 1ms to
999ms in steps of 1ms
E-4
0.0001
99.9
Values displayed in milliseconds from 0.1ms to
99.9ms in steps of 0.1ms
E-5
0.00001
9.99
Values displayed in milliseconds:
PP500: 0.02ms to 980ms in steps of 0.02ms
PP500F: 0.01ms to 9.99ms in steps of 0.01ms
E-6
0.000001
999.
Values displayed in microseconds:
PP500: 20μs to 980μs in steps of 20μs
PP500F: 1μs to 999μs in steps of 1μs
To enter pulse delay and width times, follow the key strokes below:
Use the
p
and
q
buttons to select
E-3
to enter
values from 1ms to 999ms in steps of 1ms.
Press the
SEL
button.
—
27
—
WWW.STEMMER-IMAGING.COM


