-
2
-
-
2
-
TABLE OF CONTENTS
THE 360° COMFORT EXPERIENCE
3
COMPATIBILITY
4
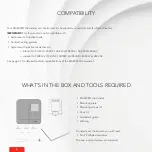
WHAT’S IN THE BOX AND TOOLS REQUIRED
4
WARNING
5
Where to install your MAESTRO controller
•
thermostat?
6
Where to install your MAESTRO controller
•
thermostat
7
Read this guide and watch the installation video
7
INSTALLING THE MAESTRO THERMOSTAT
8
1
Cut off power supply
8
2
Remove existing thermostat
9
3
Secure the MAESTRO thermostat mounting plate
10
4
Connect the wires
11
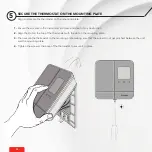
5
Secure the thermostat on the mounting plate
12
6
Turn power back on
13
7
Set-up basic options on first start
14
USING THE THERMOSTAT
15
Thermostat interface
15
Navigating the advanced menus
16
Advanced menus
16
Navigating the °STELPRO menu
17
Setting the heating mode
17
Activer le mode vestibule
17
Connecting a thermostat to the controller
•
thermostat
18
With the MAESTRO app
18
Without the MAESTRO app
19
Connecting the thermostat to another Zigbee network
20
Setting the temperature setpoint
20
Displaying ambient relative humidity or outdoor temperature
21
Choosing the temperature display unit (°C or °F)
21
Activating or deactivated proximity detection
21
Locking or unlocking the keypad
22
Activating or deactivating open window detection
22
Resetting the thermostat
22
THE 360° COMFORT EXPERIENCE
23
Make the most of your MAESTRO
23
Control your comfort from wherever you are
23
Group rooms
23
Create personalized activities
23
Anticipated start
23
Geofencing: Comfort follows you wherever you go
23
Track your energy consumption
23
THERMOSTAT TROUBLESHOOTING
24
Common problems
24
THERMOSTAT DEFAULT VALUES
26
TECHNICAL SPECIFICATIONS
27
Electrical data
27
Temperature display
27
Connectivity
27
Storage and operating conditions
27
WARRANTY
28


