12
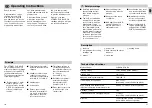
Getting Started
1
2
3
4
5
6
7
8
9
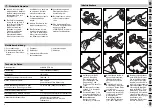
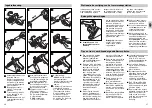
1
Detach heating head
from handle. To do this,
release bayonet catch
by pulling trigger
and
turning heating head.
2
Insert the enclosed feed
rod
into the handle.
3
Push the feed rod
further into the handle
to the stop point.
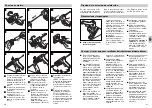
4
Insert
sealed
cartridge
into heating head
.
5
Reassemble heating
head and handle (turn
bayonet catch so that it
clips into place.).
6
Plug in power cord
in
order to supply base
station
with mains
power. Green diode will
light up.
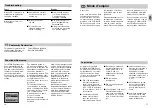
7
Insert gun into contact
slots on base station
.
Glue will now be heated
up.
Status indicator:
RED: heating up
(approx. 10–13 minutes).
8
Status indicator:
GREEN: Glue has
reached bonding tem-
perature. Remove hot-
melt glue gun from
base station
.
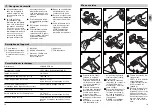
9
Unscrew cap
(store
in handle
). Pull trig-
ger to commence glu-
ing. Feed rod will ad-
vance and press against
cartridge plonger. Glue
will emerge from
nozzle.
13
Important Information
Tips on achieving particularly good glueing results
Perfect operation will
only be ensured by using
genuine STEINEL glue
cartridges.
The materials to be
glued should be free of
grease, dry and absolu-
tely clean (clean with a
paper tissue, for exam-
ple).
Important:
do not
use any solvents or simi-
lar liquid cleaners.
Furthermore, it is recom-
mended to roughly sand
the surfaces to be glued,
particularly for treated
metals such as anodised
aluminium, galvanized
metal for example.
When glueing glass, the
bond should not be
exposed continuously to
direct sunlight (UV radia-
tion). (Tape over the
back of the bond, if
necessary.)
The surfaces being
glued together should
be at room temperature.
Before applying glue to
cold materials, e.g. tiles,
marble, etc., warm them
(with a hot air gun, for
instance) so that glue
does not harden too
quickly and shorten
working time.
Fix heavy items in
position immediately
after glueing (e.g. using
adhesive tape).
Optimum bond strength
is achieved by mating up
the two contact surfaces
immediately after apply-
ing glue.
Hardened, excess glue
can easily be removed
with a knife.
Bonds can be separated
again by applying heat
(130 °C, e.g. using a hot
air gun).
Apply the glue in dabs or
beads. Do not spread.
Unplug in the event of
prolonged application
interruptions (over
60 minutes) and replace
screw cap.
Tightly sealing the
cartridge after use will
prolong the life of the
PUR hot-melt adhesive.
The load-bearing
capacity of the bond
will essentially depend
on the strength of the
substrate (e.g. when
glueing on wallpaper).
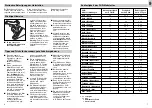
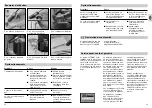
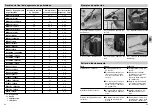
Loosening cartridge
screw cap
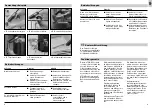
Mounting base station in a fixed position
If you wish, you can mount
the base station on a firm
base surface.
Two recessed holes are pro-
vided underneath the base
station for this purpose:
Spacing between screws
(2.9 mm dia.): 38 mm.
If you are unable to
remove the screw cap
with your bare hands
after several times of use
because it has become
stuck, it can be released
using the receptacle in
the base station (see
diagram).
Important:
You must
first heat up the hot melt
adhesive in the base
station.
Always seal cartridge
firmly when heating and
after use.
Before heating a
new
cartridge, allow heating
head to cool down.
If cartridge and heating
head accidentally stick
together, they can be
separated again
after
they are warmed up.
Clean glue residue from
heating unit by mechani-
cal means.
GB

