background image

– 30 –

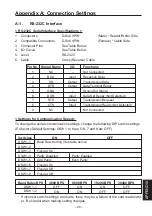
Appendix B: Removing / Installing Interface Board 

B-1. Removing

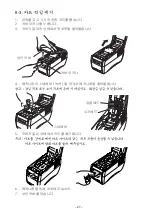
1.  Turn off the power switch.  Then, unplug the power cord from the outlet.  

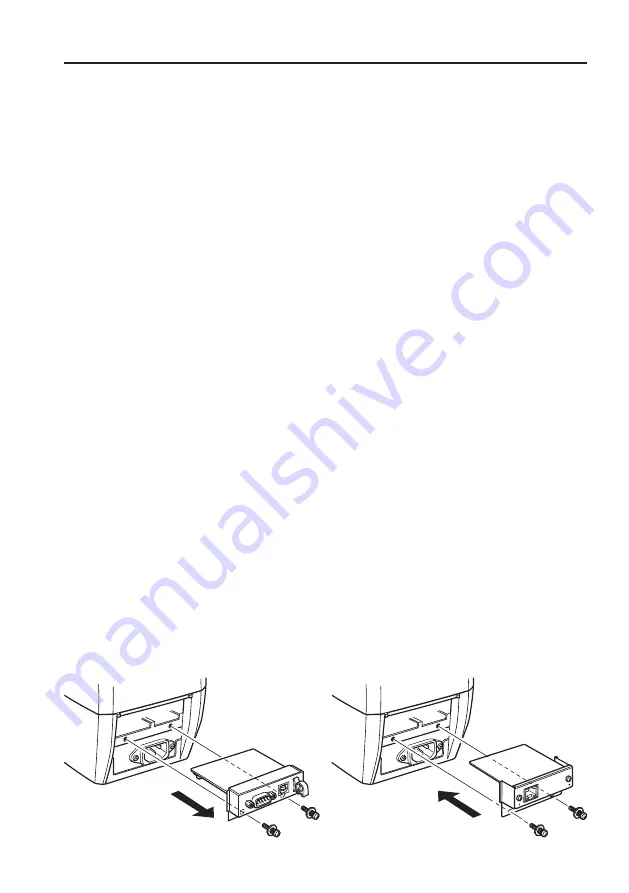
2.  Remove the two screws as shown in the figure below.  

3.  Pull the interface board in the direction of the arrow to remove it.  

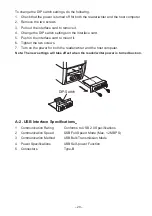
B-2. Installing

1.  Insert the interface board to the reader/writer.  


Note: Firmly  insert  so that  the  reader/writer  connector  and  the  interface  board 

connector are securely connected.


2.  Tighten the two screws to fasten the interface board.  
3.  After connecting the interface board, run a test print using the following steps be-

fore connecting the interface cable.  If the connection is good, the model of the con-

nected I/F will be printed.  


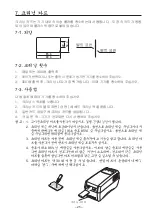
< How to Run a Test Print > 


Turn on the power while pressing the CLEANING switch.  The buzzer will ring and 

the green status lamp will flash.  Press the CLEANING switch again. The status 

lamp will switch to orange and will flash.  Insert a card in this state.  This will cause 

the  system  to  automatically  write  data  to  the  magnetic  stripe  and  to  read  data 

therefrom.  The test results will be printed, and the card will be discharged.  The 

results of reading and writing to the magnetic stripe, the setting rank of the erase/

print heads, the status of the EEPROM setting, the type of interface being used 

and the ROM version are printed in order for the test results.  


Use a PET type card with the predetermined magnetic stripe on both sides to run 

a test print.  


When performing a test print, magnetic data for the test is written to the card.  


Use a card whose magnetic stripe can be overwritten without causing a problem.  


(Use a card that is right for the print settings on the card reader/writer.)  

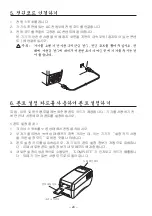
Note:  A USB cable is not an accessory part.  Purchase one that meets specifications.

Содержание TCP400 SERIES

Страница 1: ...THERMAL RE WRITABLE CARD READER WRITER TCP400 SERIES User s Manual...

Страница 2: ...ations Radio Interference Regulations This digital apparatus does not exceed the Class A limits for radio noise emissions from digital appara tus set out in the Radio Interference Regulations of the C...

Страница 3: ...ay 1989 This product has been designed and manufactured in accordance with the International Standards EN 61000 6 3 10 2001 and EN 55024 09 98 following the provisions of the Electro Magnetic Compat i...

Страница 4: ...power from a circuit to which electrical devices that generate electrical noise are connected 8 Connect a grounding wire to use this device safely 9 Allow plenty of space around the reader writer for...

Страница 5: ...17 Do not expose cards to direct sunlight or fluorescent lights for extended periods of time 18 If a card is to be reprinted allow for at least three minutes between prints When printing repeatedly to...

Страница 6: ...host computer via a cable 6 AC Inlet Connects to accessory power cord 7 Cleaning Switch Press the cleaning switch while turning the power on Insert a cleaning card dampened with alcohol to clean the r...

Страница 7: ...to the interface cable 4 Tighten the left and right screws on the connector 4 2 Mounting the USB Interface Cable 1 Affix the ferrite core onto the USB cable as shown in the illustration below and make...

Страница 8: ...t the grounding terminal to a metal portion such as an outlet that has a grounding point on a ground in the vicinity to use this reader writer safely Caution We recommend that you unplug the reader wr...

Страница 9: ...tions below Procedures to Set Fonts 1 Turn the power ON while pressing the Cleaning switch 2 The buzzer will ring and the green status lamp will flash This indicates that the reader writer has entere...

Страница 10: ...t cleaning cards Using bent cards can cause them to be come jammed 2 A cleaning fluid is not supplied with the unit Therefore an optional clean ing fluid or a commercially available ethanol 85 minimum...

Страница 11: ...other user card incorrectly Head is dirty Clean using a cleaning card Composing system is not operating normally Contact your dealer Reader writer error 8 2 Trouble when Operating Symptom Possible Cau...

Страница 12: ...h the thermal head or erasing head There is the danger of getting burned 5 Remove the card while the cover is open Caution Trying to remove the card by forcibly pulling it will damage internal parts s...

Страница 13: ...1 11 2 13 3 13 4 14 5 15 6 16 7 16 8 18 28...

Страница 14: ...11 1 1 1 1 2 3 4 5 6 7 8 9 1 2 1 Star 2 3 4 5 6 7...

Страница 15: ...12 8 9 10 11 12 13 14 15 16 17 18 19 20 21 22 23...

Страница 16: ...13 2 1 2 3 4 5 6 3 6 5 4 3 7 2 1 1 2 3 4 5 6 7...

Страница 17: ...14 4 RS 232C USB 4 1 RS 232C 1 2 3 4 4 2 USB 1 USB 2 USB USB 3 USB USB 4...

Страница 18: ...15 5 1 2 3...

Страница 19: ...16 6 1 2 3 4 COMPLETE 7 7 1 85 6 89 6 22 0 54 0...

Страница 20: ...17 7 2 1 300 2 3 300 7 3 1 2 3 4 1 2 85 3 4 85 5 30...

Страница 21: ...18 8 8 1 8 2...

Страница 22: ...19 8 3 1 2 3 4 5 6 7...

Страница 23: ...1 21 2 22 3 23 4 23 5 24 6 24 7 25 8 26 28 KOREAN...

Страница 24: ...21 21 1 1 1 1 2 3 4 5 6 7 8 9 1 2 1 2 3 TV 4 5 6 7 8 9 10 11 12 13 14 15...

Страница 25: ...22 16 17 18 19 20 21 22 23 DC 2 1 4 2 5 3 2 6...

Страница 26: ...23 3 6 5 4 3 7 2 1 1 2 3 4 5 6 AC 7 4 RS 232C USB 4 1 RS 232C 1 2 3 4 4 2 USB 1 2 USB 3 4...

Страница 27: ...24 5 1 2 AC 3 AC 6 1 2 3 4 COMPLETE...

Страница 28: ...25 7 7 1 7 2 1 300 2 3 300 LED 7 3 1 2 3 4 1 2 85 3 4 85 5 30 85 6 89 6 22 0 54 0...

Страница 29: ...26 8 8 1 LED 8 2...

Страница 30: ...27 8 3 1 2 3 4 5 6 7...

Страница 31: ...settings are made there may be a failure of the card reader writ er Be careful when making setting changes Appendix A Connection Settings A 1 RS 232C Interface RS 232C Serial Interface Specifications...

Страница 32: ...sh in the interface card to mount it 6 Tighten the two screws 7 Turn on the power for both the reader writer and the host computer Note The new settings will take effect when the reader writer power i...

Страница 33: ...zzer will ring and the green status lamp will flash Press the CLEANING switch again The status lamp will switch to orange and will flash Insert a card in this state This will cause the system to autom...

Страница 34: ...will automatically reboot itself LED Display Green 100M Lights when the port is operating at 100 Mbps Red Link Activity Lights when the link is made between the port and the connected device and mutua...

Страница 35: ...el and font settings External characters graphics Dot Configuration 24 x 12 24 x 24 48 x 24 24 x 48 48 x 48 Dot Pitch Vertical Direction 0 125 mm Horizontal Direction 0 121 mm Environment Location of...

Страница 36: ...ine Business Park Gomm Road High Wycombe Bucks HP13 7DL U K Tel 01494 471111 Fax 01494 473333 http www StarMicronicsEurope com ELECTRONIC PRODUCTS DIVISION STAR MICRONICS CO LTD 536 Nanatsusinya Shimi...

Отзывы: