- 7 -
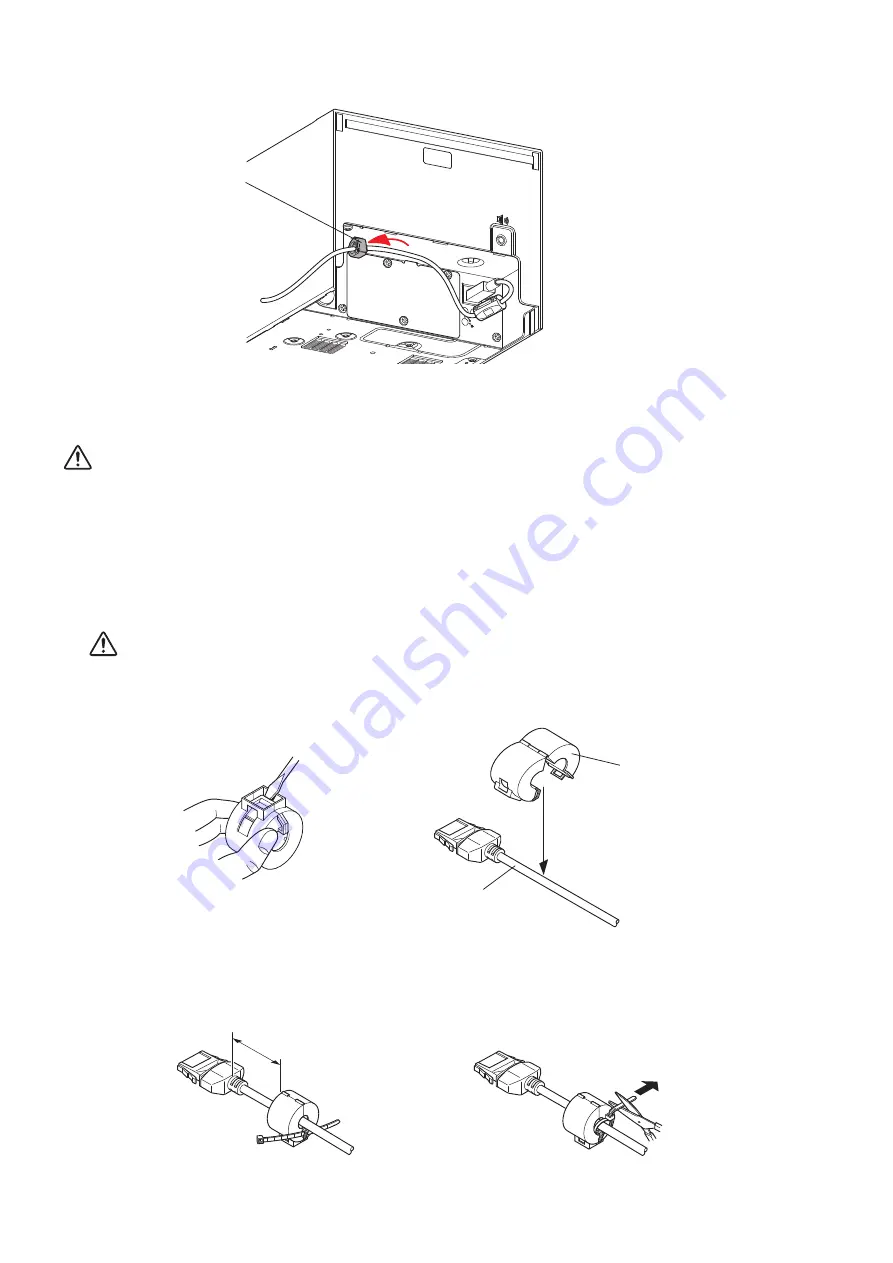
(3) Pass the cable through the cable hook.
3-2-4. PoweredUSB Interface Cable
CAUTION:
The optional PoweredUSB cable has been designed specifically for this printer.
Other PoweredUSB cables may not meet the EMC technical standards.
To protect the printer from electromagnetic interference, affix the ferrite core that came with the optional interface board to the
cable. To connect the cable, follow the instructions given below.
(1) Turn the power switch off.
(2) If the AC adapter is connected, remove the power cable plug from the outlet, and then remove the plug from the printer’s
power connector.
CAUTION:
Do not connect the AC adapter while the PoweredUSB cable is connected. Doing so may result in mal-
function.
(3) Affix the included ferrite core to the PoweredUSB cable as shown in the figure.
Option: PoweredUSB cable 1X8LNL 1.2M (P/N: 30729130)
(4) Pass the fastener through the ferrite core.
(5) Loop the fastener around the PoweredUSB interface cable, and lock it.
Use scissors to cut the excess part of the fastener.
Ferrite core
PoweredUSB cable
3.5 cm (maximum)
Pull and cut
DC
24V
Cable hook
Содержание FVP10 SERIES
Страница 1: ...THERMAL PRINTER FVP10 SERIES Hardware Manual ...
Страница 67: ...URL http www star m jp eng ...


