background image

23

WARM-UP and COOL-DOWN

Warm-Up    

The purpose of warming up is to prepare your body for exercise and to minimize injuries. 

Warm  up  for  two  to  five  minutes  before  strength  training  or  aerobic  exercising.  Perform  activities  that 

raise your heart rate and warm the working muscles. Activities may include brisk walking, jogging, 

jumping jacks, jump rope, and running in place.

Stretching

        Stretching  while  your  muscles  are  warm  after  a  proper  warm-up  and  again  after  your 

strength or aerobic training session is very important. Muscles stretch more easily at these times 

because of their elevated temperature, which greatly reduces the risk of injury. Stretches should be held 

for 15 to 30 seconds.  Do not bounce.

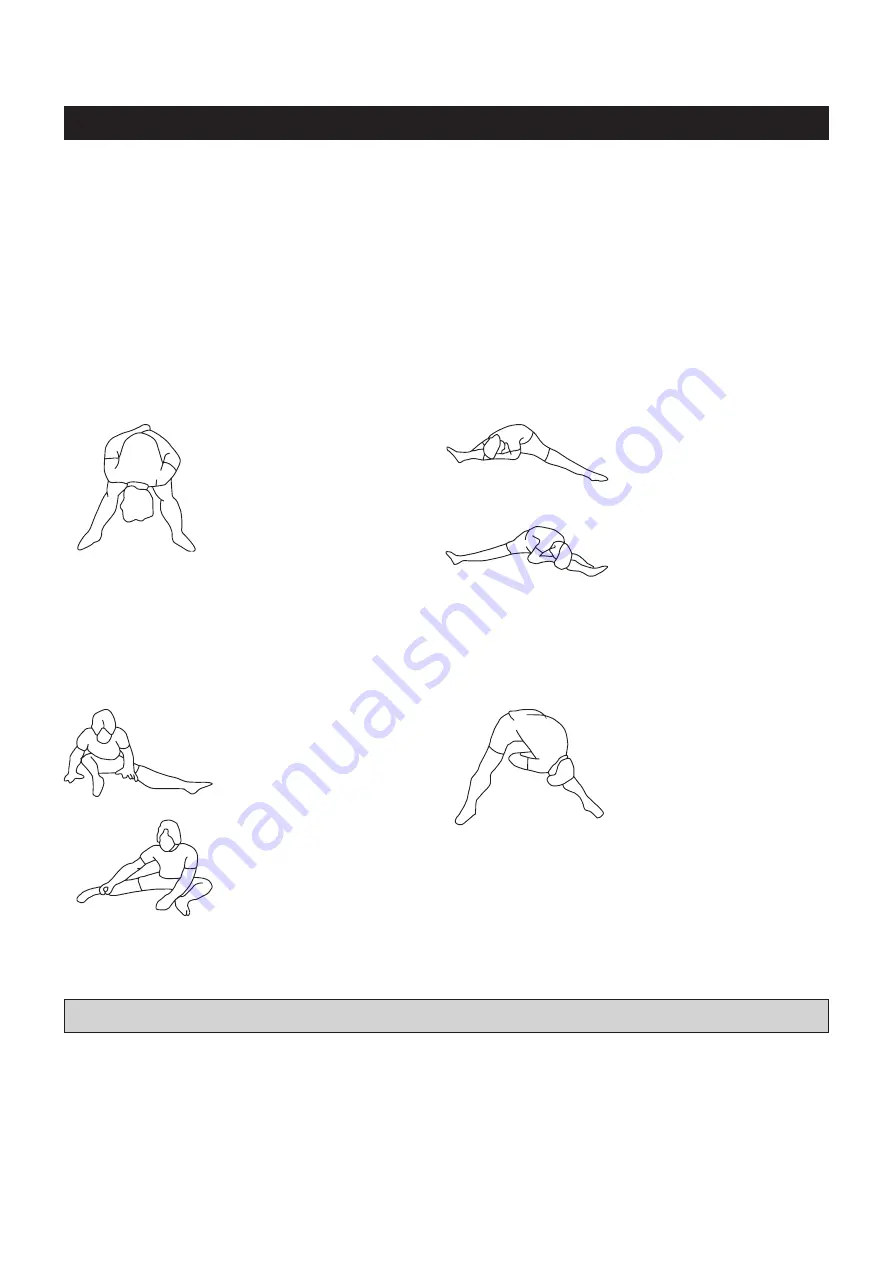
Suggested Stretching Exercises

Remember to always check with your physician before starting any exercise program.

Cool-Down

    The purpose of cooling down is to return the body to its normal, or near normal, resting 

state at the end of each exercise session. A proper cool-down slowly lowers your heart rate and allows 

blood  to  return  to  the  heart. Your  cool-down  should  include  the  stretches  listed  above  and  should  be 

completed after each strength training session.

Lower Body Stretch

Place feet shoulder-width 

apart and lean forward.

Keep this position for 30 

seconds using the body as a 

natural weight to stretch the 

backs of the legs.

DO NOT BOUNCE!

When the pull on the back of 

the legs lessens, gradually 

try a lower position.

Floor Stretch

While sitting on the floor, 

open the legs as wide as 

possible. Stretch the upper 

body toward the knee on the 

right leg by using your arms 

to pull your chest to your 

thighs. Hold this stretch 10 

to 30 seconds.

DO NOT BOUNCE!

Do this stretch 10 times. 

Repeat the stretch with the 

left leg.

Bent Over Leg Stretch

Stand with feet shoulder-

width apart and lean forward 

as illustrated. Using the 

arms, 

gently

 pull the upper 

body towards the right leg.  

Let the head hang down.

DO NOT BOUNCE!

Hold the position a minimum 

of 10 seconds. Repeat 

pulling the upper body to 

the left leg. Do this stretch 

several times slowly.

Bent Torso Pulls

While sitting on the floor,  

have legs apart, one leg 

straight and one knee bent.  

Pull the chest down to touch 

the thigh on the leg that is 

bent, and twist at the waist.  

Hold this position at least 10 

seconds. Repeat 10 times 

on each side.

Содержание 35-1409

Страница 1: ...correctly Serious bodily injury can also occur if all instructions are not followed Keep others and pets away from equipment when in use Always make sure all bolts and nuts are securely tightened pri...

Страница 2: ......

Страница 3: ...them Always use common sense when exercising 13 Do not wear loose or dangling clothing while using the Stamina DT Plus Rower 14 Never exercise in bare feet or socks always wear proper footwear such a...

Страница 4: ...and to help us better serve you please go onlineand register your new product register staminaproducts com ONLINE customer care staminaproducts com www staminaproducts com TELEPHONE 1 800 375 7520 FA...

Страница 5: ...eled Locate the serial decal on the product and write the serial number on the cover of the manual in the space provided See page 5 for an image of the serial decal Model number and serial number are...

Страница 6: ...take a moment to familiarize yourself with all of the warning caution and notice labels EQUIPMENT WARNING CAUTION NOTICE LABELS CAUTION LABEL 35 To best serve you our Customer Care Representatives wi...

Страница 7: ...heads is measured from below the head to the end of the bolt or screw Flat head bolts and screws are measured from the top of the head to the end of the bolt or screw After unpacking the unit open the...

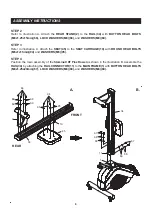
Страница 8: ...into the box Do not dispose of the packing materials until assembly is completed Read each step carefully before beginning If you are missing a part please go to staminaproducts com under the Custome...

Страница 9: ...he SEAT 45 to the SEAT CARRIAGE 10 with ROUND HEAD BOLTS M6x1x15mm 94 and WASHERS M6 95 STEP 4 Position the main assembly of the Stamina DT Plus Rower as shown in the illustration B Assemble the RAIL...

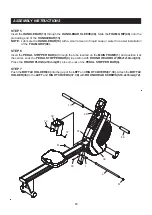
Страница 10: ...TEP 6 Insert the PEDAL STOPPER BAR 4 through the tube located on the MAIN FRAME 1 and position it at the center Lock the PEDAL STOPPER BAR 4 in position with ROUND HEAD BOLT M6x1x10mm 93 Press the ROU...

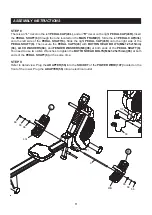
Страница 11: ...the PEDAL SHAFT 6 Then secure the PEDAL CAPS 43 with BUTTON HEAD BOLTS M8x1 25x15mm 66 LOCK WASHERS 68 and FENDER WASHERS M8 96 at both ends of the PEDAL SHAFT 6 You need to use two Allen Wrenches to...

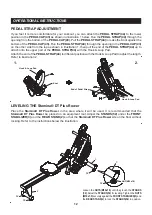
Страница 12: ...P 44 with the Hook Loop Pad Attach the end of the PEDAL STRAP 44 to different position with the Hook Loop Pad to adjust the length Refer to illustration 2 Hook Loop Pad Hook Loop Pad Knot 1 2 End of P...

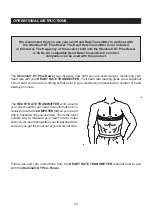
Страница 13: ...ot included in this rower The frequency of the receiver built into the Stamina DT Plus Rower is 5k Hz All compatible Heart Rate Transmitters from other companies can be used with this product The HEAR...

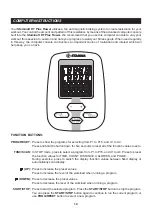
Страница 14: ...ad when running a program Press to start the selected program Press the START STOP button to stop the program You can press the START STOP button again to continue to run the current program or use PR...

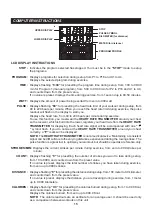
Страница 15: ...he preset value Displays the calories burned from zero up to 999 9 Kcal NOTE The calorie readouts are an estimate for an average user It should be used only as a comparison between workouts on this un...

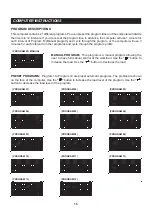
Страница 16: ...file PROGRAM M MANUAL MANUAL PROGRAM This program is a manual program allowing the user to have full manual control of the workload Use the button to increase the load Use the button to decrease the l...

Страница 17: ...bars will move to the next interval and it means you have met the preset challenge If you do not set the program time and distance in advance the computer will use 10 minutes and 4 kilometer to run th...

Страница 18: ...omatic programs that allow the user to manually preset each of the 12 intervals Under STOP mode use and FUNC SCAN buttons to edit the program profile The program profile will be stored in the memory a...

Страница 19: ...put items as follows and allow you to set the function values Use and FUNC SCAN buttons to input the values STEP 4 START THE WORKOUT Press the START STOP button to start the workout Time 5 00 to 99 00...

Страница 20: ...tion values to zero Use PROG RESET button to select a new program 4 The computer will shut off automatically after 4 minutes of inactivity and all function values will be reset to zero D USER SETTING...

Страница 21: ...Pull on the HANDLEBAR 13 and verify that the Fan and Magnetic System provides tension and the seat travel is smooth and stable 2 Clean the roller tracks in the RAIL 34 with an absorbent cloth 3 Verif...

Страница 22: ...ty of your maximum heart rate zone Start at the lower intensity and build up to higher intensity as you become more aerobically fit If you feel dizzy or lightheaded you should slow down or stop exerci...

Страница 23: ...our cool down should include the stretches listed above and should be completed after each strength training session Lower Body Stretch Place feet shoulder width apart and lean forward Keep this posit...

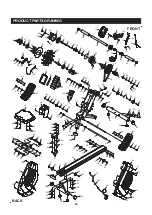
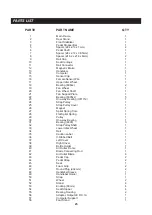
Страница 24: ...31 79 80 81 22 55 74 22 74 19 20 21 36 55 72 72 75 75 71 69 69 68 68 71 70 70 59 59 59 59 10 67 54 67 54 9 67 69 71 54 67 69 54 71 69 68 66 34 69 68 67 67 68 69 95 95 94 94 45 39 72 72 51 77 69 69 68...

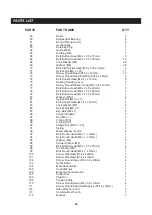
Страница 25: ...1 24 Strap Pulley 1 25 Strap Pulley Cover 1 26 Magnet 1 27 Spiral Spring Core 1 28 Flat Spiral Spring 1 29 Pulley 1 30 One way Bearing 1 31 Bearing 6000 3 32 Strap Pulley Shaft 1 33 Lower Idler Wheel...

Страница 26: ...r M10 2 81 Nylock Nut M10 x 1 5 1 82 Bolt Socket Head M6 x 1 x 16mm 4 83 Lock Washer M6 4 84 Nylock Nut M6 x 1 4 85 Eye Bolt M6 x 1 2 86 Tension Bracket 2 87 Nut M6 x 1 2 88 C Ring S10 1 89 C Ring S17...

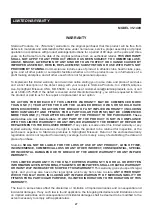
Страница 27: ...RRANTY INCLUDING MERCHANTABILITY AND FITNESS FOR A PARTICULAR PURPOSE MAY BE COMMENCED MORE THAN ONE 1 YEAR AFTER DELIVERY OF THE PRODUCT TO THE PURCHASER These warranties are not transferable IF ANY...

Страница 28: ...NOTES 28...

Страница 29: ...NOTES 29...

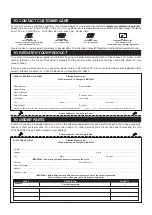
Страница 30: ...nvenience Stamina s customer care representatives can be reached by email at customer care staminaproducts com or by phone at 1 800 375 7520 in the U S Our customer care representatives are available...

Отзывы: