


27
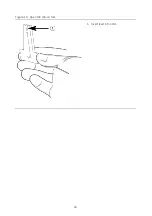
Figure 11. Extend the helix by rotating the clip-on tool clockwise
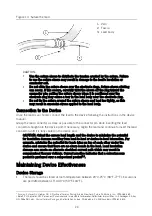
Secure the Tip with the Fixation Tool
As an alternative to the clip-on tool, the fixation tool may be used to extend or retract the helix.
After the fixation site has been selected, hold the lead body stationary in one hand and turn the
distal (gray) portion of the fixation tool in the direction marked "FIXATE" (clockwise). See the
enclosed specification sheet for the approximate number of turns required for each lead length.
On the fluoroscopic image, the helix will be extended beyond the marker ring.
The helix is fully extended when two turns of the helix extend past the marker ring, as shown in
the following figure. It may be necessary to reposition the fluoroscopy camera or to advance the
lead body in order to see the entire helix.
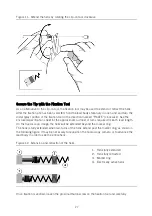
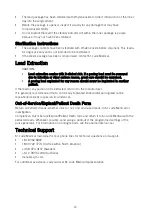
Figure 12. Extension and retraction of the helix
1.
Helix fully extended
2.
Helix fully retracted
3.
Marker ring
4.
Electrically active helix
Once fixation is verified, loosen the proximal thumbscrew on the fixation tool and carefully
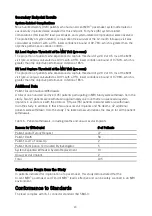
Содержание Tendril MRI LPA1200M
Страница 1: ...Tendril MRI Pacing leads Model LPA1200M User s Manual ...
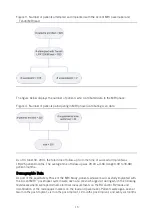
Страница 13: ...11 Figure 1 Lead Safety Phase The figure below depicts the MRI Phase ...
Страница 28: ...26 Figure 10 Open the clip on tool 1 Insert lead into notch ...
Страница 35: ......
Страница 36: ......
Страница 37: ......


