


©2014 Mad Dogg Athletics, Inc. All rights reserved. Spin®, Spinner®, Spinning®, Spin Fitness® and the
Spinning logo ® are registered trademarks that are owned by Mad Dogg Athletics, Inc.
12
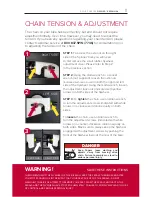
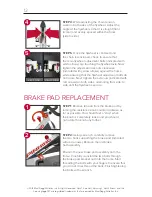
BRAKE PAD REPLACEMENT
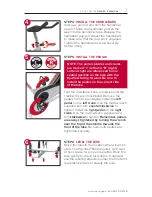
STEP 4:
While adjusting the chain tension,
work on both sides of the flywheel. Adjust the
angle of the flywheel so that it is straight (front
to rear) and evenly spaced within the forks
(side to side).
STEP 5:
Once the flywheel is centered and
the chain is tensioned, check to ensure that
the main flywheel adjustment bolts (indicated with
white arrows) are touching the flywheel axle. Now
tighten the adjusment lock nuts clockwise
(indicated with yellow arrows) against the frame
while ensuring that the flywheel adjustment bolts do
not rotate. Next, tighten the axle nuts (indicated with
red arrows) on both sides, alternating from side to
side until the flywheel is secure.
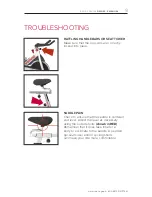
STEP 1:
Remove tension from the brake pad by
turning the resistance knob counterclockwise as
far as possible. You should feel a “stop” when
the knob is completely loose and you should
not rotate the knob any farther.
STEP 2:
Using a wrench, carefully remove
the two bolts supporting the brake pad (indicated
with red arrows). Remove the old brake
pad assembly.
Position the new brake pad assembly onto the
frame. Carefully re-install the two bolts through
the brake pad bracket and into the frame. Start
threading the bolts with your fingers to ensure that
you do not cross thread the bolts. Finish tightening
the bolts with a wrench.
4
1
2
5
LEFT SIDE RIGHT SIDE
1
1
2
3
2
3


