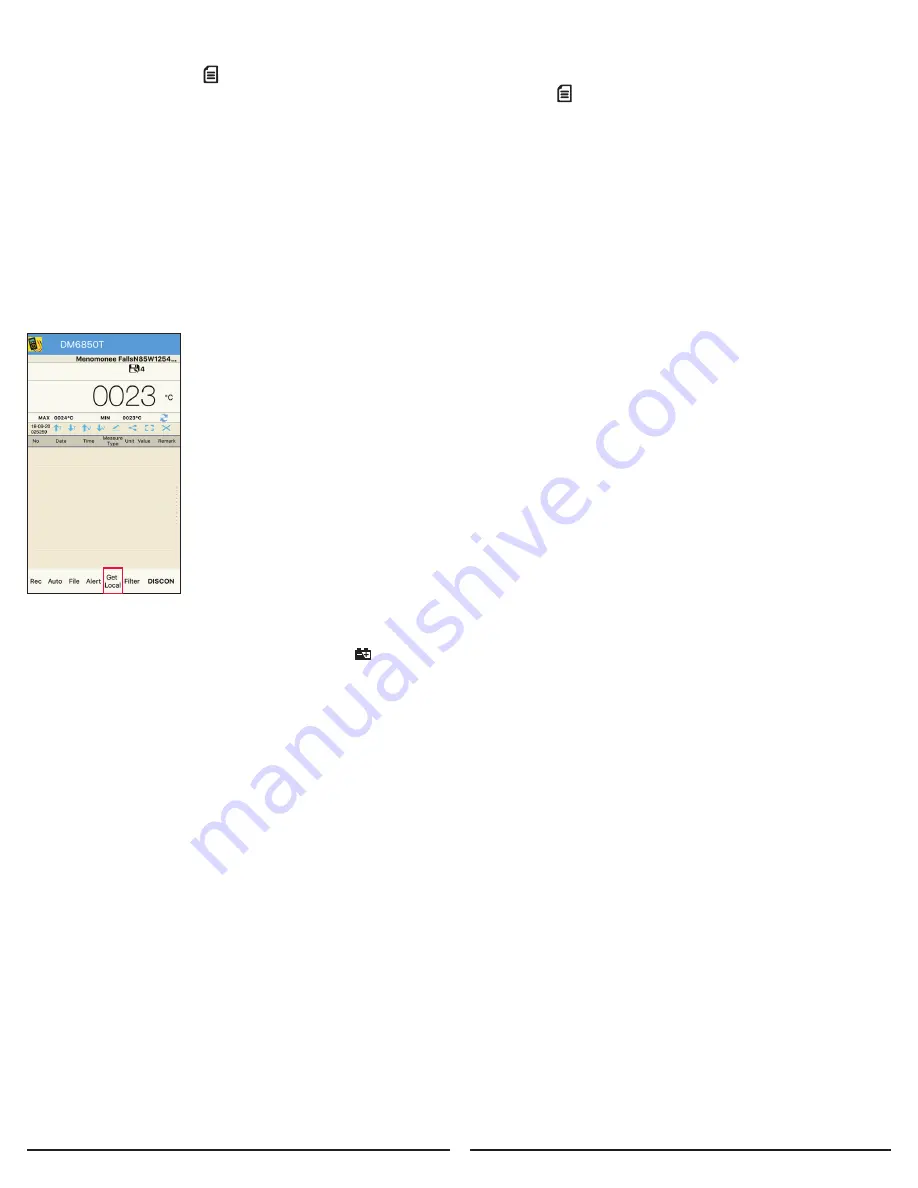
7.0 DATALOGGING & GET LOCAL
1. To begin dataloggging, hold the RELATIVE button on the DM6850T for about 2 seconds.
2. The meter will beep and a
symbol will appear on the display when datalogging is active.
3. If datalogging is active while the DM6850T is connected to the SmartMeter App, the
symbol will also be
displayed on the app along with a timer showing how long datalogging has been active.
3. Begin measurements. Measurements are stored at a rate of 1/second for a maximum of 36 hours.
a. Stored data is saved until datalogging is deactivated then activated again or if the DM6850T is turned off and back on.
At that point, any data previously stored will be deleted and overwritten the next time datalogging is activated.
b. Stored data is overwritten if datalogging is deactivated then activated again or if the DM6850T is turned off.
c. Stored data is deleted if datalogging is deactivated then activated again or if the DM6850T is turned off.
4. To stop datalogging, hold the RELATIVE button again for about 2 seconds
5. To download data stored on the meter, connect the meter to the Sperry SmartMeter app on your phone or tablet
(see section 6.0 SMART DEVICE & APPLICATIONS for instructions).
6. In the SmartMeter app, go to the main screen. Select Get Local. Datalogged data stored on the DM6850T will be displayed in the app.
This data can be managed and/or shared (See Section 6.6 Data File Management and Section 6.7 Data File Sharing above).
13
GET LOCAL
Download datalogged
measurements captured on
DMM to phone/tablet
Note: Date and time will
reflect when the data is
downloaded, not when the
data is measured/captured
8.0 BATTERY REPLACEMENT
To avoid false readings, which could lead to possible electric shock or personal injury,
replace the battery as soon as the battery indicator
1.8.8.8
Autorange
MAX MIN
AC
DC
appears.
1. Disconnect the connection between the test leads and the circuit under test, and remove the
test leads from the input terminals of the meter.
2. Turn the Meter power off.
4. Remove the screw from the battery cover on the back of the meter. Slide the battery cover off.
5. Replace the old batteries with 2 fresh AAA batteries.
Note: Do not use rechargeable batteries in this unit.
6. Carefully slide on the battery cover and tighten the screw.
Do not overtighten the screw as this may strip the threads in the meter housing.
9.0 FUSE REPLACEMENT
To avoid personal injury or damage to the Meter, use specified fuses
ONLY
in accordance with the following procedure.
To replace the Meter’s fuse:
1. Turn the Meter off and remove test leads from the input terminals.
2. Remove the 5 screws from the case bottom, and separate the case top from the case bottom.
3. Remove the fuse by gently prying one end loose, then remove the fuse from its bracket.
4.
ONLY install replacement fuses of the identical type and specification as follows and make sure
the fuse is inserted firmly into the fuse holder brackets.
Fuse 1: 12A/600V, fast type, 6.35mm x 32mm.
5. Rejoin the case bottom and case top, and reinstall the 5 screws. Be careful not to overtighten the screws.
Replacement of the fuse is seldom required. A burned fuse suggests improper operating procedures.
10.0 GENERAL SERVICE
• Periodically wipe the case with a damp cloth and mild detergent. Do not use abrasives or solvents.
• To clean the terminals use a cotton swab and detergent, as dirt and moisture in the terminals can affect readings.
• Turn the Meter power off when it is not in use.
• Take out the battery when it is not used for a long time.
• Do not use or store the Meter in a place of humidity, high temperature.


