30
►
Guide the Ethernet cable through the screw connection - use a suitable cable and observe the torque
(screw connection torque 8 Nm).
►
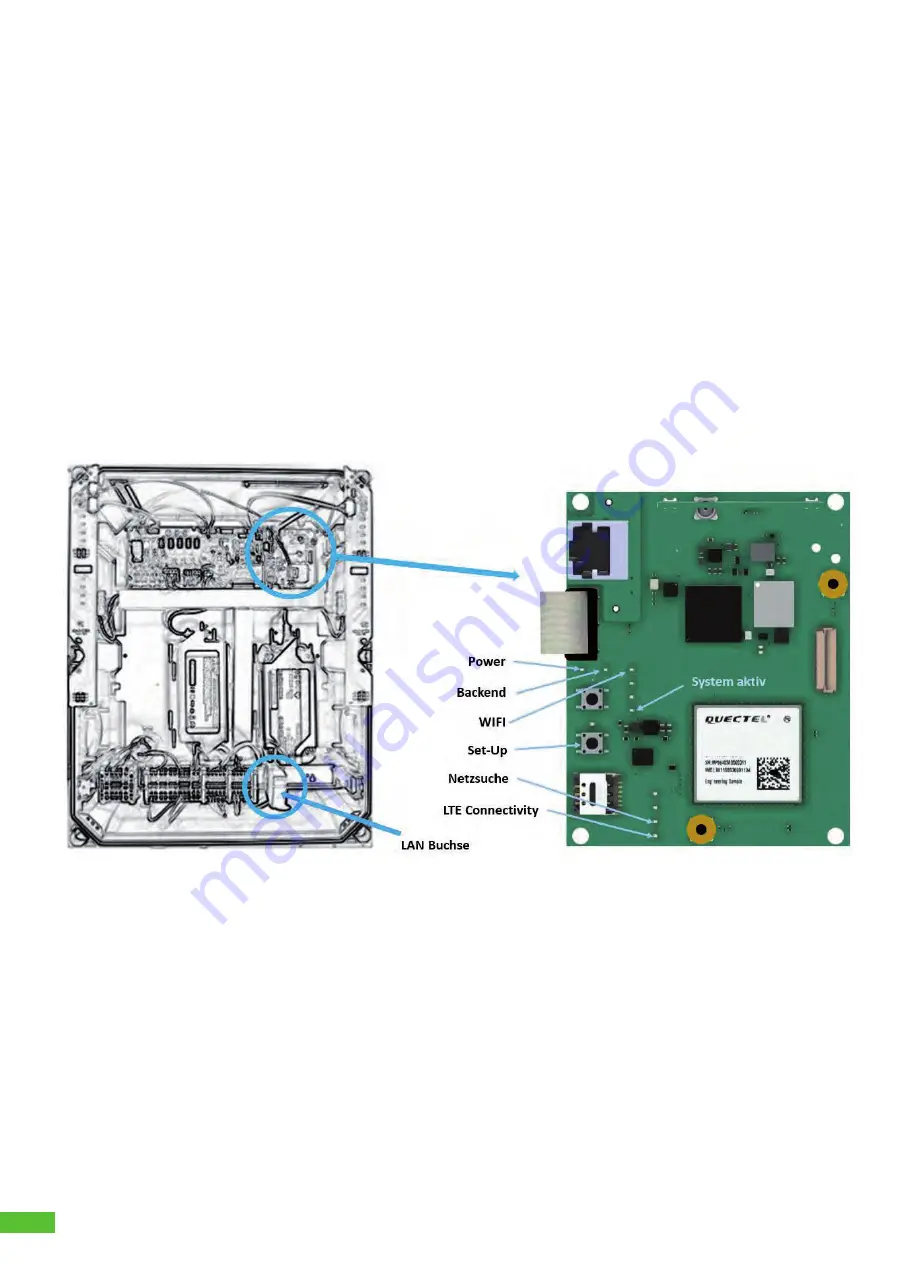
Connect the Ethernet cable to the intended connecting point, see fig. 1 -
LAN line connection
.
Ensure for a sufficient bending radii when routing the Ethernet cable.
►
Energise the mains voltage at the station, the station is ready for operation after approx. 1 minute.
►
Successful connection can be viewed on the BACKEND LED (illuminates green),
see figure 2 - Status LED BACKEND.
Note:
If an Ethernet cable is inserted, an attempt is always made to connect via Ethernet.
In case the BACKEND LED does not illuminate for some time, check the following requirements:
►
Is the cable connected to the router provided on-site?
►
Do the LEDs illuminate at the port connection there?
►
Does the router have a connection to the internet?
►
If necessary, does the router have any rules for blocking third-party devices? –
Setup the BCS SMART as approved device.
Figure 15:
Ethernet line connection
Figure 16:
Status LED BACKEND
Connection via WLAN to an existing router
For setting up the WLAN connection to an existing router, you require
the SSID and access password of the router
a smartphone or computer with WLAN function and conventional internet browser
Proceed as follows:
►
Open the housing and take off the cover.
►
Energise the mains voltage at the station, the station is ready for operation after approx. 1 minute.
Using an electrically insulated tool or object, briefly press the SETUP button,
see figure 16 - WLAN SETUP button and LED. The SETUP LED illuminates on the button.
Now the charging station opens a separate configuration access via WLAN hotspot.
Содержание BCS Pure
Страница 7: ...7 Abb 3 Abstände Wandmontage in mm Montagemaße in mm 1400 min 700 min 700 min ...
Страница 25: ...25 Figure 3 Distances for wall assembly in mm Assembly dimensions in mm 1400 min 700 min 700 min ...
Страница 38: ...38 ...
Страница 39: ...39 ...


