Speco mobile dvr Скачать руководство пользователя страница 86


85 


Displays currently assigned DNS server information.     


6.  PORT 

Displays currently assigned network port.     


7.  MAC ADDRESS 

Displays the DVR

‟s MAC address (Media Access Control address).     


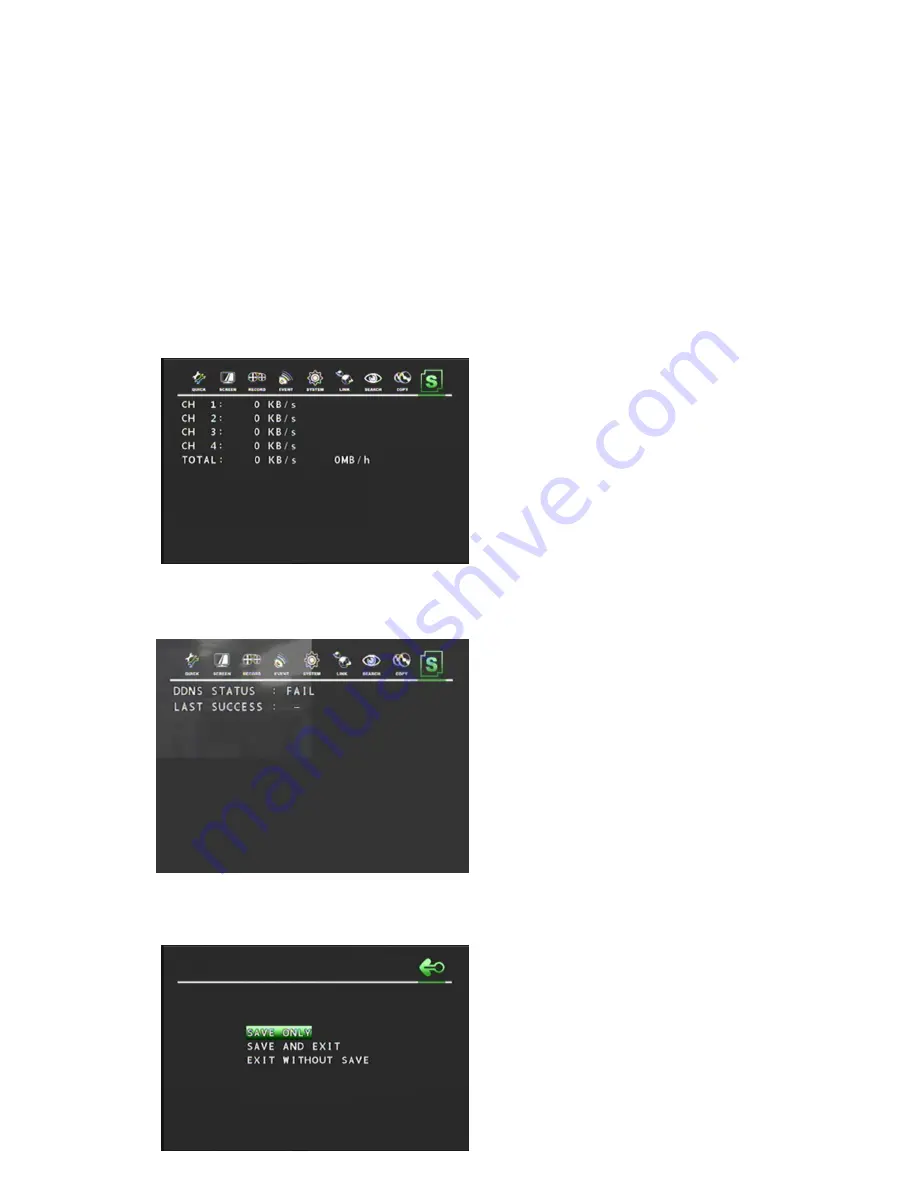
4.9.6  RECORDING BITRATE   


Move the cursor to the RECORDING STATUS 
icon and press the ENTER button to see the 
below Screen.   
The below screen gives the information about 
the recording bits in all the 4 channels. 


4.9.7 

DDNS STATUS 


Move the cursor to the DDNS STATUS,   
And press the ENTER button to see t he left 
screen.   
The screen Displays currently assigned DDNS 
server information.


4.10 EXIT     

 
At the MENU screen, 

Move the cursor to the EXIT icon using the 

,


buttons. 
 
Press the ENTER button when the cursor is on 
the EXIT icon and the following items appear. 

Содержание mobile dvr

Страница 1: ...4 Channel H 264 Mobile DVR User Manual V1 0 Copyright 2009 Speco Technologies All Rights Reserved...

Страница 2: ...ial incidental or consequential damages including damages for loss of profits loss of business loss of use or data interruption of business and the like even if Speco Technologies Inc has been advised...

Страница 3: ...following contents 1 One DVR 2 One AC Adaptor 3 One Power Cable 4 DVR Viewer Program CD 5 Instruction Manual 6 Two Rack Mount Ears and Four screws 7 One A V cable Option One Remote Controller Two AAA...

Страница 4: ...erature WARNING CAUTION accompanying the product Disposal of Old Electrical Electronic Equipment Applicable in the European Union and other European countries with separate collection systems This sym...

Страница 5: ...ibed herein at any time without prior notice No part of this guide may be reproduced transmitted transcribed stored in a retrieval system or translated into any language in any form by any means witho...

Страница 6: ...Video Recorders are intended for surveillance use and should never be used in a manner that invades other people s privacy or contravenes international or domestic privacy act and its regulations Plea...

Страница 7: ...the Digital Video Recorder s power off or unplug the power cord from the power outlet Contact a qualified service personnel authorized by the equipment distributor or the Maker Do not attempt to disa...

Страница 8: ...ctions may cause an electrical short circuit which may lead to fire or electrical shock Do not handle the device or power cord with wet hands Handling it with wet hands may lead to electrical shock Wh...

Страница 9: ...and cold temperatures may cause condensation water droplets to form on its external and internal surfaces You can avoid this by placing the equipment in an airtight re sealable plastic bag and lettin...

Страница 10: ...23 4 1 2 IMAGE SIZE 24 4 1 3 RECORD FRAME 24 4 1 4 IMAGE QUALITY 25 4 1 5 EVENT 25 4 1 6 PRE RECORD TIME 26 4 1 7 POST RECORD TIME 26 4 1 8 PREVIEW QUALITY 26 4 1 9 AUDIO RECORD 27 4 1 10 SAVE 27 4 2...

Страница 11: ...45 4 4 7 GPS 46 4 5 SYSTEM 47 4 5 1 STORAGE 47 4 5 1 1 STORAGE CONFIGURATION 48 4 5 1 2 STORAGE INITIALIZE 49 4 5 2 CLOCK 49 4 5 2 1 DATE TIME 50 4 5 2 2 TIME ADJUST 50 4 5 3 VIDEO STANDARD 51 4 5 4...

Страница 12: ...H 72 4 6 8 WIRELESS 72 4 6 8 1 WIRELESS MODE 68 4 6 8 2 MOBILE SERVER 68 4 6 9 DDNS 72 4 7 SEARCH 75 4 7 1 CALENDER SEARCH 75 4 7 2 SEARCH COPY 76 4 7 3 TIME SEARCH 77 4 7 4 EVENT SEARCH 77 4 7 5 BLOC...

Страница 13: ...the SPECO MOBILE DVR This Manual depicts the user how to install and operate the DVR provided with the features and specifications Please read this manual carefully and follow the installation proced...

Страница 14: ...cy recording in full frame rate of every channel Digital Watermark support Smooth reverse playback Ease of operation Remote controller Front key external keypad controller and Network Viewer Supported...

Страница 15: ...plit PIP AUDIO Compression ADPCM Audio Input Line 1CH RCA Input Level 0 5 1 4Vp p 20k Audio Output Line 3 5mm Stereo Mini Jack RECORDING Compression H 264 Resolution 720 H 480 V 720 H 240 V 360 H 240...

Страница 16: ...r mobile DVR SD viewer Transmission Rate Max 120ips CIF full motion transmission Search Supporting multi client 16 clients accessible SYSTEM MONITORING RECOVERY System Logging Power Failure Checkable...

Страница 17: ...elay output 2 pins Box connector NO Common RS 485 for External Control PTZ 2 pins Box Connector Ethernet RJ 45 10 100Mbps USB 2 0 1 port Front ELECTRICAL Power Source Input DC 9V 35V Output DC 12V 1 5...

Страница 18: ...support CD DVD external devices IRSensor Infrared signal receiver for the IR remote controller Do not block the receiver as a clear line of sight is required for proper operation Panic REC Pressthisbu...

Страница 19: ...ors for connecting the Audio Input Audio Video Out RCA Connectors for connecting the Audio Video Output VGA Output D sub 15 pin Connector for connecting the PC Monitor Power In Camera Power In Etherne...

Страница 20: ...r down to the next line Enter the PIP mode 9 D ZOOM Move the cursor in right direction in the setup menu Control of zoom in and out 10 AUTO F Auto sequence Downward value Focus control of PTZ 11 FREEZ...

Страница 21: ...change the value of the selected item 3 RIGHT MOUSE BUTTON a Single click in the main window enter main menu b Double click in the menu screen exit to main screen 18 LV PB Convert the screen into rea...

Страница 22: ...ill display its original size once the hard drive is formatted In playback mode it displays the direction and the speed of the playback If there is no hard drive in the DVR it shows NO HDD 2 CHANNEL S...

Страница 23: ...and Accel You can see the driving speed of the vehicle on the screen 7 Location The monitor shows the location where in you are with the DVR unit There is installed GPS antenna to receive your locatio...

Страница 24: ...tings of the DVR All changes made in quick setup are affected equally to all channels This includes the image size record speed image quality event options pre and post recording time and audio record...

Страница 25: ...recording speed of the DVR The recording speed adjusts automatically according to the image size and divided equally between all available channels User can select the desired frame rate for normal r...

Страница 26: ...RM V LOSS MOTION GPS ALARM LOSS ALARM MOTION ALARM GPS LOSS MOTION LOSS GPS and MOTION GPS ALL Select all kinds of event ALARM when the alarm is ring the DVR will start recording V LOSS when the video...

Страница 27: ...from the remote When video loss alarm or motion is detected the DVR will store post recorded data during the selected period The post recording time can be set up from 0 second to 60 second and the de...

Страница 28: ...Save icon using the Enter button in order to save the Menu Configuration 4 2 SCREEN Screen setup defines various screen related options Any changes affect the main video as well as the spot monitor o...

Страница 29: ...itching each channel in sequence The value is from 1SEC to 60SEC but the default is 3SEC To exit this AUTO SEQUENCE menu press the ESC button 4 2 2 DISPLAY At the SCREEN menu Move the cursor to the DI...

Страница 30: ...DISPLAY menu Move the cursor using the buttons to select the STORAGE FREE SPACE MODE Use the button to choose PERCENT or GIGABYTE The default is PERCENT ON Remaining capacity of the fixed not backup S...

Страница 31: ...tton to choose ON or OFF The default is ON 4 2 2 4 CLOCK DISPLAY At the DISPLAY menu Move the cursor using the buttons to select the CLOCK DISPLAY Use the button to choose ON or OFF The default is ON...

Страница 32: ...ISPLAY menu Move the cursor using the buttons to select the TITLE DISPLAY Use the button to choose ON or OFF The default is ON ON Each channel title will be displayed on the screen YY MM DD All date a...

Страница 33: ...to select the BORDER COLOR Use the button to choose WHITE or BLACK The default is WHITE WHITE The color of the border line will be displayed on the multi channel screen in white BLACK The color of the...

Страница 34: ...SPEED DISPLAY MODE At the DISPLAY menu Move the cursor using the buttons to select the SPEED DISPLAY MODE Use the button to choose either MILE or KILOMETER This will display the distance covered by t...

Страница 35: ...channel title Press the ENTER button after selecting desired channel using the buttons and the following screen will appear Select the character using the buttons and then press the ENTER button To ex...

Страница 36: ...the CAMERA and the following screen appears You can control brightness contrast hue and saturation of each camera from 0 to 100 The default is 50 ON Selected channel will be displayed in black screen...

Страница 37: ...and the following screen appears Move the cursor to choose the desired time using the buttons Select the desired program among PROGRAM 0 9 and POWER OFF using the button Turn right the shuttle ring t...

Страница 38: ...esired value for each selected item using the button After all setting are done exit using the ESC key or the right double click of mouse When exiting from this menu the DVR computes the values under...

Страница 39: ...IO RECORD using the buttons Press the button of the remote to change the Audio Record ON or OFF If select ON DVR will record the Audio with the Video User has to turn Off the record to see Image Quali...

Страница 40: ...time to work the REPEAT RECORD ALARM Move the cursor to REPEAT RECORD ALARM using buttons and then select the desired value using button The value is from 5 to 10 To exit this REPEAT RECORD menu pres...

Страница 41: ...the button Move the cursor using buttons and set up the value using the button To exit this HOLIDAY menu press the ESC button 4 3 7 RECORD LIMIT User can select the Record Limit either ON or OFF by b...

Страница 42: ...MOTION DETECTION At the EVENT menu Move the cursor to the MOTION DETECTION using buttons Press the ENTER button when the cursor is on the MOTION DETECTION and the left screen appears 4 4 1 1 CHANNEL A...

Страница 43: ...set the motion detection area Select the motion detection area using the buttons and then press the ENTER button to save the area Turn the shuttle ring to the right to select all cells for motion dete...

Страница 44: ...ursor to the EVENT SCREEN MODE using buttons Select the EVENT SCREEN MODE using the button SCREEN HOLD Keeping the current screen even if the event occurs EVENT FULL Display the full screen of the cha...

Страница 45: ...N At the EVENT menu Move the cursor to the EVENT INDICATION using buttons Select ON or OFF using the button to set the event indication 4 4 5 SENSOR INPUT SELECT At the EVENT menu Move the cursor to t...

Страница 46: ...buttons Press the ENTER button when the cursor is on the RELAY OUTPUT and the following screen appears Move the cursor using the buttons and set up the value using the button To exit this screen pres...

Страница 47: ...is working when power is off USER User can operate the relay output manually by pressing the FUNCTION button with button and button NC Normal close NO press the button with FUNCTION button NO Normal...

Страница 48: ...E and the left screen appears To exit this STORAGE menu press the ESC button X THRESHOLD X Threshold values are automatically varied when there is any event but the default value is 1 Y THRESHOLD Y Th...

Страница 49: ...ears User can set the SDCARD Memory stick either to Record or Backup Mode arbitrarily The DVR detects installed storage drives automatically Any storage derives can be defined to be a normal recording...

Страница 50: ...he STORAGE move the cursor to YES and then press the ENTER button If not move the cursor to NO and then press the ENTER button To exit this screen press the ESC button 4 5 2 CLOCK At the SYSTEM menu M...

Страница 51: ...e TIME ADJUST using the buttons Press the ENTER button when the cursor is on the TIME ADJUST and the left screen will appear OFF using the buttons when the cursor is on INTERNET TIME ADJUST If the INT...

Страница 52: ...Move the cursor to the LANGUAGE using the buttons Select the desired language using the buttons Manual setup This DVR can recognize the correct time by itself That is to say if you input the correct...

Страница 53: ...sing the button 4 5 6 POWER SAVING MODE At the SYSTEM menu Move the cursor to the POWER SAVING MODE using the buttons Press the ENTER button when the cursor is on the POWER SAVING MODE and the left sc...

Страница 54: ...VOLTAGE Select voltage rate using the button from 1 to 99 If user sets up the power off voltage by 80 when the capacity of battery of vehicle remains 20 the DVR will be power off automatically 4 5 6...

Страница 55: ...and the following screen appears To exit this ADVANCED SETUP menu press the ESC button 4 5 7 1 PASSWORD CHECK At the ADVANCED SETUP menu Move the cursor to the PASSWORD CHECK using the buttons Select...

Страница 56: ...d _ _ _ _ _ _ _ _ beside RE TYPE using the CAMERA NUMBE INPUT buttons to verify the password To exit this menu press the ESC button NOTE You can use only 0 9 number buttons to setup the PASSWORD The d...

Страница 57: ...een appears Move the cursor using the buttons and change the value using the buttons 4 5 7 4 DVR MENU SETUP At the ADVANCED SETUP menu Move the cursor to the DVR MENU SETUP using the buttons Press the...

Страница 58: ...NTER button If you want to initialize move the cursor to YES and then press the ENTER button If not move the cursor to NO and then press the ENTER button Use the buttons to move the cursor NOTE If you...

Страница 59: ...then press the ENTER button to begin the firmware upgrade The USB flash memory with the upgrade file must be inserted into the front USB port If not move the cursor to NO and then press the ENTER butt...

Страница 60: ...ntages The whole process should take approximately two minutes When the upgrade is finished the DVR will display COMPLETED RESTART DVR Power off and power on the DVR to apply the upgrade NOTE Upgrade...

Страница 61: ...LAN cable to unit User can monitor the image in media viewer using this LAN cable 2 Using Mobile Communication Terminal User can viewer the images in the Media Viewer using the mobile communication t...

Страница 62: ...he NETWORK and the following screen appears To exit this NETWORK menu press the ESC button 4 6 1 1 DHCP Select DHCP option on or off DHCP Dynamic Host Configuration Protocol is another word for Dynami...

Страница 63: ...e gateway should also be provided along with the IP address and the subnet mask 4 6 1 5 DNS At the NETWORK menu Define the DNS Domain Name Server If the internet time server and or the SMTP e mail ser...

Страница 64: ...RS485 and the following screen appears Use the buttons to choose the item and use the buttons to set the data value To exit this RS485 menu press the ESC button 4 6 2 1 SYSTEM ID Select the DVR s sys...

Страница 65: ...ailable speeds are from 1200 to 115200 The default speed is 57600 4 6 2 3 DATA BIT Select the data bit Available options are 6 to 8 The default bit is 8 4 6 2 4 PARITY BIT Select the parity bit Availa...

Страница 66: ...cameras the DVR also supports a variety of protocols The following is the list of supported manufacturers and their models Manufacturer Model Samsung Techwin SPD Samsung Techwin SRX 100B Canon VC C4R...

Страница 67: ...desired channel using buttons Use the buttons to select the right model of installed PTZ camera Press the button to set up an ID of the PTZ camera Use the buttons to select the desired ID Press the bu...

Страница 68: ...the cursor is on the E MAIL and the following screen appears The DVR is capable of sending e mails when an event occurs to up to ten different e mail addresses 4 6 4 1 SEND E MAIL At the E MAIL menu M...

Страница 69: ...e buttons to input the e mail sever address to be used by DVR Press the ENTER button and the following screen appears 4 6 4 2 1 SMTP SERVER Press the ENTER button to define an e mail server Enter the...

Страница 70: ...s are 0000 through 9999 4 6 4 3 DVR E MAIL ADDRESS Press the ENTER button to define an DVR e mail address Move the cursor to the DVR email address using the buttons Press the ENTER button and the foll...

Страница 71: ...SS WORD Press the ENTER button to define a user ID and pass word 4 6 4 5 E MAIL ADDRESS 1 THOUGHT 10 Highlight a desired e mail address to send the notifications to and then press the ENTER button to...

Страница 72: ...obile Manager You should set the DVR name to something unique for Speco Mobile Manager Set the DVR name selecting the characters Press the ESC button to return to previous menu 4 6 6 DVR LOCATION The...

Страница 73: ...t this CHARACTER TABLE screen press the ESC button 4 6 7 BANDWIDTH Move the cursor to the BANDWIDTH using the buttons to input network bandwidth User can change the values from 256KB to 10MB using the...

Страница 74: ...type MANUAL AND AUTO using buttons 5 6 8 2 MOBILE SERVER Move the cursor to the mobile sever using the buttons to select the character Select the character using the buttons and then press the ENTER b...

Страница 75: ...74 5 6 9 DDNS Move the cursor to the DDNS using the buttons to see the DDNS condition This screen displays the DDNS condition User can select the ENABLE DDNS ON or OFF...

Страница 76: ...o the CALENDER SEARCH icon using the in the MENU screen Press the ENTER button when the cursor is on the Calendar Search and the following screen appear Calendar search provides a quick overview of th...

Страница 77: ...desired hour block and then press the ENTER button to start the playback 4 7 5 SEARCH COPY Move the cursor to the SEARCH COPY icon using the in the MENU screen Press the ENTER button when the cursor i...

Страница 78: ...it and the following screen appear Time search provides an overview of the recorded data from the earliest available recording to the latest available recording Select the year month date hour minutes...

Страница 79: ...icon page 22 4 7 8 BLOCK SEARCH Move the cursor to the BLOCK SEARCH icon using the in the MENU screen Press the ENTER button when the cursor is on it and the following screen appear Block search has t...

Страница 80: ...LE SEARCH icon using the in the MENU screen Press the ENTER button when the cursor is on it and the following screen appear File search is capable of reading and playing back the data from the media u...

Страница 81: ...the following screen appear The log file keeps a list of the important events that happened to the DVR The log file can be saved to a USB flash memory as a text file so that it can be viewed and archi...

Страница 82: ...creen appears Select the desired MEDIA using the buttons Move the cursor to HDD ID using the buttons and select the desired HDD to copy among HDD IDs using the buttons Move the cursor to the desired p...

Страница 83: ...the buttons Press the ENTER button and the following screen appears Select formatting media using the button Move the cursor to MEDIA FORMAT and then press the ENTER button The message FORMATTING will...

Страница 84: ...Screen 4 9 4 DVR STATUS Move the Cursor to the DVR STATUS icon using on the remote press the Enter button to get the below Screen The status screen displays the basic information about the DVR Press...

Страница 85: ...hardware version of the DVR 7 CELSIUS TEMPERATURE Displays current Celsius temperature scale 8 FAHRENHEIT TEMPERATURE Displays current Fahrenheit temperature scale 4 9 5 NETWORK STATUS Move the curso...

Страница 86: ...ENTER button to see the below Screen The below screen gives the information about the recording bits in all the 4 channels 4 9 7 DDNS STATUS Move the cursor to the DDNS STATUS And press the ENTER butt...

Страница 87: ...ER button SAVE ONLY Select this item if you want only to save the changed setup SAVE AND EXIT Select this item if you want to save the changed setup and exit this screen EXIT WITHOUT SAVE Select this...

Страница 88: ...e user name and password fill in the appropriate areas and click log in If you are a new user click register user 1 If you are a new user read the agreement carefully and click Agree if you agree with...

Страница 89: ...are mandatory To see if your ID is available click overlapping check DVR and Camera List The DVR Camera list can be searched by User ID or MAC Clicking on Camera name will give you detailed informatio...

Страница 90: ...e mandatory To check to see if there is a duplicate domain name or MAC click Overlapping check After the overlapping check has been completed an ADD button will appear at the bottom of page Click the...

Отзывы: