© Copyright 2014 by Conrad Electronic SE.
V1_0214_02-ETS-Mkde
These operating instructions are published by Conrad Electronic SE, Klaus-Conrad-Straße 1, D-92240 Hirschau (www.conrad.com).
All rights including translation reserved. Reproduction by any method, e.g. photocopy, microfilming, or the capture in electronic data
processing systems require the prior written approval by the editor. Reprinting, also in part, is prohibited.
These operating instructions represent the technical status at the time of printing. Changes in technology and equipment reserved.
Operation
• If necessary, attach the rubber feet supplied to the bottom of the product. The rubber feet
provide secure and non-slip stability.
• Read and follow all instructions included in the user manual for each device to be connected.
Turn off all devices to be connected and disconnect their mains plug from the wall socket.
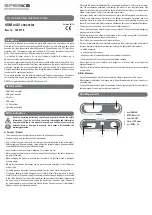
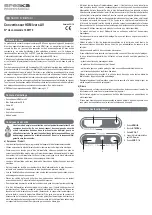
• Connect the HDMI cable of your input device (e.g. hard drive recorder, game console, etc.)
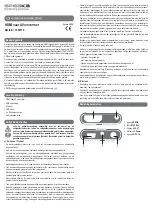
to the HDMI IN input (1).
Use a suitable HDMI cable of max. 10 m in length. Otherwise there might be a risk
of signal interferences or no signal will be sent.
When choosing a cable, please note that there are different types of HDMI cables.
In case of doubt, consult a professional for further information.
• Connect the jack plug of the AV cable to the AV OUT output (3).
• Connect the three cinch plugs of the AV cable to the respective inputs on your output device
(e.g. CRT television, projector, etc.). Observe the colour codes of the plugs when doing so.
• Connect the USB plug of the USB cable to the respective socket on the power adapter.
• Connect the Mini-USB plug of the USB cable to the 5V/DC, 1A input (5).
• Connect the USB power adapter to a wall socket. The status LED Power (4) lights up red.
• Connect the input device and the output device to the mains voltage and start playback.
• Press the NTSC/PAL button (2) to select one of the two colour encoding systems.
Troubleshooting
Problem
Solution
Status LED does not light up.
Check the cable connection between power
adapter and converter.
The output device shows a blurry or no
picture.
Make sure the input device and the output
device are turned on and connected
properly to the converter.
Check if the connection cables are
defective and replace them if necessary.
Maintenance and cleaning
• Before cleaning, disconnect the product from the connected devices and unplug it from the
power outlet.
• There are no components located inside the product you need to maintain. Never open/
dismantle the product.
• Do not use any aggressive cleaning agents, rubbing alcohol or other chemical solutions as
they can cause damage to the housing and malfunctioning.
• To clean the product, a dry, soft and clean cloth is sufficient. Do not apply too much pressure
to the housing as this may cause scratch marks.
• You can easily remove dust using a long-haired, soft and clean brush.
Disposal
Electronic devices are recyclable waste and must not be disposed of in the household
waste.
At the end of its service life, dispose of the product according to the relevant statutory
regulations.
You thus fulfil your statutory obligations and contribute to the protection of the environment.
Technical data
a) HDMI to AV converter
Input.................................................. HDMI
Output ............................................... Composite
HDMI resolution (input) ..................... 1080p / 1080i / 720p / 576p / 576i / 480p
Composite resolution (output) .......... 576i / 480i
Operating conditions ......................... -5 to +45 ºC, 0 – 90 % RH (non-condensing)
Storage conditions ............................ -5 to +45 ºC, 0 – 90 % RH (non-condensing)
Cable length ..................................... 45 cm (AV cable)
..........................................................
120 cm (USB cable)
Dimensions (W x H x D) ................... 68 x 16 x 51 mm
Weight .............................................. 55 g
b) Power adapter
Input voltage / current ....................... 100 – 240 V/AC, 50/60 Hz, max. 0.2 A
Output voltage / current .................... 5 V/DC, 1 A


