background image

Installation and Startup 

Lyo-SEA 


Rev 005, 05/11 


© SP Scientific 2011 

Setup and Installation 

Note: Field replacement of the standard door, with a Sample Extractor door, requires two 
people. 


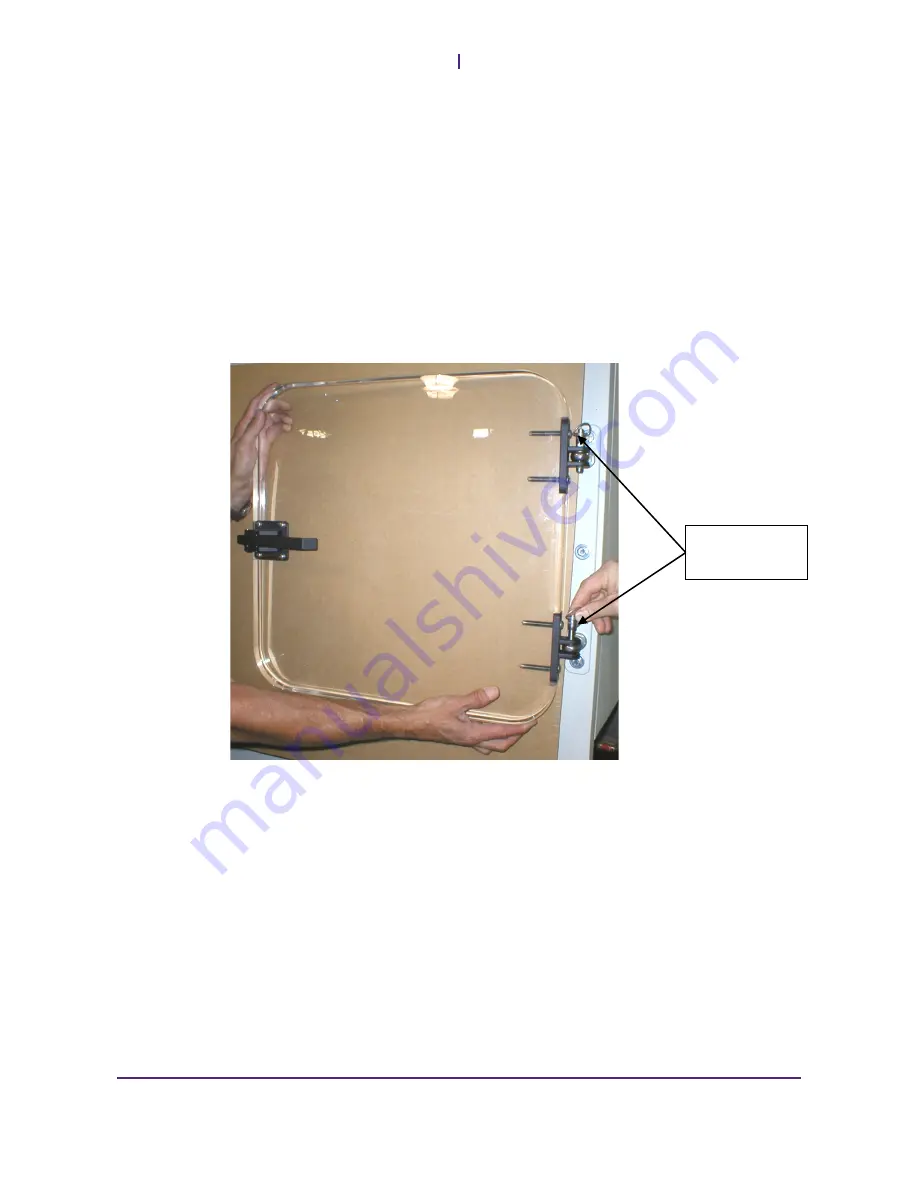
Standard Door Removal 


Open the standard door. An assistant should take position to support the 

1.

door. 


Remove the upper and lower quick release pins.  

2.

Note: The quick-release pins may be saved for replacement pins. 


Remove the standard door. 

3.


Quick Release 

Pins 

Содержание LYO-SEA

Страница 1: ...SAMPLE EXTRACTOR ASSEMBLY OPERATOR S MANUAL LYO SEA FOR LYOSTAR II ...

Страница 2: ......

Страница 3: ...perator s Manual by any means and in any form or manner is expressly prohibited except with the prior written permission of SP Scientific Permitted copies of this document must retain all proprietary notices contained in the original The information in this document is subject to change without prior notice Always confirm with SP Scientific that you are using the most current version of this docum...

Страница 4: ...MENDATIONS STREAMLINE UNIT OPERATION AND PREVENT COMMON OPERATOR ERRORS WEAR SAFETY GLASSES EXPLOSIVE MATERIALS HAZARD KEEP OBJECTS AWAY FROM HEAT Safety Warnings Always transport the unit with care Sudden jolts or drops may damage the refrigeration system Always observe all warning labels Always turn off the unit and disconnect the line cord from the available power source prior to performing any...

Страница 5: ...t or repair of parts pursuant to this warranty shall not in any way extend the original warranty period The Company shall not be responsible for any unauthorized repairs replacements or product modifications nor will it be responsible for any product failures resulting from such unauthorized repairs replacements or product modifications negligently or otherwise made by persons other than Company e...

Страница 6: ...iv Rev 005 05 11 SP Scientific 2011 ...

Страница 7: ...rnings ii Warranty Information iii Introduction 1 Overview 1 Key Features 2 Installation and Startup 3 Initial Inspection 3 Setup and Installation 4 Standard Door Removal 4 Sample Extractor Door Installation 5 Operation 7 SEA Operation 7 Shelf Area 9 Electrical Requirements 9 ...

Страница 8: ...Contents Lyo SEA vi Rev 005 05 11 SP Scientific 2011 ...

Страница 9: ...rying run The selection and removal process is accomplished with virtually no interruption or alteration of the drying protocol The simplicity of the design and ease of use provides operators with a cost effective methodology for periodic removal of stoppered product containers for sample analysis The Sample Extractor is a pivotal option when the operator s mission is product development or stabil...

Страница 10: ...techamber with stoppering ram Acrylic antechamber isolation door Vacuum pump Inert gas back fill valve Vacuum gauge Stainless steel selector arm Vacuum Pump not shown Acrylic Door Vacuum Antechamber Stoppering Ram Selector Arm Inert Gas Backfill Vacuum Break Valve Vacuum Gauge Isolation Door Locking Handle Vacuum Pump Port Antechamber Isolation Door Jaw Controls Filter Thumbscrews ...

Страница 11: ...is discovered contact the freight carrier immediately 1 Keep all contents packing material and related paperwork intact until a written report is obtained Note SP Scientific will cooperate in the matter of collecting your claim but is not responsible for the collection or free replacement of the material When possible replacement parts will be shipped and invoiced to you making them a part of your...

Страница 12: ...e standard door with a Sample Extractor door requires two people Standard Door Removal Open the standard door An assistant should take position to support the 1 door Remove the upper and lower quick release pins 2 Note The quick release pins may be saved for replacement pins Remove the standard door 3 Quick Release Pins ...

Страница 13: ...h thumb screws 1 Remove the front antechamber plate with selector arm 2 With help from an assistant align the Sample Extractor door in the hinge 3 brackets Re install the quick release pins 4 Re install the front plate with selector arm 5 Extractor door without front antechamber cover and selector arm Thumb Screw Front Plate ...

Страница 14: ...Installation and Startup Lyo SEA 6 Rev 005 05 11 SP Scientific 2011 ...

Страница 15: ...on door With locking handle in the up or 3 unlocked position the antechamber door can be slid open When antechamber isolation door is fully open lower the handle to lock the 4 isolation door in position Manipulate the selector arm to select and extract the vial s of choice Vials 5 are securely held in spring loaded jaws Push the button to open the jaws and release to close them Place the sample s ...

Страница 16: ...m to manually stopper the vial s 9 Open the inert gas fill vacuum break valve until the antechamber is back to 10 atmospheric pressure Loosen the thumb screws and slide the front plate down until it can be 11 opened Remove the stoppered vials 12 13 Close the front plate to reseal the chamber for the next run 14 Lower handle to lock shut Press to stopper Open front plate to remove the vials ...

Страница 17: ...and increases the accessible shelf area to 240 sq in This configuration requires vials to be rotated 90 degrees to a horizontal position to be removed Electrical Requirements 120V 60hz 6 Amps LYO3 shown below The profile shows 190 sq in of area that can be reached on the middle shelf The 5 ml vial is the tallest vial that can be used on a 3 shelf LyoStarII ...

Страница 18: ...Operation Lyo SEA 10 Rev 005 05 11 SP Scientific 2011 ...

Страница 19: ......

Страница 20: ...SP Scientific 815 State Route 208 Gardiner NY 12525 USA 3538 Main Street Stone Ridge NY 12484 www SPScientific com 800 431 8232 845 255 5000 ...

Отзывы: