19
US
Se
ttings
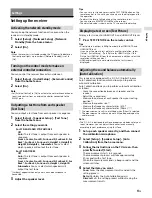
Linking with a Hi-Fi music system
This receiver can switch its power and input automatically by
linking with playback operation of the Hi-Fi music system.
Configure settings to enable the receiver to operate linked
with a Hi-Fi System device.
1
Select [Setup] - [Network Setup] - [Music
Connect] from the home.
2
Select the setting you want.
Each of the following settings can be selected on both
Device 1 and Device 2.
Connected Device: Select the connected device to
enable the function.
Input for Music Connect1 or 2: Select the input to link
with.
Preset Volume: Preset the volume level.
Output Zone: Select the zone to which you want to
output sound.
3
Start playback on the player device.
The receiver will be turned on and the input will be
switched automatically.
To disable Music Connect
Select [Setup] - [Network Setup] - [Music Connect] -
[Connected Device] - [Remove Connected Device] from the
home menu.
Notes
• The Music Connect feature can be linked only with the power
source and input of the main zone or Zone 2. This feature does not
link with Zone 3.
• The link feature of Music Connect may not work correctly
depending on factors such as the specifications of the connected
device.
• We recommend that you set [Network Standby] to [On] to activate
the feature for linking with Music Connect even if the receiver is in
standby mode.
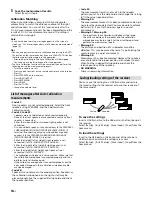
Mixing separate audio/video inputs (Last
video mode)
The receiver can continuously output the input video image
used most recently when an audio-only input source is
selected.
1
Connect the desired background music source to
an input by analog, optical, or coaxial cable. Or
use the built-in tuner.
2
Set the input to the following in the Input Setup
menu.
HDMI: [None]
Component: [None]
Composite: [---]
Audio: The input connected to the source.
When using the built-in tuner, set the screen mode to
[Simple] using the options menu in [FM/AM Display].
Example
Press SAT/CATV followed by TUNER to listen to sound from
the built-in tuner while watching a video source connected
to SAT/CATV.
The audio output changes to that of the tuner source while
SAT/CATV video output is retained.
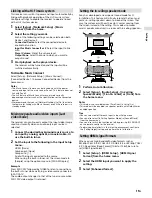
Setting the in-ceiling speaker mode
Sony has developed a new special sound mode for CI
installation. This feature will virtually relocate the front and
center in-ceiling speakers down to around the screen. That
way, the customer will hear the actors’ voices coming from
the screen instead of the ceiling. This mode also makes
music sound more natural in a room with in-ceiling speakers.
1
Perform Auto Calibration.
2
Select [Setup] - [Audio Setup] - [In-Ceiling
Speaker Mode] - [Front & Center] or [Front] from
the home menu.
Notes
• This mode is not available when [Pure Direct] is set to [On].
• This mode will be disabled in a speaker pattern with Dolby Atmos
enabled speakers.
Tips
• You can select on/off for each input in Input Setup menu.
• You can also select [In-Ceiling Speaker Mode] in [Sound Effects]
from the home menu.
• You can also switch the function on/off by pressing IN-CEILING SP
on the remote control or the receiver.
• To obtain optimal effects in the listening environment, configure
the [Ceiling Height] setting and perform Auto Calibration.
Setting HDMI signal formats
When you use high bandwidth video formats such as
4K/60p YCbCr 4:4:4/YCbCr 4:2:2/RGB 4:4:4 or 4K/60p YCbCr
4:2:0 Deep Color (Deep Colour) (10 bit or 12 bit), be sure to
set [HDMI Signal Format].
1
Select [Setup] - [HDMI Setup] - [HDMI Signal
Format] from the home menu.
2
Select the HDMI input you want to apply the
setting.
3
Select [Enhanced format].
Содержание STR-ZA1100ES
Страница 51: ...27FR Informations utiles ...
Страница 77: ... 2017 Sony Corporation 4 688 617 12 1 ...


