background image

Advanced VCR Operations

86

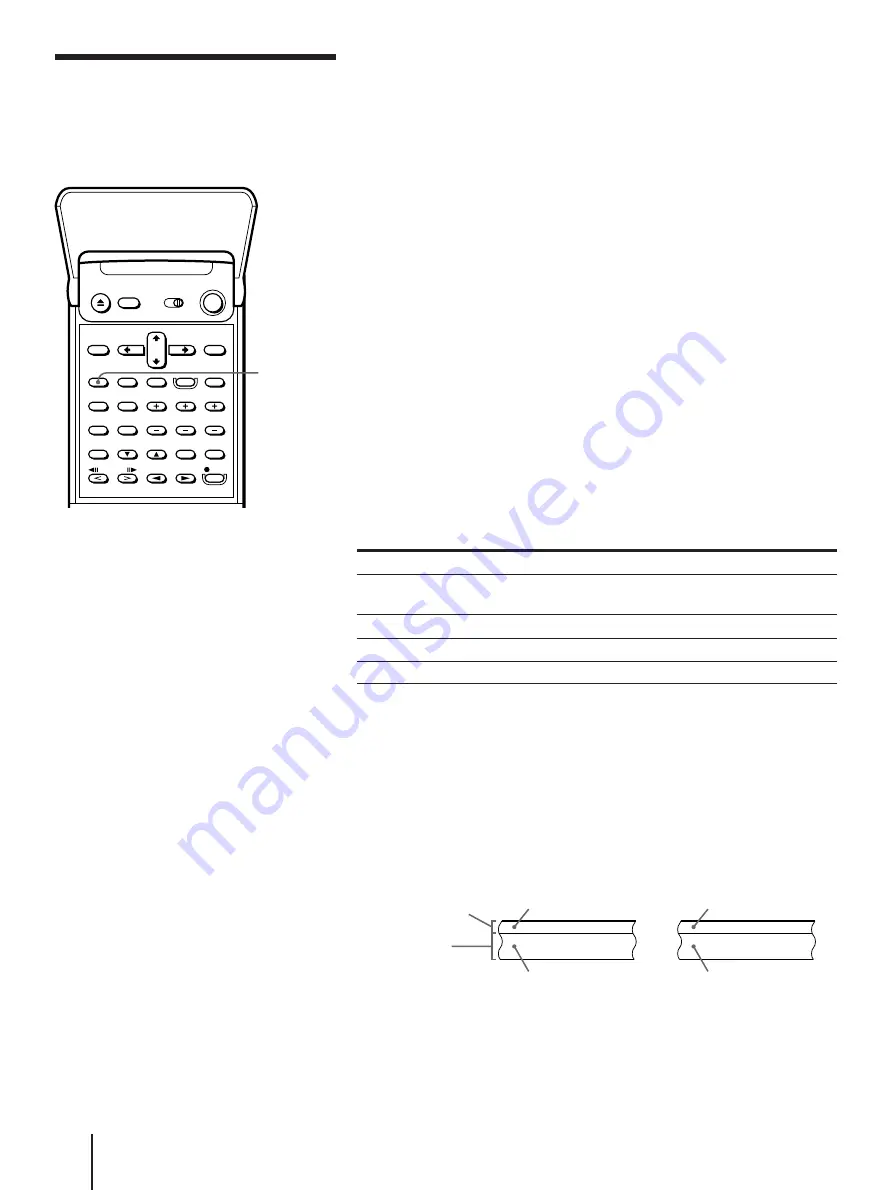
Recording stereo
and bilingual
programs

Notes

• If the AUDIO MONITOR

button does not function,
check that AUDIO MIX in
the SET UP MENU is set to
OFF.

• When you play a tape

recorded in monaural, the
sound is heard in monaural
regardless of the AUDIO
MONITOR setting.

Recording stereo programs

This VCR automatically receives and records stereo programs.  When a
stereo program is received, the STEREO indicator lights up.  If there is
noise in the stereo program, set AUTO STEREO in the ADVANCED
OPTIONS menu to OFF.  The sound will be recorded in monaural (on
both hi-fi and normal audio tracks) but with less noise.  For details, see
page 89.

Recording bilingual programs

Normally, this VCR records only the main sound on both hi-fi and
normal audio tracks.  To record SAP (Second Audio Program) sound on
the normal audio track, set NORMAL AUDIO in the ADVANCED
OPTIONS menu to SAP (the SAP indicator lights up).  For details, see
page 89.

To select the bilingual sound while recording

Press AUDIO MONITOR to select the sound you want.

Selecting the sound during playback

Press AUDIO MONITOR to select the sound you want.

To listen to

Stereo/main
(left and right channels)

Left channel only

Right channel only

Monaural (SAP)

Display window

STEREO

STEREO

STEREO

No indicator

On-screen display

STEREO

LEFT CH

RIGHT CH

No indicator

How sound is recorded on a video tape

The unit’s VCR records sound onto two separate tracks.  Hi-fi audio is
recorded onto the main track along with the picture.  Monaural sound is
recorded onto the normal audio track along the edge of the tape.

Stereo

Usually mixed
left/right channels

Stereo sound
(left/right channels)

Bilingual

Main (left channel)
Sub (right channel)

Main or SAP sound

Normal audio track
(monaural)

Hi-fi audio track
(main track)

AUDIO
MONITOR

Содержание SLV-AV100C

Страница 1: ... 1997 by Sony Corporation Integrated Amplifier Video Cassette Recorder 3 859 466 11 1 Operating Instructions SLV AV100U C j G ...

Страница 2: ...may require authorization from the cable television transmission and or program owner Owner s record The model number is located at the rear and front of the unit and the serial number on the top Record these numbers in the spaces provided below Refer to them whenever you call upon your Sony dealer regarding this product Model No _____________________ Serial No ______________________ WARNING To pr...

Страница 3: ...ld Operations 75 Taking advantage of the sound fields 77 Getting the most out of Dolby Pro Logic Surround 2 sound 78 Customizing the sound fields 82 Reconfiguring the PROLOGIC and THEATER sound fields Advanced VCR Operations 84 Playing searching at various speeds 85 Recording TV programs using the quick timer 86 Recording stereo and bilingual programs 87 Searching using the index function 88 Adjus...

Страница 4: ...packing Remote commander Size AA R6 batteries Step 1 75 ohm coaxial cable with F type connectors AM loop antenna Check that you have received the following items with the unit Video cable 1 phono to 1 phono FM wire antenna ...

Страница 5: ...A R6 batteries matching the and on the batteries to the diagram inside the battery compartment Notes The remote commander is initially set to control this unit However if it doesn t control the unit press VHS TUNER first If the remote commander still doesn t operate read Controlling VCRs on page 62 first With normal use the batteries should last about three to six months If you do not use the remo...

Страница 6: ...l not be reproduced well Do not connect the AC power cord until you finish all the connections through Step 5 TV antenna or cable hookups on page 11 Be sure to make connections firmly to avoid hum and noise 1 Connect the front speakers to the FRONT SPEAKERS L R connectors Twist about 15 mm of the stripped ends of the cord Then insert the stripped ends into the connectors as shown on the right 2 Co...

Страница 7: ... of the front left and right speakers Mount the surround rear left and right speakers on the walls so they face each other Position the front left and right speakers and center speaker as close to the same height as possible Connecting an active woofer For further sound improvement connect an active woofer to MIX OUT with an audio cable not supplied The active woofer will increase bass response Th...

Страница 8: ...ntil all of the connections are complete Be sure to make connections firmly to avoid hum and noise Step 4 Red R White L Red R Yellow Yellow Video cable Audio cable White L Necessary cable for each piece of equipment One audio cable Two audio cables One video cable and one audio cable One video cable and one audio cable One video cable CD VIDEO 1 MONITOR VIDEO 1 IN IN VIDEO OUT IN R L TV TAPE MD LI...

Страница 9: ...n your country for this connection Make sure that the power consumption of the components connected to AC OUTLET doesn t exceed 120 watts Do not connect high wattage electrical home appliances such as electric irons fans or TVs to this outlet Notes The power will not be supplied to the components as long as the unit is turned off Any electronic memory of the components may be cleared if you make t...

Страница 10: ...s weakened by ferroconcrete used in the construction of your apartment or building If you have poor FM reception Connect a 75 ohm coaxial cable not supplied to an FM outdoor antenna Note To prevent noise pick up keep the AM loop antenna away from the unit and TV When the noise is not cleared yet turn off the TV FM wire antenna ANTENNA FM AM After connecting the wire antenna keep it as horizontal a...

Страница 11: ...et started Turn off the power to all equipment Do not connect the AC power cords until all of the connections are completed Be sure you make connections firmly Loose connections may cause picture distortion If your TV doesn t match any of the examples provided see your nearest Sony dealer or qualified technician DSS is a registered trademark of DIRECTV Inc a unit of Hughes Electronics Corporation ...

Страница 12: ... connector and the antenna terminals of the TV receiver should be made only as shown in the following instructions Failure to do so may result in operation that violates the regulations of the Federal Communications Commission regarding the use and operation of RF devices Never connect the output of the VCR to an antenna or make simultaneous parallel antenna and VCR connections at the antenna term...

Страница 13: ...CR s cable box control feature to select channels on the cable box What you can t do Record with the cable box turned off Record one channel while watching another channel Rear of TV VHF UHF VHF UHF Wall A Match the type of connector on your TV A B or C B For connector types B and C no UHF connection is required C UHF VHF Side view or or Positioning the Cable Mouse Place the Cable Mouse so that it...

Страница 14: ...ion menu appears Select the center mode and press EXECUTE For details see page 30 6 The TEST TONE selection menu appears Set the volume of the center and rear speakers and press EXECUTE For details see page 31 EASY SET UP NEXT SET SELECT EXECUTE SET UP CLOCK SET WED 1 1 997 2 0 0 1 1 AM SET UP CABLE BOX OFF ON CABLE MOUSE CABLE BOX CONTROL BOX CODE NO CH3 BOX OUTPUT CH k ey s 0 9 SET SELECT SET UP...

Страница 15: ... 44 1 Press MENU and select VHS MENU 2 Select SET VCR Plus CHANNELS 3 Enter the program guide channel then the channel you use on your TV 4 Press EXECUTE MENU VHS MENU SOUND SET QUIT SET SELECT EXECUTE MENU MENU ADVANCED OPTIONS CLOCK SET TUNER PRESET TIMER SET CHECK CABLE BOX CONTROL SET VCR Plus CHANNELS QUIT SET SELECT EXECUTE MENU SET VCR Plus CHANNELS GUIDE VCR Plus CHANNEL LIST O r t o CH TV...

Страница 16: ...ature and your cable system scrambles only a few channels What you can do with this hookup Record any unscrambled channel by selecting the channel on the VCR What you can t do Record scrambled channels that require a cable box Step 5 TV antenna or cable hookups continued Rear of TV VHF UHF A Match the type of connector on your TV A B or C For connector types B and C no UHF connection is required V...

Страница 17: ...SET starts 5 After completing AUTO PRESET the CENTER MODE selection menu appears Select the center mode and press EXECUTE For details see page 30 6 The TEST TONE selection menu appears Set the volume of the center and rear speakers and press EXECUTE For details see page 31 EASY SET UP NEXT SET SELECT EXECUTE SET UP CLOCK SET WED 1 1 997 2 0 0 1 1 AM SET UP CABLE BOX CABLE BOX CONTROL OFF ON CABLE ...

Страница 18: ...etails see page 44 1 Press MENU and select VHS MENU 2 Select SET VCR Plus CHANNELS 3 Enter the program guide channel then the channel you use on your TV 4 Press EXECUTE MENU ADVANCED OPTIONS CLOCK SET TUNER PRESET TIMER SET CHECK CABLE BOX CONTROL SET VCR Plus CHANNELS QUIT SET SELECT EXECUTE MENU SET VCR Plus CHANNELS GUIDE VCR Plus CHANNEL LIST O r t o CH TV CH 25 15 Pus h 0 9 k ey s t o s e t P...

Страница 19: ...r or Rear of TV VHF UHF VHF UHF VHF UHF Match the type of connector on your TV A B or C B For connector types B and C no UHF connection is required A C or or UHF Match the type of connector on your TV A B or C A Rear of TV VHF UHF VHF B C VHF UHF If you cannot connect your antenna cable to the VCR directly If your antenna cable is a flat cable 300 ohm twin lead cable attach an external antenna con...

Страница 20: ...39 4 The AUTO PRESET starts 5 After completing AUTO PRESET the CENTER MODE selection menu appears Select the center mode and press EXECUTE For details see page 30 6 The TEST TONE selection menu appears Set the volume of the center and rear speakers and press EXECUTE For details see page 31 EASY SET UP NEXT SET SELECT EXECUTE SET UP CLOCK SET WED 1 1 997 2 0 0 1 1 AM SET UP CABLE BOX CABLE BOX CONT...

Страница 21: ... 44 1 Press MENU and select VHS MENU 2 Select SET VCR Plus CHANNELS 3 Enter the program guide channel then the channel you use on your TV 4 Press EXECUTE MENU ADVANCED OPTIONS CLOCK SET TUNER PRESET TIMER SET CHECK CABLE BOX CONTROL SET VCR Plus CHANNELS QUIT SET SELECT EXECUTE MENU SET VCR Plus CHANNELS GUIDE VCR Plus CHANNEL LIST O r t o CH TV CH 25 15 Pus h 0 9 k ey s t o s e t P r og r am GUID...

Страница 22: ...th the VCR s cable box control feature and your cable system scrambles all or most channels What you can do with this hookup Record any channel by selecting the channel on the cable box What you can t do Record with the cable box turned off Record one channel while watching another channel Select channels directly on the VCR Wall VHF UHF Rear of TV A VHF or or B For connector types B and C no UHF ...

Страница 23: ... The AUTO PRESET starts 5 After completing AUTO PRESET the CENTER MODE selection menu appears Select the center mode and press EXECUTE For details see page 30 6 The TEST TONE selection menu appears Set the volume of the center and rear speakers and press EXECUTE For details see page 31 EASY SET UP NEXT SET SELECT EXECUTE SET UP CLOCK SET WED 1 1 997 2 0 0 1 1 AM SET UP CABLE BOX CABLE BOX CONTROL ...

Страница 24: ...ENU and select VHS MENU 2 Select SET VCR Plus CHANNELS 3 Enter the program guide channel then the cable box output channel 4 Press EXECUTE MENU VHS MENU SOUND SET QUIT SET SELECT EXECUTE MENU MENU ADVANCED OPTIONS CLOCK SET TUNER PRESET TIMER SET CHECK CABLE BOX CONTROL SET VCR Plus CHANNELS QUIT SET SELECT EXECUTE MENU SET VCR Plus CHANNELS GUIDE VCR Plus CHANNEL LIST O r t o CH TV CH 33 3 Pus h ...

Страница 25: ...ilable through your program providers It also has program guides that are sorted by program categories What you can do with this hookup Record any channels using the VCR s cable box control feature to select channels on the DSS receiver What you can t do Record with the DSS receiver turned off Record any channels from cable or an antenna To record channels from cable or an antenna turn off the cab...

Страница 26: ...ge 31 EASY SET UP NEXT SET SELECT EXECUTE SET UP CLOCK SET WED 1 1 997 2 0 0 1 1 AM SET UP CABLE BOX OFF ON CABLE MOUSE CABLE BOX CONTROL BOX CODE NO CH3 BOX OUTPUT CH k ey s 0 9 SET SELECT SET UP CABLE BOX OFF ON CABLE MOUSE CABLE BOX CONTROL BOX CODE NO CH3 BOX OUTPUT CH 650 NEXT SET SELECT EXECUTE NEXT SET CENTER MODE EXECUTE NORMAL SET UP SOUND SET END SELECT TEST TONE EXECUTE TEST TONE SET UP...

Страница 27: ...d channel by selecting the channel directly on the VCR the A B switch is set to A Record any scrambled channel by selecting the channel on the cable box the A B switch is set to B What you can t do Record one scrambled channel while watching another channel the A B switch is set to B or or Wall A B switch A B Rear of TV VHF UHF VHF UHF VHF C A B UHF Match the type of connector on your TV A B or C ...

Страница 28: ...and press EXECUTE For details see page 31 EASY SET UP NEXT SET SELECT EXECUTE SET UP CLOCK SET WED 1 1 997 2 0 0 1 1 AM ANTENNA CABLE SET UP TUNER PRESET ANT CABLE CANCEL NEXT SELECT EXECUTE EASY UP SET AUTO PRESET P l ea EXECUTING s e wa i t SET UP TUNER PRESET NEXT SET CENTER MODE EXECUTE NORMAL SET UP SOUND SET END SELECT TEST TONE EXECUTE TEST TONE SET UP SOUND SET CENTER REAR 5 5 dB dB SET SE...

Страница 29: ...CR Plus CHANNEL LIST O r t o CH TV CH 25 15 Pus h 0 9 k ey s t o s e t P r og r am GUIDE CH pus h s ee EXECUTE Your actual TV channel Program guide channel MENU VHS MENU SOUND SET QUIT SET SELECT EXECUTE MENU 3 For scrambled channels enter all the scambled channels you want to record and the cable box output channel usually 2 3 or 4 For details see page 44 1 Press MENU and select VHS MENU 2 Select...

Страница 30: ...speaker emitting the test tone is indicated by the red speaker mark Check each speaker s relative volume balance with the test tones 4 Press CURSOR to move the cursor I to CENTER Then press CURSOR to increase or decrease the volume of the center speaker so you have an equal volume balance with the other speakers at your listening position If you selected PHANTOM in step 2 skip this step This volum...

Страница 31: ...e PROLOGIC sound field 6 Press EXECUTE After SET UP is done screen is appears a channel appears on the TV screen Tips To adjust the relative volume balance between the front left and right speakers use BALANCE L R on the unit If you change the speaker configuration reset the modes See Reconfiguring the PROLOGIC and THEATER sound fields on page 82 If you need to further increase the volume of the r...

Страница 32: ...und sufficiently If you have front and rear speakers and a large center speaker Select WIDE The combination of this speaker configuration and mode selection is ideal for Dolby Pro Logic Surround sound If you have only front and rear speakers Select PHANTOM The center channel sound is output from the front speakers If you have only front and center speakers Select 3CH LOGIC 3 Channel Logic The rear...

Страница 33: ...SOR to move the cursor I to CLOCK SET and press EXECUTE When using the EASY SET UP procedure skip this step 3 Set the month using CURSOR 4 Press CURSOR to highlight the date and the day of the week EXECUTE MENU CURSOR Tip To change the digits during setting press CURSOR to return to the item to be changed and select the digits using CURSOR Note The menu disappears automatically if you don t procee...

Страница 34: ...the year hour and minutes in sequence using CURSOR to highlight the item to be set and CURSOR to select the digits 7 Press EXECUTE to confirm the setting Setting the clock continued CLOCK SET END SET SELECT EXECUTE THU 27 1 997 3 3 0 1 1 AM CLOCK SET THU 27 1 997 0 0 0 1 1 END SET SELECT EXECUTE AM ...

Страница 35: ...ontact your cable operator they may be able to provide you with a compatible cable box 1 Lift the top cover of the remote commander Press MENU Then press CURSOR to move the cursor I to VHS MENU and press EXECUTE 2 Press CURSOR to move the cursor I to CABLE BOX CONTROL and press EXECUTE When using the EASY SET UP procedure skip this step 3 Press CURSOR to select ON 4 Close the top cover of the remo...

Страница 36: ...Archer BBT Cable Star Cabletenna Cable time Century Citizen Clyde Cablevision Colour Voice Comband Comtronics Decsat Diamond Eagle Comtronics Code numbers 018 022 024 028 217 218 033 050 164 218 278 067 033 172 282 388 459 164 164 326 327 097 036 042 243 244 051 071 434 046 051 Cable box brand Eastern Electricord Electus Filmnet Focus Garrard GC Electronics GE GEC Gemini General Instrument Hamlin ...

Страница 37: ...34 155 271 544 411 011 032 218 411 031 270 284 290 013 081 315 317 490 051 155 386 017 019 028 288 338 521 324 051 022 051 069 032 318 107 166 014 026 058 109 Cable box brand Stargate STS Sylvania T Cable Teletext Tandy Tatung Teknica Tele 1 TeleCaption Teleservice Texscan TFC Timeless Tocom Toshiba Tudi TV86 TV COM Uniden Unika United Artists United Cable Universal Videoway Vidtech Viewstar Westm...

Страница 38: ...o both 1 and 2 is yes you have made the correct setting If you cannot get your unit s VCR to control the cable box DSS receiver Check that the Cable Mouse is connected to the CABLE BOX CONTROL jack on the VCR Check the position of the Cable Mouse Place the cable box DSS receiver and VCR away from each other Do not place the cable box DSS receiver on top of the VCR Try the setup again making sure t...

Страница 39: ...r appears in the VCR s display window Presetting all receivable channels automatically 1 Press MENU Then press CURSOR to move the cursor I to VHS MENU and press EXECUTE 2 Press CURSOR to move the cursor I to TUNER PRESET and press EXECUTE When using the EASY SET UP procedure skip this step 3 To preset cable TV channels Press CURSOR to set ANTENNA CABLE to CABLE To preset VHF and UHF channels Press...

Страница 40: ...s can be found presetting stops and the picture from the lowest numbered channel is displayed on the TV screen Tip When receiving a VHF UHF or CATV channel the display changes as follows each time you press the DISPLAY button Channel number sound field mark and muting mark No display TUNER PRESET CH2 CABLE ANT ANTENNA CABLE AUTO PRESET MANUAL SET ERASE ADD AFT OFF ON FINE TUNING START EXECUTE ...

Страница 41: ...ber 2 Press CURSOR to set MANUAL SET to ERASE 4 Repeat step 3 to preset or disable channels as required then press EXECUTE TUNER PRESET CH2 CABLE ANT ANTENNA CABLE AUTO PRESET MANUAL SET ADD ERASE ERASE ADD AFT OFF ON FINE TUNING SELECT CH 0 9 ENTER TUNER PRESET CH5 CABLE ANT ANTENNA CABLE AUTO PRESET MANUAL SET ERASE ADD AFT OFF ON FINE TUNING ADD ERASE SELECT CH 0 9 ENTER TUNER PRESET CH5 CABLE ...

Страница 42: ... select FINE TUNING The fine tuning meter appears 5 Press CURSOR to adjust to a clearer picture Note that the AFT setting switches to OFF TUNER PRESET CH2 CABLE ANT ANTENNA CABLE AUTO PRESET MANUAL SET ADD ERASE ERASE ADD AFT OFF ON FINE TUNING SELECT CH 0 9 ENTER TUNER PRESET CH5 CABLE ANT ANTENNA CABLE AUTO PRESET MANUAL SET ERASE ADD AFT OFF ON FINE TUNING ADD ERASE SELECT CH 0 9 ENTER ADJUST T...

Страница 43: ...t to check that the channel numbers match For example if HBO is listed in the Channel Line up Chart on channel 33 and your VCR receives HBO on channel 5 you need to coordinate these numbers using the following procedure For channels in which the numbers are the same you can skip this procedure Example of PlusCode Example of Channel Line up Chart 5 30 6 30 PlusCode 14 2 CNN 2 3 4 5 SCIENCE AND TECH...

Страница 44: ... whose numbers don t match 6 When you have set all channels press EXECUTE to confirm your channel settings 7 When you ve finished press MENU to exit 1 2 3 4 5 6 7 8 9 0 10 Number buttons ENTER MENU EXECUTE CURSOR SET VCR Plus CHANNELS GUIDE VCR Plus CHANNEL LIST O r t o CH TV CH Pus h 0 9 k ey s t o s e t P r og r am GUIDE CH pus h s ee EXECUTE y Then pus h ou r TV CH SET VCR Plus CHANNELS GUIDE C...

Страница 45: ...ress SHIFT the character A B or C appears in the display window If MEMORY disappears start again from step 3 7 While MEMORY is displayed press the CH PRESET to select the number and press MEMORY 8 Repeat steps 2 through 5 to preset other stations Presetting radio stations Tips If the STEREO indicator remains off press FM MODE when an FM stereo broadcast is received If an FM stereo program is disto...

Страница 46: ...ess SHIFT while FM AM TUNER LIST appears To change a preset station Preset a new station on the number you want to change To erase the memory of the preset number 1 Press CH PRESET to select the preset number you want to erase 2 Press MEMORY 3 While MEMORY is displayed press TIMER CLEAR Presetting radio stations continued FM AM TUNER LIST A1 SET ENTER QUIT A2 A3 A4 A5 FM AM FM 90 00 690 1 89 50 A6...

Страница 47: ...When the tape reaches the end it will rewind automatically 4 Press MASTER VOL on the remote commander to adjust the volume Additional tasks To Stop play Pause play Resume play after pause Search forward Search backward Fast forward the tape Rewind the tape Eject the tape Press p STOP P PAUSE P PAUSE or PLAY During playback press and hold FF To resume normal playback release the button During playb...

Страница 48: ...splay window momentarily To display only the indication selected with the STATUS button set INDICATION in the ADVANCED OPTIONS to OFF see page 89 To mute the sound Press MUTING on the remote commander or unit The muting mark appears on the TV screen if the on screen display function is on and the MASTER VOLUME indicator on the unit flashes To restore the sound press MUTING again Basic VCR Radio Op...

Страница 49: ... a suitable sound field 4 Press EXECUTE or CURSOR The customizing menu for the selected sound field appears If you want to customize the sound field see Customizing the sound fields on page 78 5 Press MENU to return to the original screen The selected sound field mark appears on the TV screen if the display function is on see To check the remaining tape length on the next page MENU EXECUTE CURSOR ...

Страница 50: ...but the information won t be recorded on the tape If you don t want to watch TV while recording you can turn off the TV When using a cable box be sure to leave it on You can enjoy watching or listening to another input source even while recording Note The display does not appear during still pause mode or slow motion playback TAPE SPEED SP EP r REC SP VTR EP VTR To stop recording Press p STOP To c...

Страница 51: ...the video channel manually When using a cable box turn it on 1 Press VCR Plus 2 Press the number buttons to enter the program s Plus Code If you make a mistake press TIMER CLEAR and enter the correct number 3 Lift the top cover of the remote commander then press TAPE SPEED to select SP or EP 4 Press CURSOR to select ONCE DAILY or WEEKLY Number buttons TIMER REC ON OFF TIMER CLEAR TAPE SPEED SP EP ...

Страница 52: ...on the remote commander Note If you selected any audio input while watching the unit s VCR picture before the unit s VCR enters recording standby only the picture switches to the TV after you press TIMER REC ON OFF To stop recording To stop the unit s VCR while recording press TIMER REC ON OFF To record satellite broadcasts If you connect a DSS receiver and the unit you can record satellite progra...

Страница 53: ...ndby and timer recording To use the unit s VCR before a timer recording begins just press TIMER REC ON OFF The TIMER indicator turns off and the unit s VCR switches on Remember to press TIMER REC ON OFF again to reset the timer after using the unit s VCR You can also do the following VCR related tasks while the unit s VCR is recording Reset the counter Display tape information on the TV screen Che...

Страница 54: ...m To correct a setting press CURSOR to return to that setting and reset To record the same program every day or on the same day every week press CURSOR while the date is highlighted For details see Daily weekly recording on the next page To record from a DSS receiver or other source connected to the LINE jacks press CURSOR in the CH column repeatedly to display LINE 4 Press CURSOR to confirm the s...

Страница 55: ...input sources see Audio Video Equipment Operations from page 59 during timer recording standby and timer recording To use the unit s VCR before a timer recording begins just press TIMER REC ON OFF The TIMER indicator turns off and the unit s VCR switches on Remember to press TIMER REC ON OFF again to reset the timer after using the unit s VCR You can also do the following VCR related tasks while t...

Страница 56: ...g standby 3 Press CURSOR to select the setting you want to change or cancel To change the setting press CURSOR to highlight the item you want to change then press CURSOR to reset it Then press CURSOR repeatedly until the cursor I appears at the beginning of the line To cancel the setting press TIMER CLEAR 4 Press EXECUTE If any settings remain press TIMER REC ON OFF to return to recording standby ...

Страница 57: ...s first has priority and the second program starts recording only after the first program has finished If the programs start at the same time the program listed first in the menu has priority 20 seconds will be cut off 20 Seconds Will be cut off Program 1 Program 2 Program 1 Program 2 ...

Страница 58: ...To scan the preset stations Press CH PRESET Each press changes the preset number as follows A1 A2 A0 B1 B2 B0 C1 C2 C0 You can select only the preset number Press and hold this button to keep changing the preset numbers To listen to non preset radio stations 1 Press AUDIO repeatedly until FM or AM appears or press TUNER on the remote 2 Press TUNING MODE repeatedly until MANUAL appears 3 Press FM A...

Страница 59: ... source Function buttons on the remote commander SYSTEM CONTROL FUNCTION Press VHS TUNER VHS LINE VIDEO1 VIDEO2 TV 1 CD TUNER TAPE MD 1 If the TV is connected to the unit with only the antenna cable the unit s speakers do not reproduce the sound even if you press this button When you use the TV tuner press TV CONTROL ON see Controlling other TVs with the remote commander on page 65 2 TV usually do...

Страница 60: ... the picture continues to be output The last selected video source s indicator remains lit in the display window Before operating audio video equipment Connect all the components securely and correctly as indicated on pages 6 through 10 Turn MASTER VOLUME to the leftmost position 0 to avoid damaging the speakers Note that you may not be able to control all the functions of the equipment described ...

Страница 61: ... or decrease the volume Press MASTER VOL on the remote commander or turn MASTER VOLUME on the unit clockwise or anticlockwise To mute the sound Press MUTING To restore the sound press it again To turn off the whole system Press SYSTEM OFF Note You cannot turn off the power of the non Sony TVs ...

Страница 62: ... selector s name on the unit is VTR COMMAND MODE however it is described as COMMAND MODE in these Operating Instructions for the sake of convenience Controlling a VCR which doesn t have a COMMAND MODE selector If a VCR has no COMMAND MODE selector set COMMAND MODE on the remote commander in the following way If your VCR is a Set COMMAND MODE to Sony Betamax format VCR VTR1 Sony 8mm formatVCR VTR2 ...

Страница 63: ...mber button 7 to control the VCR with its COMMAND MODE selector set to VTR1 or Betamax format VCR press number button 8 to control the VCR with its COMMAND MODE selector set to VTR2 or 8mm format VCR or press number button 9 to control the VCR with its COMMAND MODE selector set to VTR3 or VHS format VCR The customized button is no longer related to the COMMAND MODE position To turn on and control ...

Страница 64: ...ecting a stereo or bilingual program Press AUDIO MONITOR Each press changes the sound between bilingual and stereo Using the WIDE function Press TV WIDE Each press changes the WIDE mode Controlling the TV Number buttons TV VIDEO 1 2 3 4 5 6 7 8 9 0 10 ENTER TV WIDE TV VOL CH TV CH TV VIDEO buttons TV POWER Note You cannot use the on screen display while the unit is in TV control mode VISUAL POWER ...

Страница 65: ... Philco Philips Pioneer Portland Quasar Radio Shack Manufacturer RCA Sampo Sanyo Scott Sears Sharp Sylvania Teknika Toshiba Wards Yorx Zenith Code number 03 03 08 12 04 13 04 12 13 17 04 12 06 19 03 04 08 16 03 06 18 05 14 Code number 04 10 12 11 12 07 10 11 03 05 18 08 12 03 08 14 07 03 04 12 12 15 Manufacturer Sony Akai AOC Centurion Coronado Curis Mathes Daytron Fisher General Electric Hitachi ...

Страница 66: ...top play Pause play Resume play after pause Scan forward or backward Locate the beginning of other tracks Stop and remove the CD This function doesn t operate some CD players Close the tray This function doesn t operate some CD players Select other discs This function only works for CD players with a built in multi disc changer To locate a track with the number buttons Press one of the number butt...

Страница 67: ...OP Pause play P PAUSE This function doesn t operate some cassette decks Resume play after pause DIRECTION 9 DIRECTION or P PAUSE Fast forward FF Rewind 0 REW Recording on a tape 1 Press TAPE MD and turn on the cassette deck The unit turns on and switches the input source to the cassette deck connected to the TAPE MD jacks 2 Insert a blank cassette with its erasure prevention tabs in place into dec...

Страница 68: ... deck B if you have a double cassette deck To control deck A first you need to customize one of the function buttons for deck A You can customize the VIDEO 1 VIDEO 2 CD TAPE MD or TV function buttons While pressing the selected function button press the number button 5 You must select the function button corresponding to the input jacks the cassette deck is connected to Now that function button op...

Страница 69: ...ttons on page 91 Playing a tape 1 Press the function button you customized for the DAT deck and turn on the DAT deck The unit turns on and switches the input source to the jacks the DAT deck is connected to 2 Press 6 OPEN CLOSE to open the cassette cover holder If the cassette cover holder doesn t open refer to your DAT deck s operating instructions 3 Insert a cassette 4 Press PLAY The deck starts...

Страница 70: ... VIDEO 2 on the TV screen If you want to select the CD player or tuner press AUDIO repeatedly to display CD or TUNER on the TV screen 4 Locate the point you want to start recording from To record from the beginning of the tape press 0 REW to rewind the tape to the beginning To record from the end of the recorded portion press FF The deck locates the end of the recorded portion on the tape and stop...

Страница 71: ...r function buttons on page 91 Playing an MD 1 Press the function button you customized for the MD deck and turn on the MD deck The unit turns on and switches the input source to the jacks the MD deck is connected to 2 Insert an MD referring to your MD deck s operating instructions 3 Press PLAY The MD deck starts playing Additional tasks To Stop play Pause play Resume play after pause Scan forward ...

Страница 72: ... a program position or LINE on the TV screen If you want to select a piece of equipment connected to the VIDEO 1 or VIDEO 2 jacks press VIDEO repeatedly to display VIDEO 1 or VIDEO 2 on the TV screen If you want to select the CD player or tuner press AUDIO repeatedly to display CD or TUNER on the TV screen 4 Lift the top cover of the remote commander and press r REC to set the MD deck to recording...

Страница 73: ...ed to 2 Press 6 OPEN CLOSE to open the disc tray 3 Place an LD on the disc tray 4 Press PLAY The disc tray closes and side A of the LD starts playing When playback of side A ends side B starts playing automatically Additional tasks To Press Stop play p STOP Pause play P PAUSE Resume play after pause P PAUSE or PLAY Scan forward or backward And hold FF or 0 REW during playback Skip chapters or trac...

Страница 74: ...PLAY To listen to analog sound from an LD If your LD contains digital sound tracks the player automatically outputs digital sound To listen to the sound recorded on analog soundtracks press ANALOG To resume the digital mode press ANALOG again To play a stereo disc or Second Audio Programme SAP disc When playing SAP discs such as bilingual discs you can alternate the sound output by pressing AUDIO ...

Страница 75: ...nd sound on the next page Reproduce the acoustics of a hall See What s surround sound on the next page Reproduce the feeling of a large open air stadium See What s surround sound on the next page Obtain maximum audio impact from video game software See What s surround sound on the next page Reproduce normal 2 channel stereo Turn off the sound effect See Selecting the center mode on page 32 See Sel...

Страница 76: ...ro Logic Surround encoded software by looking at the packaging Some video tapes and laser discs may use Dolby Surround even if it s not indicated on the package What s surround sound Surround sound consists of three elements direct sound early reflected sound early reflections and reverberated sound reverberation The acoustics of the venue affect the way these three sound elements are heard The un...

Страница 77: ...IC for CENTER MODE 1 Repeat steps 1 through 4 in Using the pre programed sound fields on page 49 and select PROLOGIC in step 3 2 Press CURSOR to move the cursor I to SUR EDIT then highlight DELAY 3 Press EXECUTE then press CURSOR to select 15ms 20ms 25ms or 30ms as the delay time Make the delay time longer when you have placed the rear speakers in a small room or close to your listening position a...

Страница 78: ...STADIUM or GAME in step 1 skip this step If you select THEATER in step 1 and you set the center mode to PHANTOM see Selecting the center mode on page 32 skip this step 4 Press CURSOR to move the cursor I to REAR then press CURSOR to increase or decrease the volume of the rear speakers to a preferable level If you select THEATER in step 1 and 3CH LOGIC is selected as the center mode see Selecting t...

Страница 79: ...uencies as you like 4 Press CURSOR to move the cursor I to TREBLE then press CURSOR to adjust the level of the high frequencies as you like 5 Press MENU to return to the original screen To return to the previous menu Select RETURN instead of pressing MENU in step 5 then press EXECUTE To start your adjustment from a flat equalizer curve Select FLAT after pressing EXECUTE in step 3 above then adjust...

Страница 80: ...ss CURSOR to select 1 2 3 or 4 as the effect level If you select THEATER in step 1 and you set the center mode to PHANTOM see Selecting the center mode on page 32 skip this step 4 Press MENU to return to the original screen To return to the previous menu Select RETURN in stead of pressing MENU in step 4 then press EXECUTE Customizing the sound fields continued SET SELECT SOUND SET SOUND FIELD ON L...

Страница 81: ...s 1 through 4 in Using the pre programed sound fields on page 49 and select one of the sound fields in step 3 2 Press CURSOR to move the cursor I to BASS BOOST then highlight ON 3 Press MENU to return to the original screen SET SELECT SOUND SET SOUND FIELD ON LEVEL OFF EFFECT TONE EDIT BASS BOOST SUR EDIT THEATER CENTER MODE EXECUTE SOUND SET SOUND FIELD ON LEVEL OFF EFFECT TONE EDIT BASS BOOST SU...

Страница 82: ...ck each speaker s relative volume balance with the test tones 6 Press CURSOR to increase or decrease the volume of the center speaker If you selected PHANTOM in step 3 skip this step For PROLOGIC sound you should have an equal volume balance with the other speakers at your listening position For THEATER sound you can adjust the speaker level as you like Tip To adjust the relative volume balance be...

Страница 83: ...hrough 4 in Using the pre programmed sound fields on page 49 and select PROLOGIC or THEATER in step 3 2 Press CURSOR to move the cursor I to SUR EDIT then highlight LEVEL 3 Repeat steps 5 through 8 on the previous page Increasing the maximum rear speaker level Although the adjustment range of the rear speakers is preset from 15 to 10 dB you can shift the range up 5 dB 10 to 15 dB Hold down MUTING ...

Страница 84: ...back sound is muted during these modes except for normal speed playback Tapes recorded in the LP mode on other VCRs can be played back on this unit s VCR but the picture quality cannot be guaranteed If the playback mode mark doesn t appear on the TV screen press DISPLAY FF 0 REW Shuttle ring Using the Shuttle ring With the Shuttle ring you can operate a variety of playback options During playback ...

Страница 85: ...ops recording and turns off automatically To extend the duration Press QUICK TIMER repeatedly to set to the new duration To stop recording To stop the unit s VCR while recording press TIMER REC ON OFF 0 00 0 30 1 00 10 30 11 00 QUICK TIMER Tips You can also set the quick timer and start recording during stop mode In this case the unit must be turned on before you start recording You can turn off t...

Страница 86: ... Audio Program sound on the normal audio track set NORMAL AUDIO in the ADVANCED OPTIONS menu to SAP the SAP indicator lights up For details see page 89 To select the bilingual sound while recording Press AUDIO MONITOR to select the sound you want Selecting the sound during playback Press AUDIO MONITOR to select the sound you want To listen to Stereo main left and right channels Left channel only R...

Страница 87: ...ss INDEX SEARCH repeatedly to specify how many index signals ahead or behind you want to search To search ahead press INDEX SEARCH To search behind press INDEX SEARCH The unit s VCR starts searching and the index number on the TV screen counts down to zero Playback starts automatically from that point To stop searching Press p STOP 1 2 3 4 5 6 7 8 9 0 10 Note No index signal will be added when rec...

Страница 88: ...t recording the unit s VCR adjusts to the tape using the APC function the APC indicator flashes rapidly This adjustment remains in effect until the tape is ejected To deactivate the APC Press MENU and select SET UP MENU then set APC to OFF The APC indicator in the display window goes off Tracking meter AUTO MANUAL NORMAL TRACKING Notes Auto tracking adjustment cannot be used on tapes recorded in t...

Страница 89: ...s separately Select the sound using the AUDIO MONITOR button For details see page 86 MAIN to record the main sound on both hi fi and normal audio tracks SAP to record the SAP Second Audio Program sound on the normal audio track The main sound is recorded on the hi fi audio track ON to display the operational function and selected sound field for a few seconds in the display window OFF to display o...

Страница 90: ...an LD player 4 Press VIDEO or VHS repeatedly to select the input playback source VIDEO1 VIDEO2 or LINE 5 Search for the point to start playback and set it to playback pause 6 To start editing press P PAUSE on this unit and release the pause mode on the other equipment at the same time To stop editing Press the p STOP buttons on both units EDIT P PAUSE VHS VIDEO r REC Tips To cut out unwanted scene...

Страница 91: ...e sections for controlling each piece of equipment see pages 62 through 74 This section shows you the factory settings of and the way to customize the remote commander function buttons Factory set functions Press VHS TUNER VHS LINE VIDEO 1 VIDEO 2 TUNER CD TAPE MD TV Then the remote commander operates The unit s VCR The COMMAND MODE selector determines the controllable VCR Same as above Same as ab...

Страница 92: ...Select an active channel number in your area 5 Turn on your TV and set it to the channel you selected in step 1 channel 3 or 4 The selected TV channel broadcast appears on the TV screen If the channels change when you press CH PRESET on this unit you have made the correct setting Whenever you use this unit set the TV to the channel selected in step 1 Attaching the external antenna connector When u...

Страница 93: ... use the EAC 66 UHF VHF band separator mixer not supplied to connect the antenna to the VCR 1 Loosen the screws on the mixer 2 Wind the twin leads around the screws on the mixer 3 Retighten the screws 4 Connect the 75 ohm coaxial cable to the mixer EAC 66 UHF VHF band separator mixer not supplied 300 ohm twin lead cable 75 ohm coaxial cable ...

Страница 94: ...et to the channel for the VCR If you are using a monitor set it to video input Adjust the tracking with the TRACKING NORMAL SLOW buttons The video heads are dirty see below Clean the video heads using the Sony V 25CL video head cleaning cassette If this cleaning cassette is not available in your area have the heads cleaned at your nearest Sony service facility a standard service charge will be req...

Страница 95: ...ander may be switched to control other equipment Make sure the remote commander is set for the unit s VCR control if you use r REC on the remote commander If you want to record TV programs press VHS TUNER on the remote commander then select a channel Check that the clock is set Make sure a tape has been inserted Check that the safety tab has not been removed Make sure the tape is not at its end Ma...

Страница 96: ...nit Check that the speakers and components are connected correctly and securely Check that the connecting cords and cables are away from a transformer or motor and at least 3 meters away from a TV set or fluorescent light Place your TV away from the audio components The plugs and jacks are dirty Wipe them with a cloth slightly moistened with alcohol Select the appropriate center mode Adjust the sp...

Страница 97: ... projecting parts and controls Mass USA model Approx 13 3 kg 29 lb 6 oz Canadian model Approx 13 0 kg 28 lb 11 oz Supplied accessories Remote commander 1 Size AA R6 batteries 2 75 ohm coaxial cable with F type connectors 1 Video cable 1 phono to 1 phono 1 AM loop antenna 1 FM wire antenna 1 Design and specifications are subject to change without notice System Channel coverage VHF 2 to 13 UHF 14 to...

Страница 98: ...ton 45 7 P PAUSE button 90 8 6 EJECT button 47 9 0 REW button 47 0 FF button 47 Shuttle ring 45 84 PLAY button 47 MASTER VOLUME control indicator 47 48 p STOP button 90 BALANCE L R control 31 82 MUTING button 48 SURROUND button indicator 75 78 r REC button 90 ª FUNCTION buttons 45 60 67 70 72 90 º STATUS button 48 FM MODE button 90 TUNING MODE button 45 SHIFT button 46 Remote sensor 5 PHONES jack ...

Страница 99: ...or 62 0 Tape operation indicators Display window 1 Video input indicators 60 2 TIMER indicator 52 55 85 3 REC indicator 85 4 VTR indicator 92 5 APC indicator 88 89 6 MONO indicator 45 7 STEREO indicator 45 8 SAP indicator 86 9 AUTO MANUAL MEMORY indicators 45 46 º Line channel indicator 50 Time counter clock operating function sound field indications 48 Tape speed indicators 50 Ò tape indicator co...

Страница 100: ... VHF UHF IN OUT connectors 13 16 19 22 25 27 7 MONITOR VIDEO OUT jack 8 8 TV IN VIDEO jack 8 9 VIDEO 1 IN VIDEO jack 8 º LINE IN VIDEO jack 8 AC OUTLET 9 AC power cord 9 CONTROL S OUT jack 13 25 LINE IN AUDIO L R jacks 8 VIDEO 1 IN AUDIO L R jacks 8 TV IN AUDIO L R jacks 8 TAPE MD REC OUT IN AUDIO L R jacks 8 CD IN AUDIO L R jacks 8 ª ANTENNA terminal 8 Index to parts and controls continued ...

Страница 101: ...n 66 84 7 0 REW FF buttons 47 66 67 69 71 73 84 8 PLAY button 47 66 69 71 63 9 p STOP button 47 66 67 69 71 73 0 Shuttle ring 45 84 COMMAND MODE VTR1 2 3 selector 62 91 SYSTEM OFF button 61 VISUAL POWER button 62 65 74 TV VIDEO button 65 VCR Plus button 51 CH PRESET buttons 41 MASTER VOL buttons 47 61 MUTING button 48 61 ª INDEX SEARCH 76 AMS 66 69 71 73 buttons º P PAUSE button 47 66 67 70 71 73 ...

Страница 102: ... buttons 65 6 COUNTER RESET 48 button 7 TRACKING AUTO MANUAL 88 ANALOG CX 74 button 8 4 TRACKING NORMAL SLOW 88 4 STILL ADJUST 84 buttons 9 7 FRAME buttons 74 84 0 TIMER REC ON OFF button 52 55 TIMER CLEAR button 52 56 TV WIDE button 64 CH 64 buttons TAPE SPEED SP EP button 50 STATUS button 48 r REC button 50 68 70 72 9 DIRECTION 67 72 74 SIDE A 9 SIDE B 73 buttons Index to parts and controls cont...

Страница 103: ...itoring during playback 86 during recording 86 N O Normal audio track 86 NORMAL mode 32 P PHANTOM mode 32 Picture adjustment See Adjusting Playback 47 at various speeds 47 84 frame by frame 84 skip 84 slow motion 84 Presetting channels 39 radio stations 45 Program source selection 59 Q Quick timer 85 R Recording 50 bilingual programs 86 SAP broadcasts 86 stereo programs 86 using VCR Plus 51 while ...

Страница 104: ...number 4 Select ONCE DAILY or WEEKLY in the VCR Plus menu 5 Insert a tape 6 Press POWER to turn off the VCR 7 Leave the cable box on To watch TV 1 Turn off your VCR or press the VCR s TV VTR button until the VTR indicator in the display window goes off 2 Turn on your cable box 3 Set the TV to the cable box output channel usually 2 3 or 4 4 Set the cable box to the channel you want to watch Hookup ...

Отзывы: