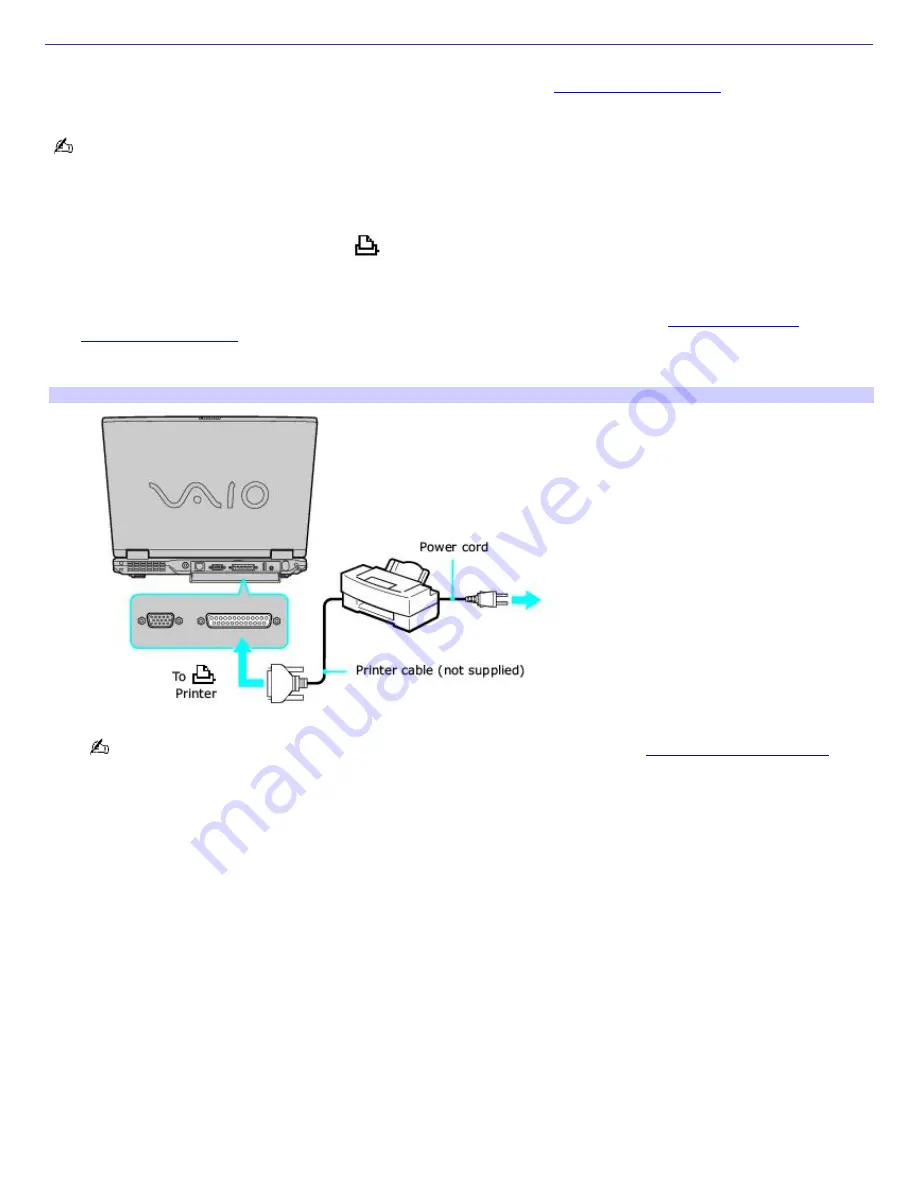
Connecting a Parallel Port Printer
If your computer came with a docking station, you may connect a Windows
®
compatible parallel port printer to the docking
station. However, if your computer did not come with a docking station, see
Connecting a USB Printer
for information on
connecting a printer to your computer.
Turn off the computer before connecting peripherals. In normal use, you should turn on the peripherals before turning
on your computer.
To connect a parallel port printer
1.
Locate the Printer port, identified by the
symbol, on the docking station.
2.
Plug the printer cable (may or may not be supplied by printer company) into the Printer port.
3.
Make sure the Printer setting in the Sony Notebook Setup software is properly set. See
Displaying the Sony
Notebook Setup Screen
for more information.
4.
See the manual supplied with your printer for more information on its installation and use
Connecting a Printer to the Docking Station
If your printer stops functioning after resuming from a power saving mode, see
Troubleshooting the Printer
for
more information.
Page 52


