3
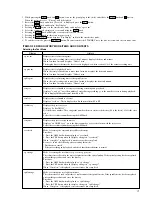
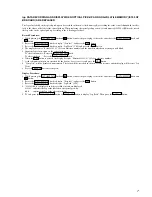
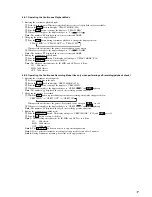
1. While pressing the AMS knob and
x
button, connect the power plug to the outlet, and release the AMS knob and
x
button.
When the test mode is set, “[Check]” will be displayed.
2. Rotate the AMS knob and when “[Service]” is displayed, press the YES button.
3. Rotate the AMS knob and display “Err Display”.
4. Pressing the YES button sets the error history mode and displays “op rec tm”.
5. Select the contents to be displayed or executed using the AMS knob.
6. Pressing the AMS knob will display or execute the contents selected.
7. Pressing the AMS knob another time returns to step 4.
8. Pressing the MENU/NO button displays “Err Display” and exits the error history mode.
9. To exit the test mode, press the REPEAT button. The unit sets into the STANDBY state, the disc is ejected, and the test mode ends.
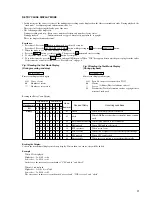
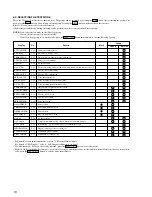
ITEMS OF ERROR HISTORY MODE ITEMS AND CONTENTS
Selecting the Test Mode
Display
op rec tm
op play tm
spdl rp tm
retry err
total err
err history
retry adrs
er refresh
op change
spdl change
History
Displays the total recording time.
When the total recording time is more than 1 minute, displays the hour and minute
When less than 1 minute, displays “Under 1 min”
The display time is the time the laser is set to high power, which is about 1/4 of the actual recording time.
Displays the total playback time.
When the total playback time is more than 1 minute, displays the hour and minute
When less than 1 minute, displays “Under 1 min”
Displays the total rotating time of the spindle motor.
When the total rotating time is more than 1 minute, displays the hour and minute
When less than 1 minute, displays “Under 1 min”
Displays the total number of retry errors during recording and playback
Displays “r xx p yy”. xx is the number of errors during recording. yy is the number of errors during playback.
This is displayed in hexadecimal from 00 to FF.
Displays the total number of errors
Displays “total xx”. This is displayed in hexadecimal from 00 to FF.
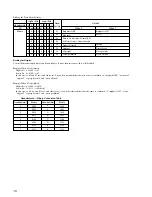
Displays the past ten errors.
Displays “0x ErrCd@@”.
X is the history number. The younger the number, the more recent is the history (00 is the latest). @@ is the error
code.
Select the error history number using the AMS knob.
Displays the past five retry addresses.
Displays “xx ADRS yyyy”, xx is the history number, yyyy is the cluster with the retry error.
Select the error history number using the AMS knob.
Mode for erasing the error and retry address histories
Procedure
1. Press the AMS knob when displayed as “er refresh”.
2. Press the YES button when the display changes to “er refresh?”.
When “complete!” is displayed, it means erasure has completed.
Be sure to check the following after executing this mode.
*Data has been erased.
*Perform recording and playback, and check that the mechanism is normal.
Mode for erasing the total time of op rec tm, op play tm.
These histories are based on the time of replacement of the optical pickup. If the optical pick-up has been replaced,
perform this procedure and erase the history.
Procedure
1. Press the AMS knob when displayed as “op change”.
2. Press the YES button when the display changes to “op change?”.
When “Complete!” is displayed, it means erasure has completed.
Mode for erasing the total spdl rp tm time
These histories are based on the time of replacement of the spindle motor. If the spindle motor has been replaced,
perform this procedure and erase the history.
Procedure
1. Press the AMS knob when displayed as “spdl change”
2. Press the YES button when the display changes to “spdl change?”
When “Complete!” is displayed, it means erasure has completed.
Содержание MDS-JE440 - Md Player
Страница 42: ...MDS JE440 42 42 6 10 SCHEMATIC DIAGRAM MAIN SECTION 3 3 See page 47 for IC Block Diagrams ...
Страница 43: ...MDS JE440 43 43 6 11 PRINTED WIRING BOARD POWER SECTION ...
Страница 44: ...MDS JE440 44 44 6 12 PRINTED WIRING BOARD DISPLAY SECTION ...
Страница 45: ...MDS JE440 45 45 6 13 SCHEMATIC DIAGRAM DISPLAY SECTION See page 34 for Waveforms ...


