


HVR-DR60
6-10
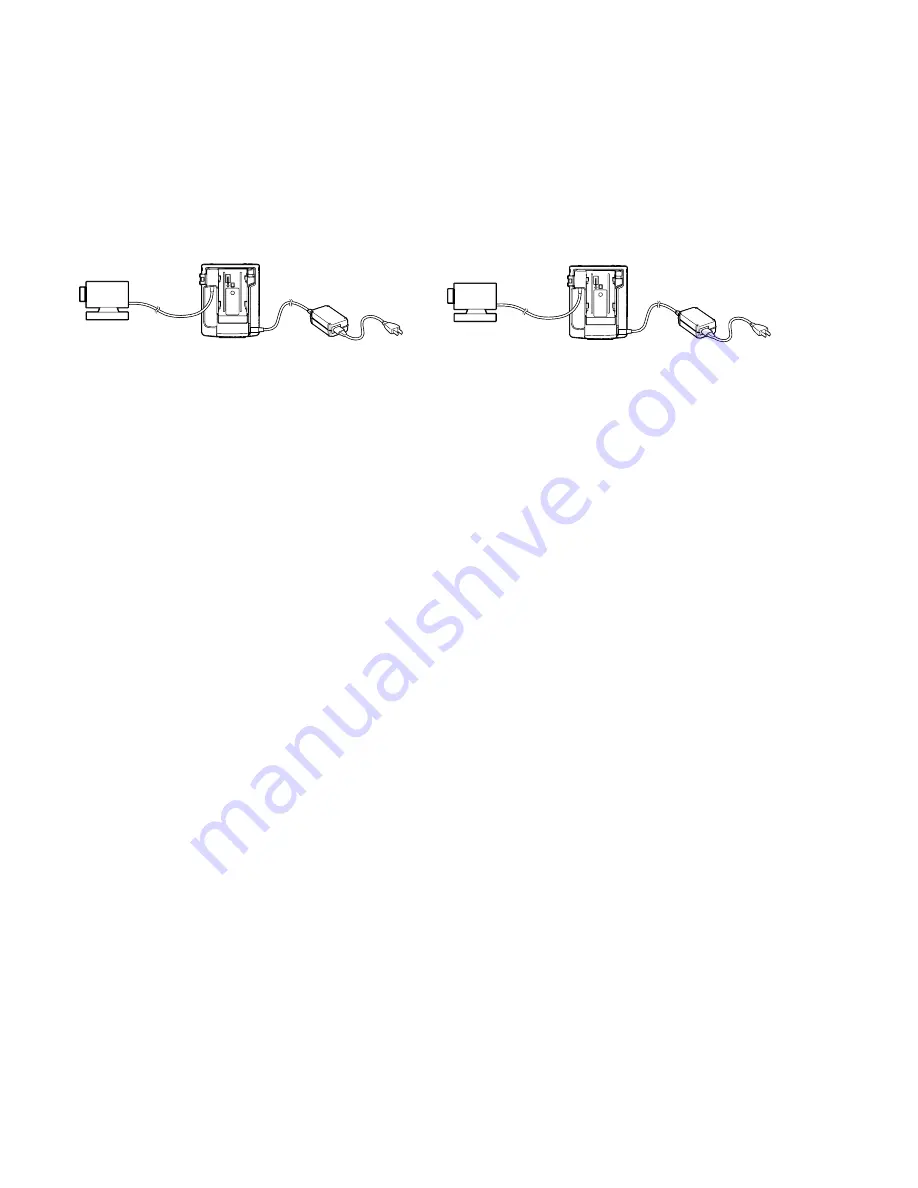
Camera
AC adapter
HVR-DR60
i.LINK cable
6-5. HDD AVC Mode Recording Check
Confirm that the HDV moving picture is recorded in AVC mode.
Adjustment conditions: HVR-DR60 AVC mode
Camera
HDV mode
Jig specified:
• HDV camcorder
• i.LINK cable
• AC adapter
Connection
Fig. 6-5-1
Procedures
1. Set the POWER switch of camcorder to CAMERA.
2. Set the VIDEO OUTPUT of camcorder to HDV mode.
The “STBY” appears on the LCD of HVR-DR60.
3. Set the REC button of HVR-DR60 to ON and record a moving
object.
Recording Time: Approx. 5 seconds
• Confirm that the recording LED of HVR-DR60 lights.
• Confirm that “REC” appears on the LCD of HVR-DR60
and the counter is running.
4. Press the STOP button.
Jig specified
• Confirm that the LED of HVR-DR60 goes off.
• Confirm that “STBY” appears on the LCD of HVR-DR60.
Inspection specification
Play back the recorded video and confirm that the video is
recorded.
Camera
AC adapter
HVR-DR60
i.LINK cable
6-6. Confirmation of HDV AVC Mode Playback
Confirm that the HDV moving picture is played back in AVC mode.
Adjustment conditions: HVR-DR60 AVC mode
Camera
HDV mode
Jig specified:
• HDV camcorder
• i.LINK cable
• AC adapter
Connection
Fig. 6-6-1
Procedure
1. Set the POWER switch of camcorder to VIDEO.
2. Press the PLAY button of HVR-DR60.
• Confirm that “PLAY” appears on the LCD of HVR-DR60
and the counter is running.
• Confirm that the video is played back on the LCD of
camcorder.
Inspection Specification
The recorded video is played back without any problem.
6-7. Confirmation of DV SBP Mode Playback
Confirm that the DV moving picture is played back in SBP mode.
Adjustment conditions: SBP mode
Jig specified:
• PC (with IEEE1394 terminal and driver exclu-
sive for HVR-DR60 adjustment/confirmation in-
stalled)
• i.LINK cable
• AC adapter
Procedures
1. Record a DV picture.
(1) Set the camcorder to CAMERA and DV mode.
(2) Set the POWER switch of camcorder to VIDEO.
“STBY” iappears on the LCD of HVR unit.
(3) Set the REC button of HVR-D60 unit to ON and record the
moving object.
• Confirm that the recording LED lights.
• Confirm that “REC” appears on the LCD and the counter is
running.
(4) Press the STOP button of HVR-DR60.
• Confirm that the LED goes off.
• Confirm that “STBY” is displayed on the LCD soon.
2. Confirm that the moving picture is played back on the PC.
(1) Connect the i.LINK cable to the PC.
(2) Set the POWER switch of HVR-DR60 unit to COMPUTER.
• The LCD back light turns on.
(3) Confirm that the new drive appears on the PC.
(4) Play back an avi file in DVFÄ100DVF on the HDD of HVR-
DR60 unit with Media Player.
Inspection Specification
The video can be played back without interruption.


