


3-9
HDPS-M10
8)
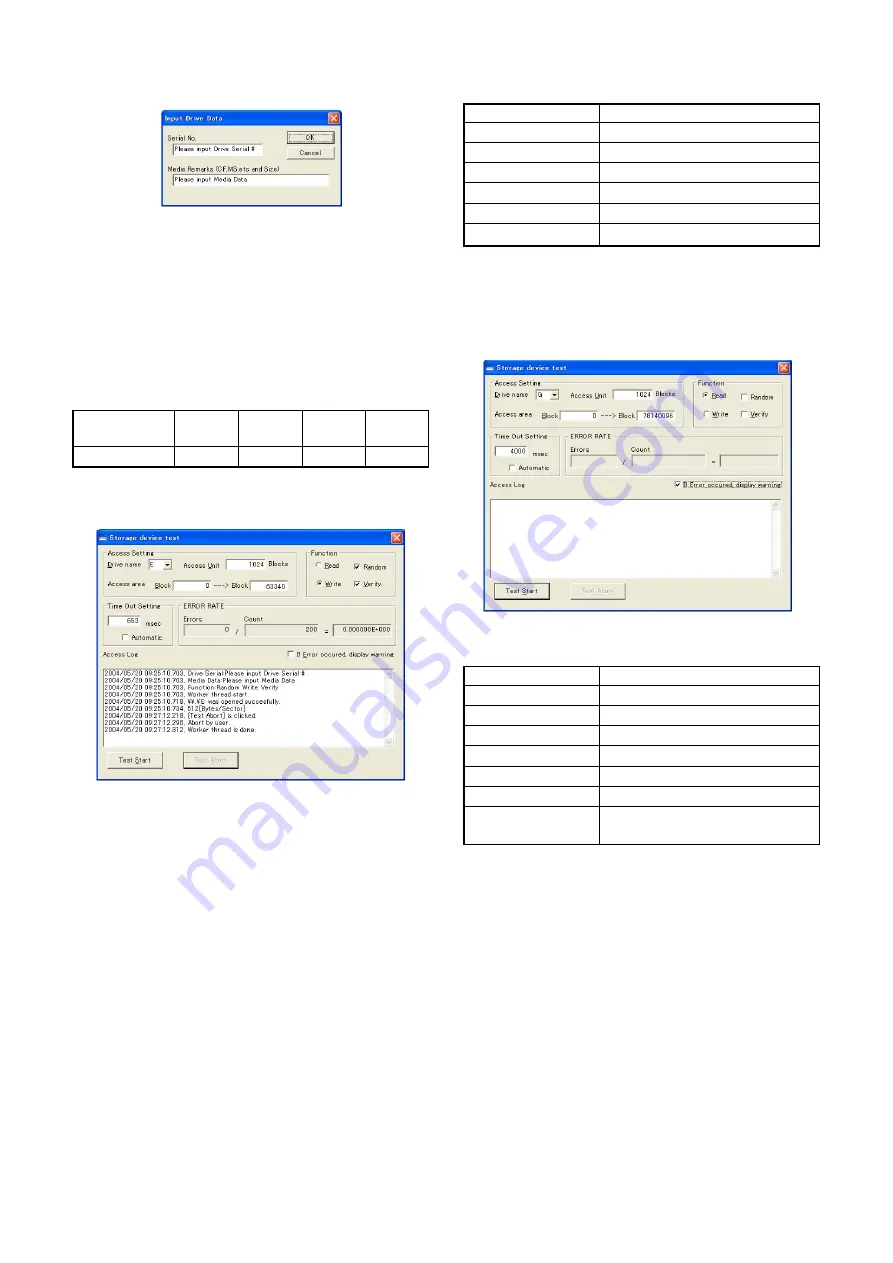
Check that “Input Drive Data” screen is displayed.
Fig. 3-1-16.
9)
Input serial No. and media remarks.
For example:
Hard disk ..................................................................... HDD
Memory Stick PRO ........................................................ MS
CompactFlash ................................................................. CF
Microdrive ..................................................................... MD
10) Click “OK” button.
11) “Storage device test” is performed automatically.
12) When the “Count” of the ERROR RATE window reaches the
following value, click “Test Abort” button to abort the test.
Storage media
Memory
Compact
Microdrive Hard disk
Stick PRO Flash
Count
200
200
200
1000
13) Check that error rate satisfies the specified value.
Note:
0.0 000 = 0.000000
×
10
0
= 0.000000
×
1 = 0 = 0%
5.000000E – 002 = 5.000000
×
10
–2
= 5.000000
×
0.01 = 0.05 = 5%
Fig. 3-1-17.
3-2-6.
Burn In (Read) Check
Mode
USB
Power Supply
AC power adaptor
Test Program
strdevtst7.exe
MemoryStick
Not necessary
CompactFlash
Not necessary
Microdrive
Not necessary
Specified Value
Hard disk drive: Errors count = 0
Checking method:
1)
Turn on the power of HDPS-M10.
2)
Connect HDPS-M10 and PC using the USB cable.
3)
Double click “strdevtst7.exe” of the “FC2_BI(r)” folder, and
start “Storage device test” on the PC.
4)
Check that “Storage device test” screen is displayed.
Fig. 3-1-18.
5)
Set up “Storage device test” as follows.
Drive name (Note)
G
Read
Check
Write
No check
Random
No check
Verify
No check
Time out setting
4000msec
Automatic
No check
If error occurred,
Check
display warning
Note:
The drive letter (e.g., “G:”) of the hard disk drive differs depending
on the PC.
6)
Click “Test Start” button.


